Drawing my Hand using the Viewfinder Tool
How the Viewfinder can help us be more precise in our seeing skills, and that in turn will improve our drawing skills.
This exercise can be done on white paper, or on toned paper.
Toned paper is created by adding an even shade of pencil or charcoal layer all over the paper before I start drawing. The even shade gives me one extra dimension I can work with, by lifting with an erase to create lighter value. See the pic above. this is done on non-white paper, with toning. The lightest part of the drawings is erased using a putty eraser to give the illusion of light.
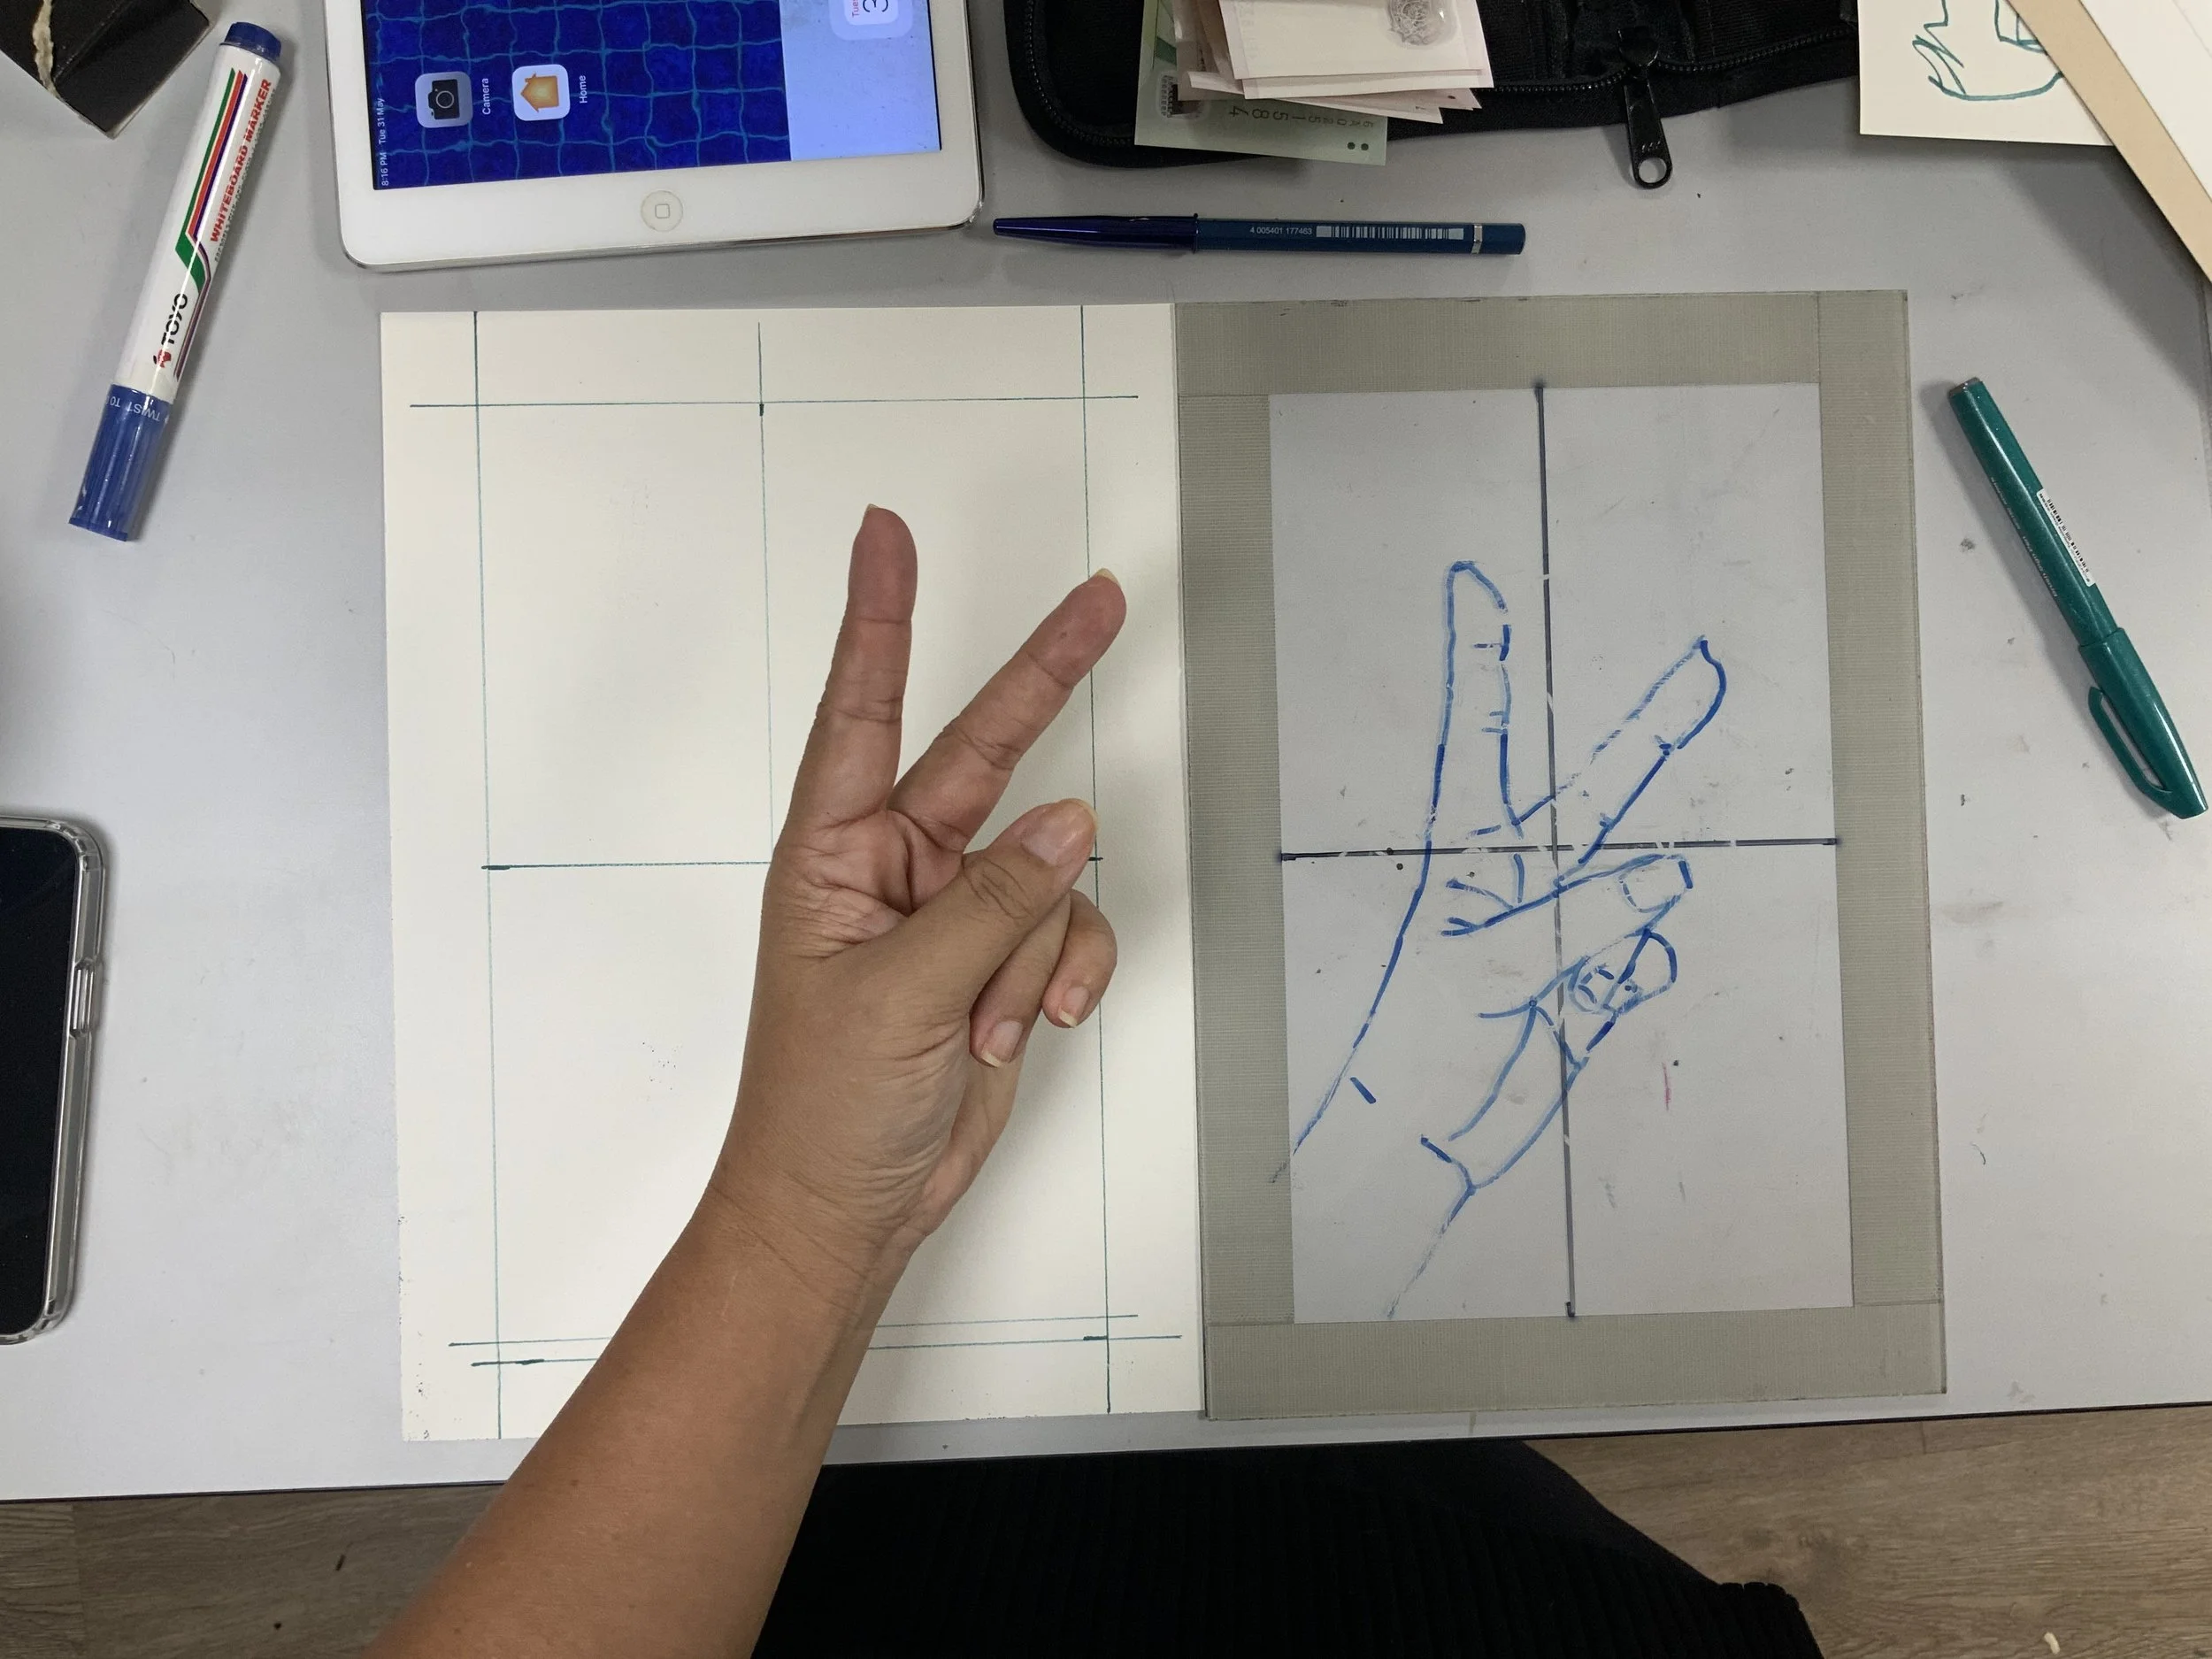
The viewfinder should be a direct copy of our object/subject as shown here, and then our job is to transfer the lines to paper, by way of measuring angles and using the cross hair in the middle.
The video above shows how I do this transferring. I use my fingers also as a transferring tool, and I create more negative shapes within the 4 spaces to help me find the right outlines.
This procedures can be quite taxing, because it challenges your thinking brain. The transferring can be confusing too because your thinking brain truly doesn’t believe what the measurements shows. Always trust the measurement.
What often happens is that students will argue within themselves between what they think they saw, and what is there. That is perfectly normal. Always trust the measurement.
When your drawings appears out of proportions because the shape doesn’t feel right, you can place the perspex back to your posed hand, and check what you see. This is easier as always to squint and use one eye. I also mentioned the artist squint here
The squint is basically closing one eye to flattened your binocular vision a bit and this is truly the secret to drawing from observation.
Contour Lines
What’s a contour line?
In map making, contour line is a line drawn on a topographic map to indicate ground elevation or depression.
This kind of lines applies to all 3D surfaces to express the volume and mass of the form. The lines helps show the illusion of 3D on a flat surface. 3D animation, architects and 3D modelling tools uses contour lines to deal with perspective.
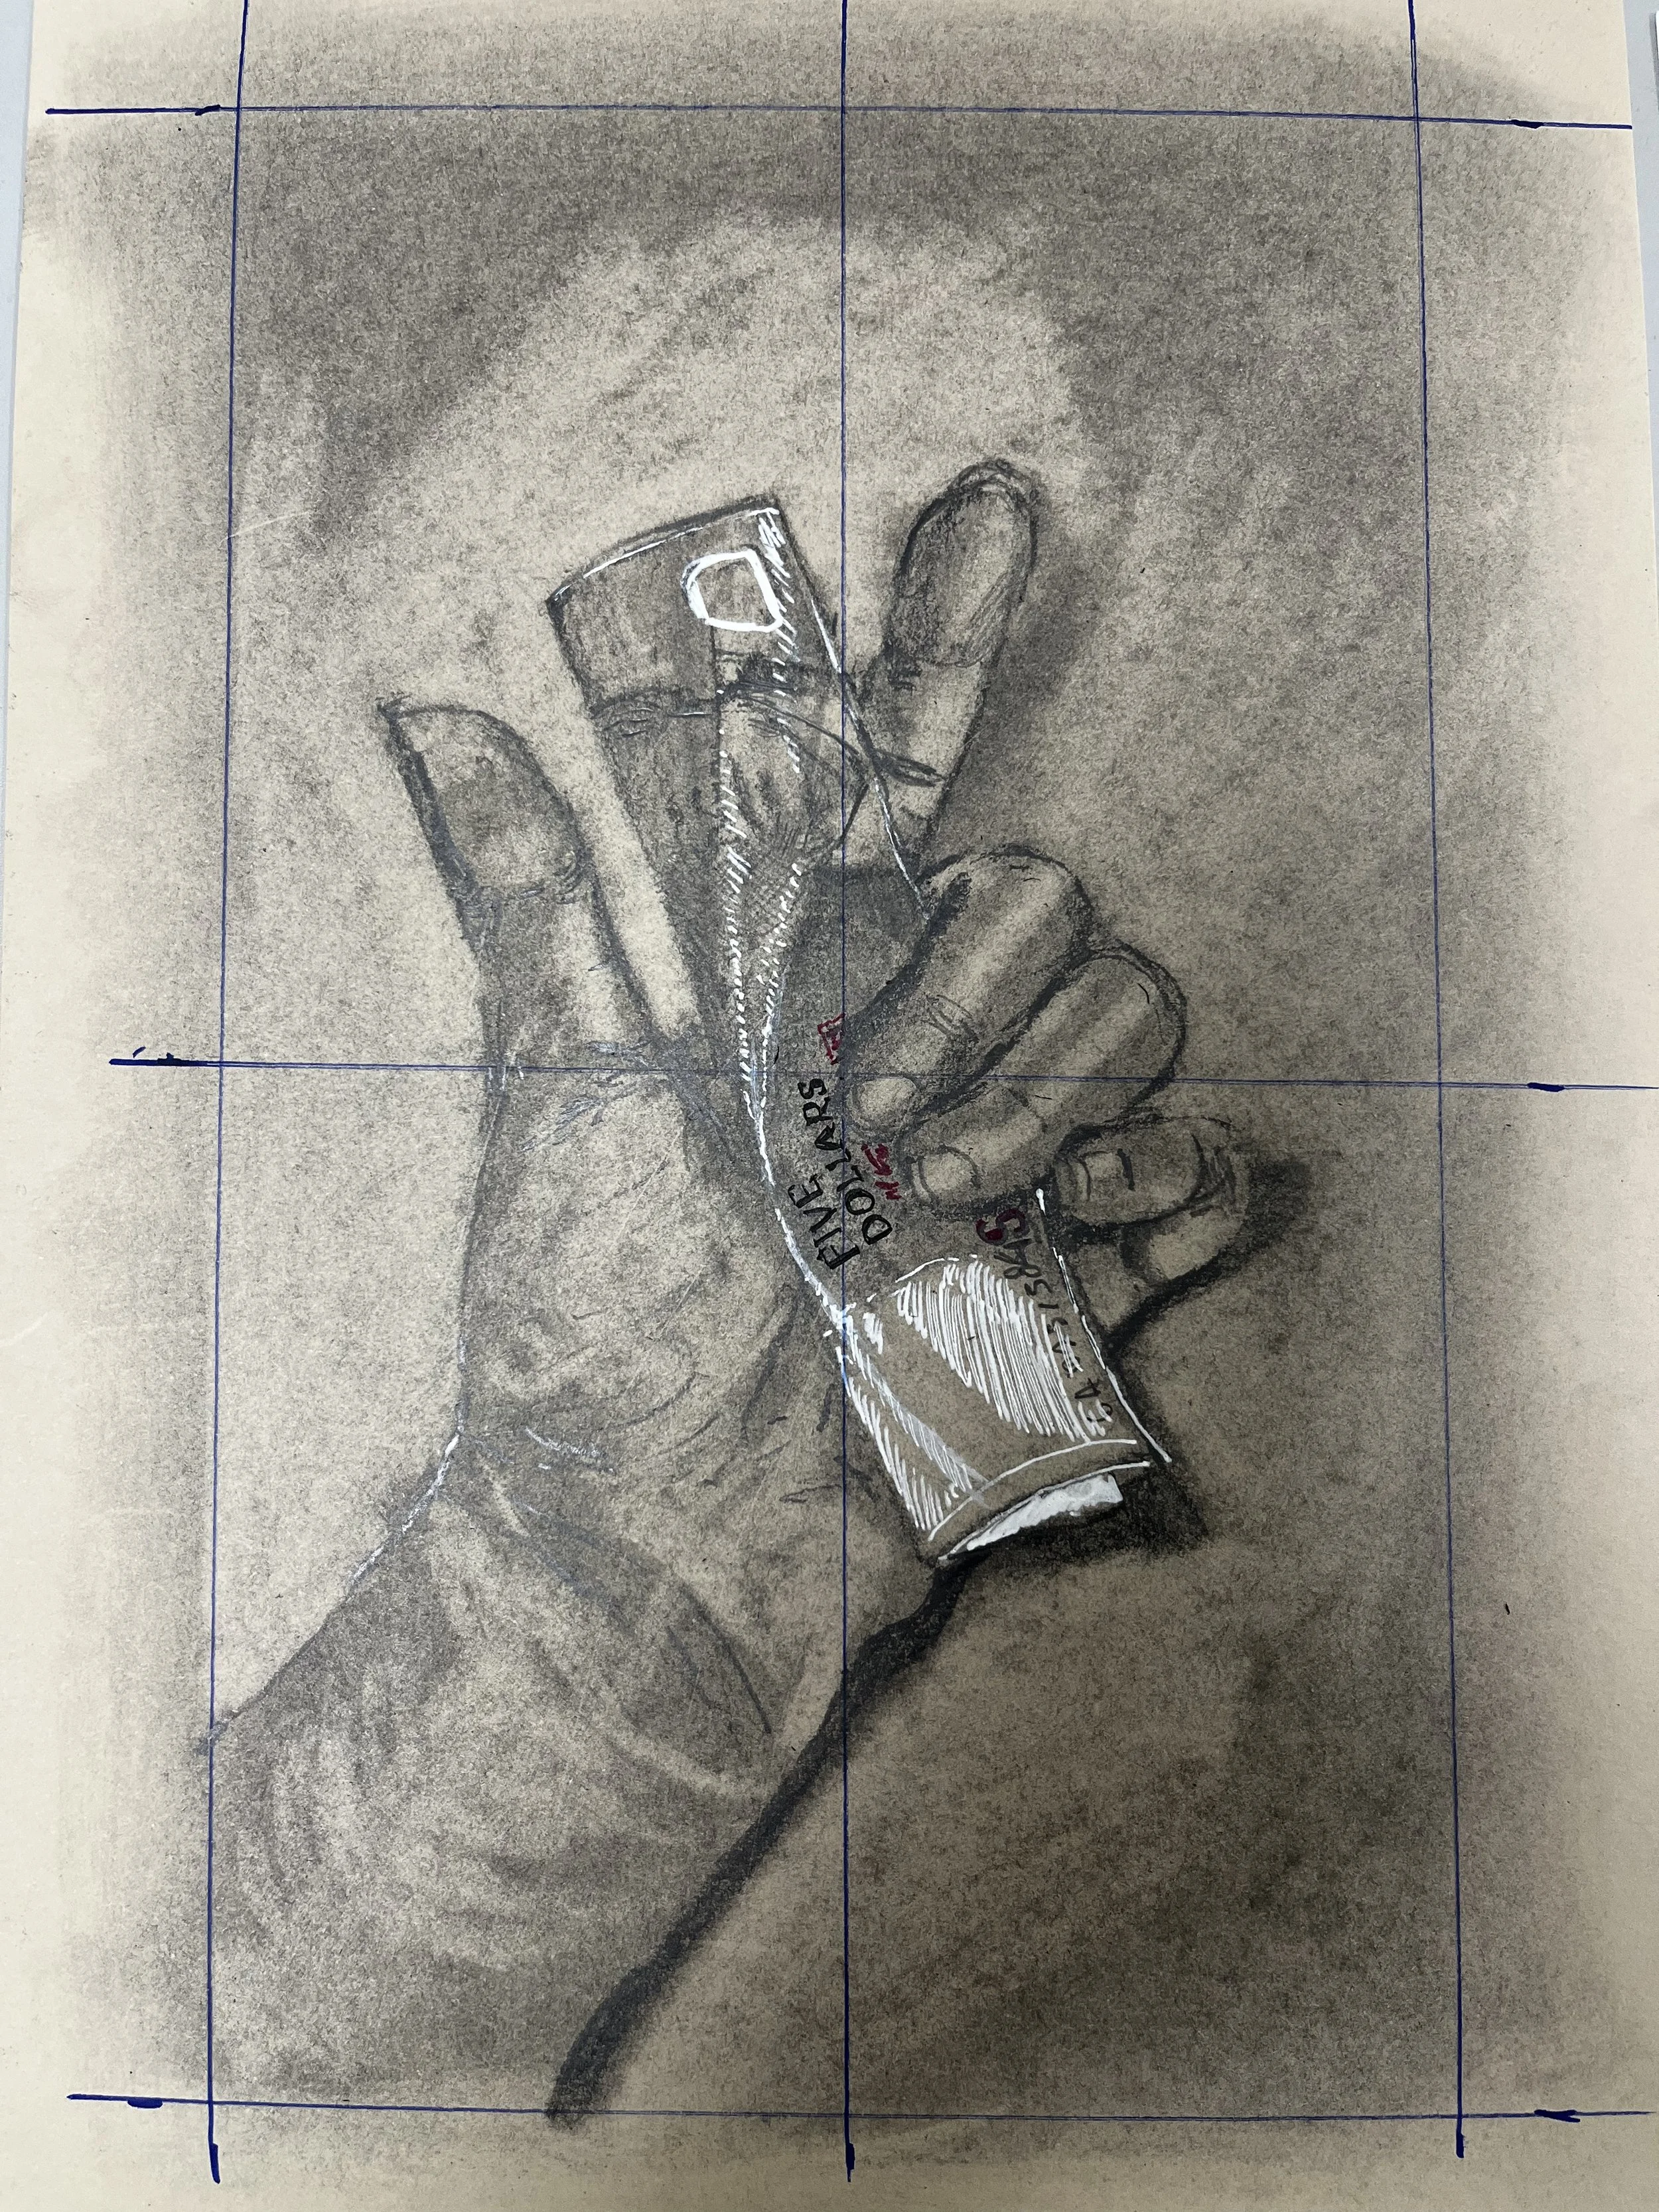
See the example of my own hand drawing below (albeit the pic is a little blurry, sorry) The red lines are the topographical contour line to show the 3D shape of my fingers
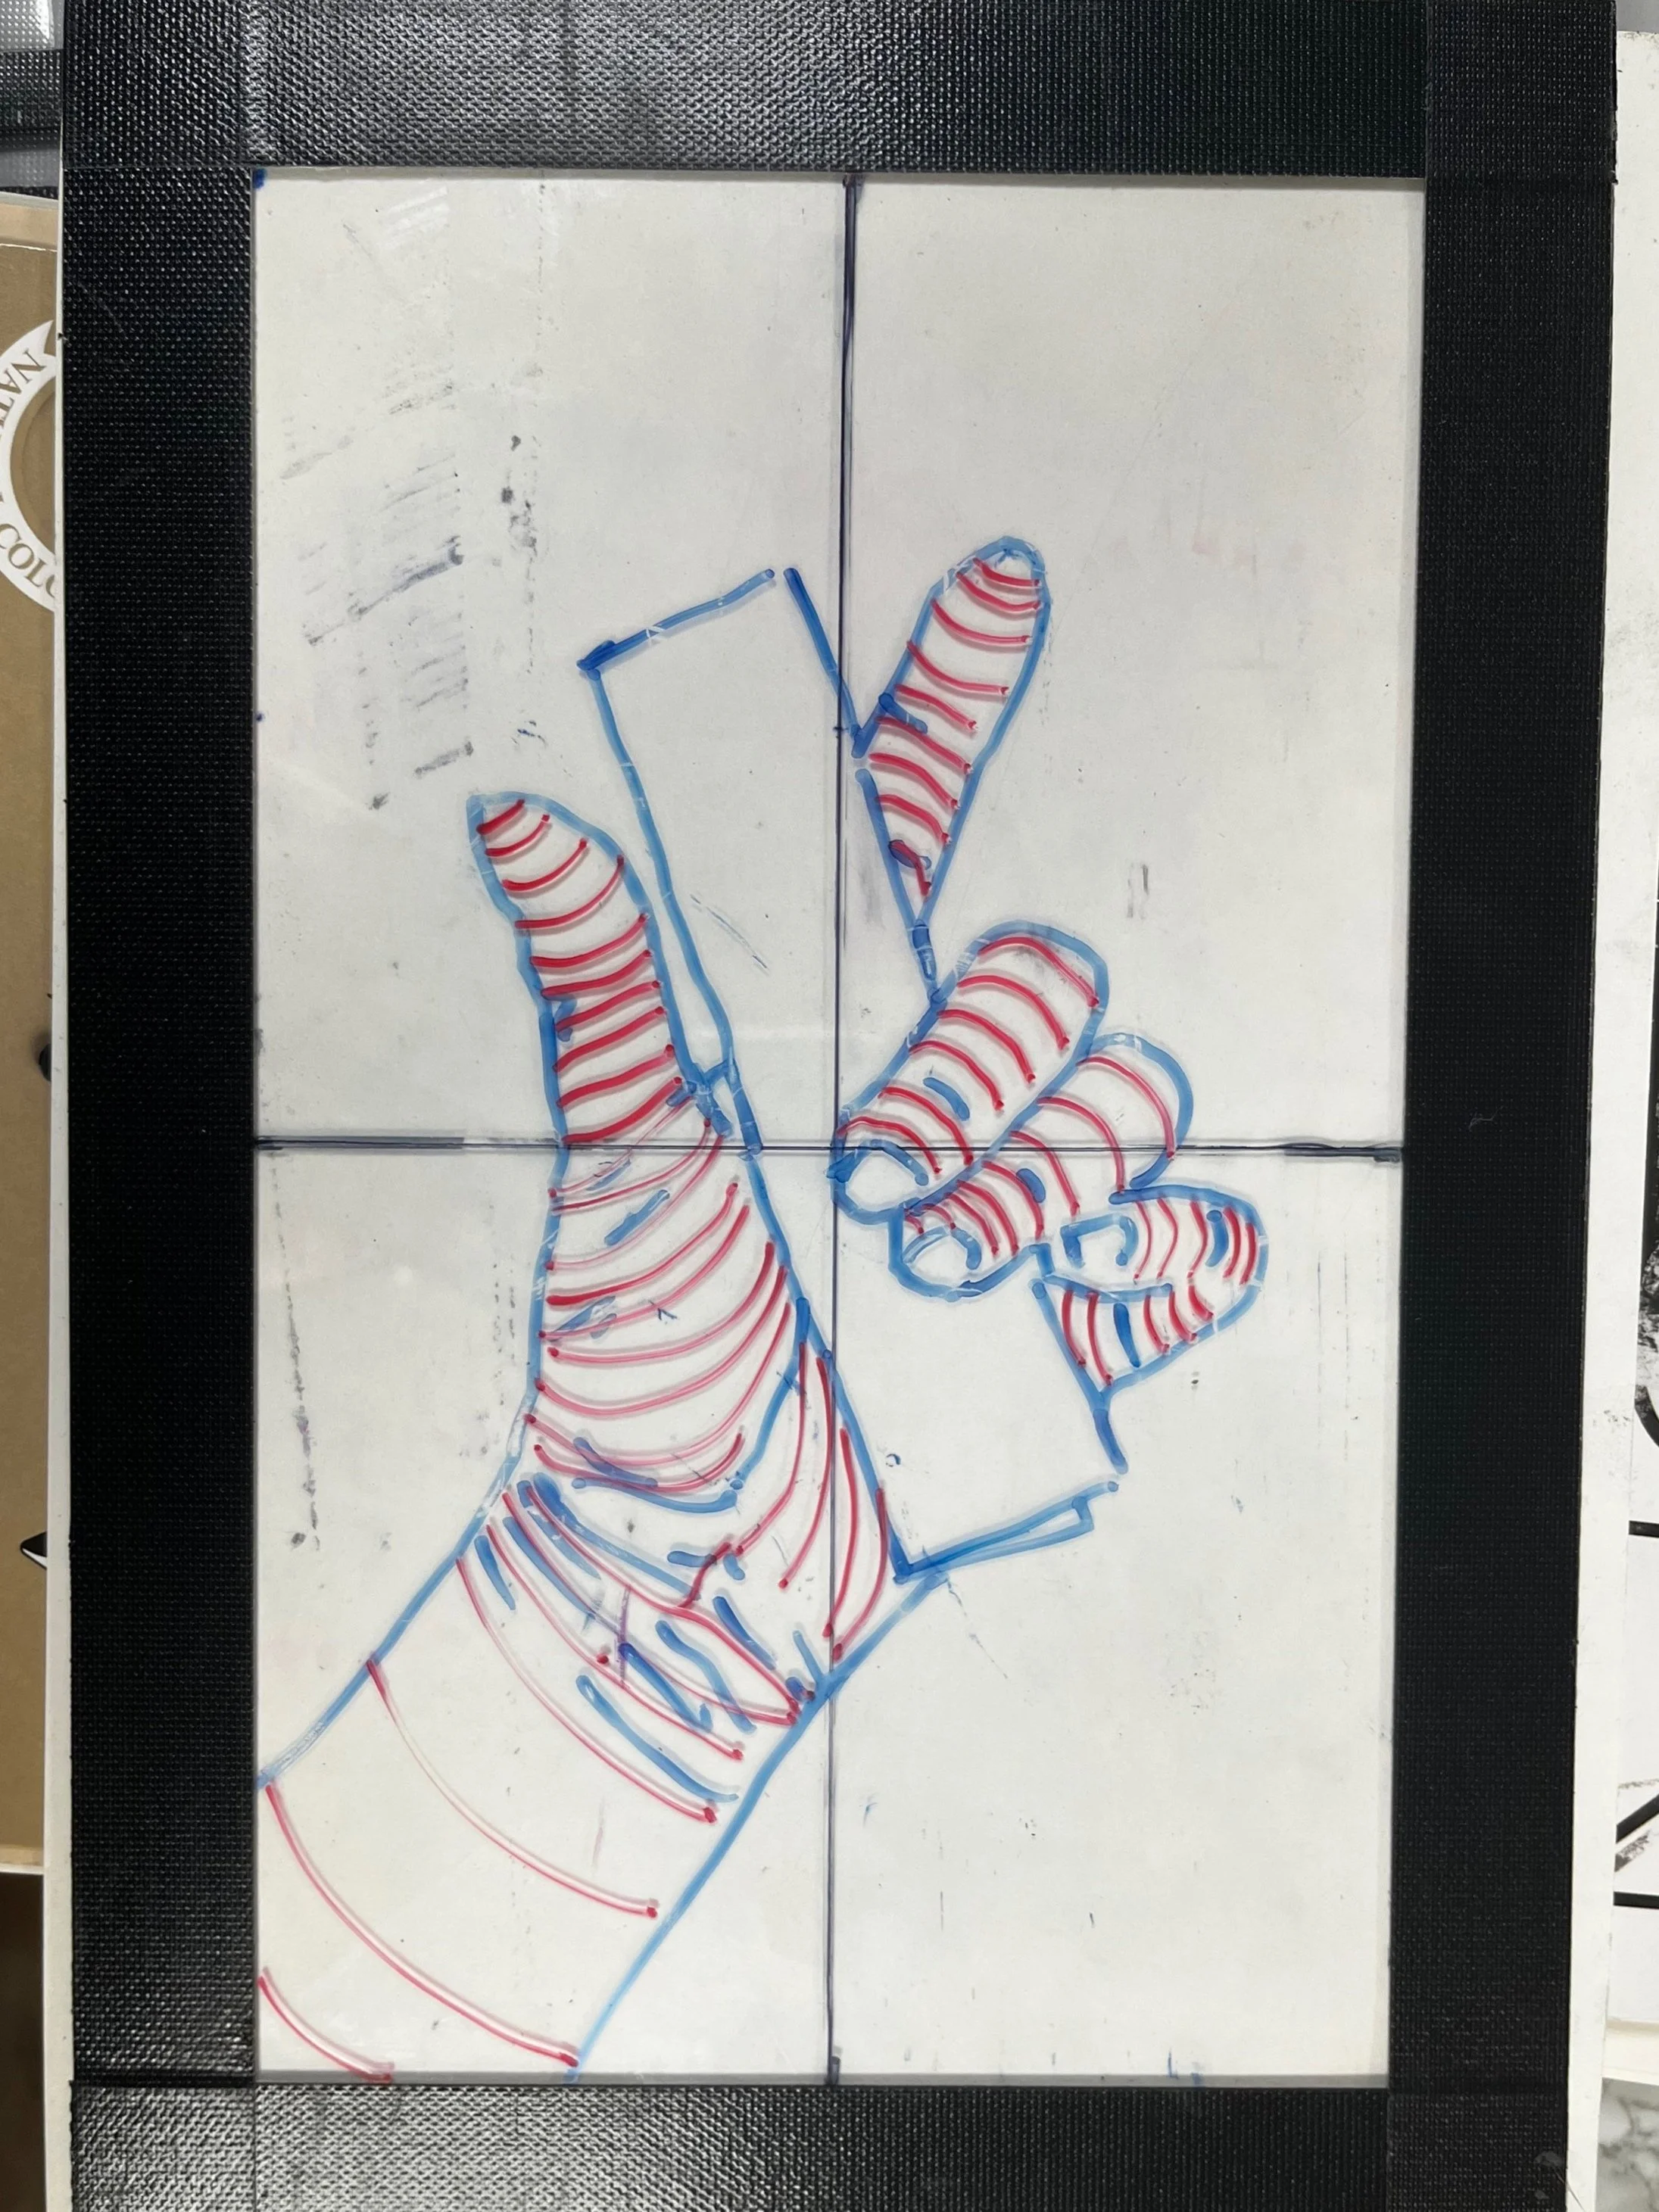

Here’s an illustration of those contour lines on my hand, and how that transfers to paper.
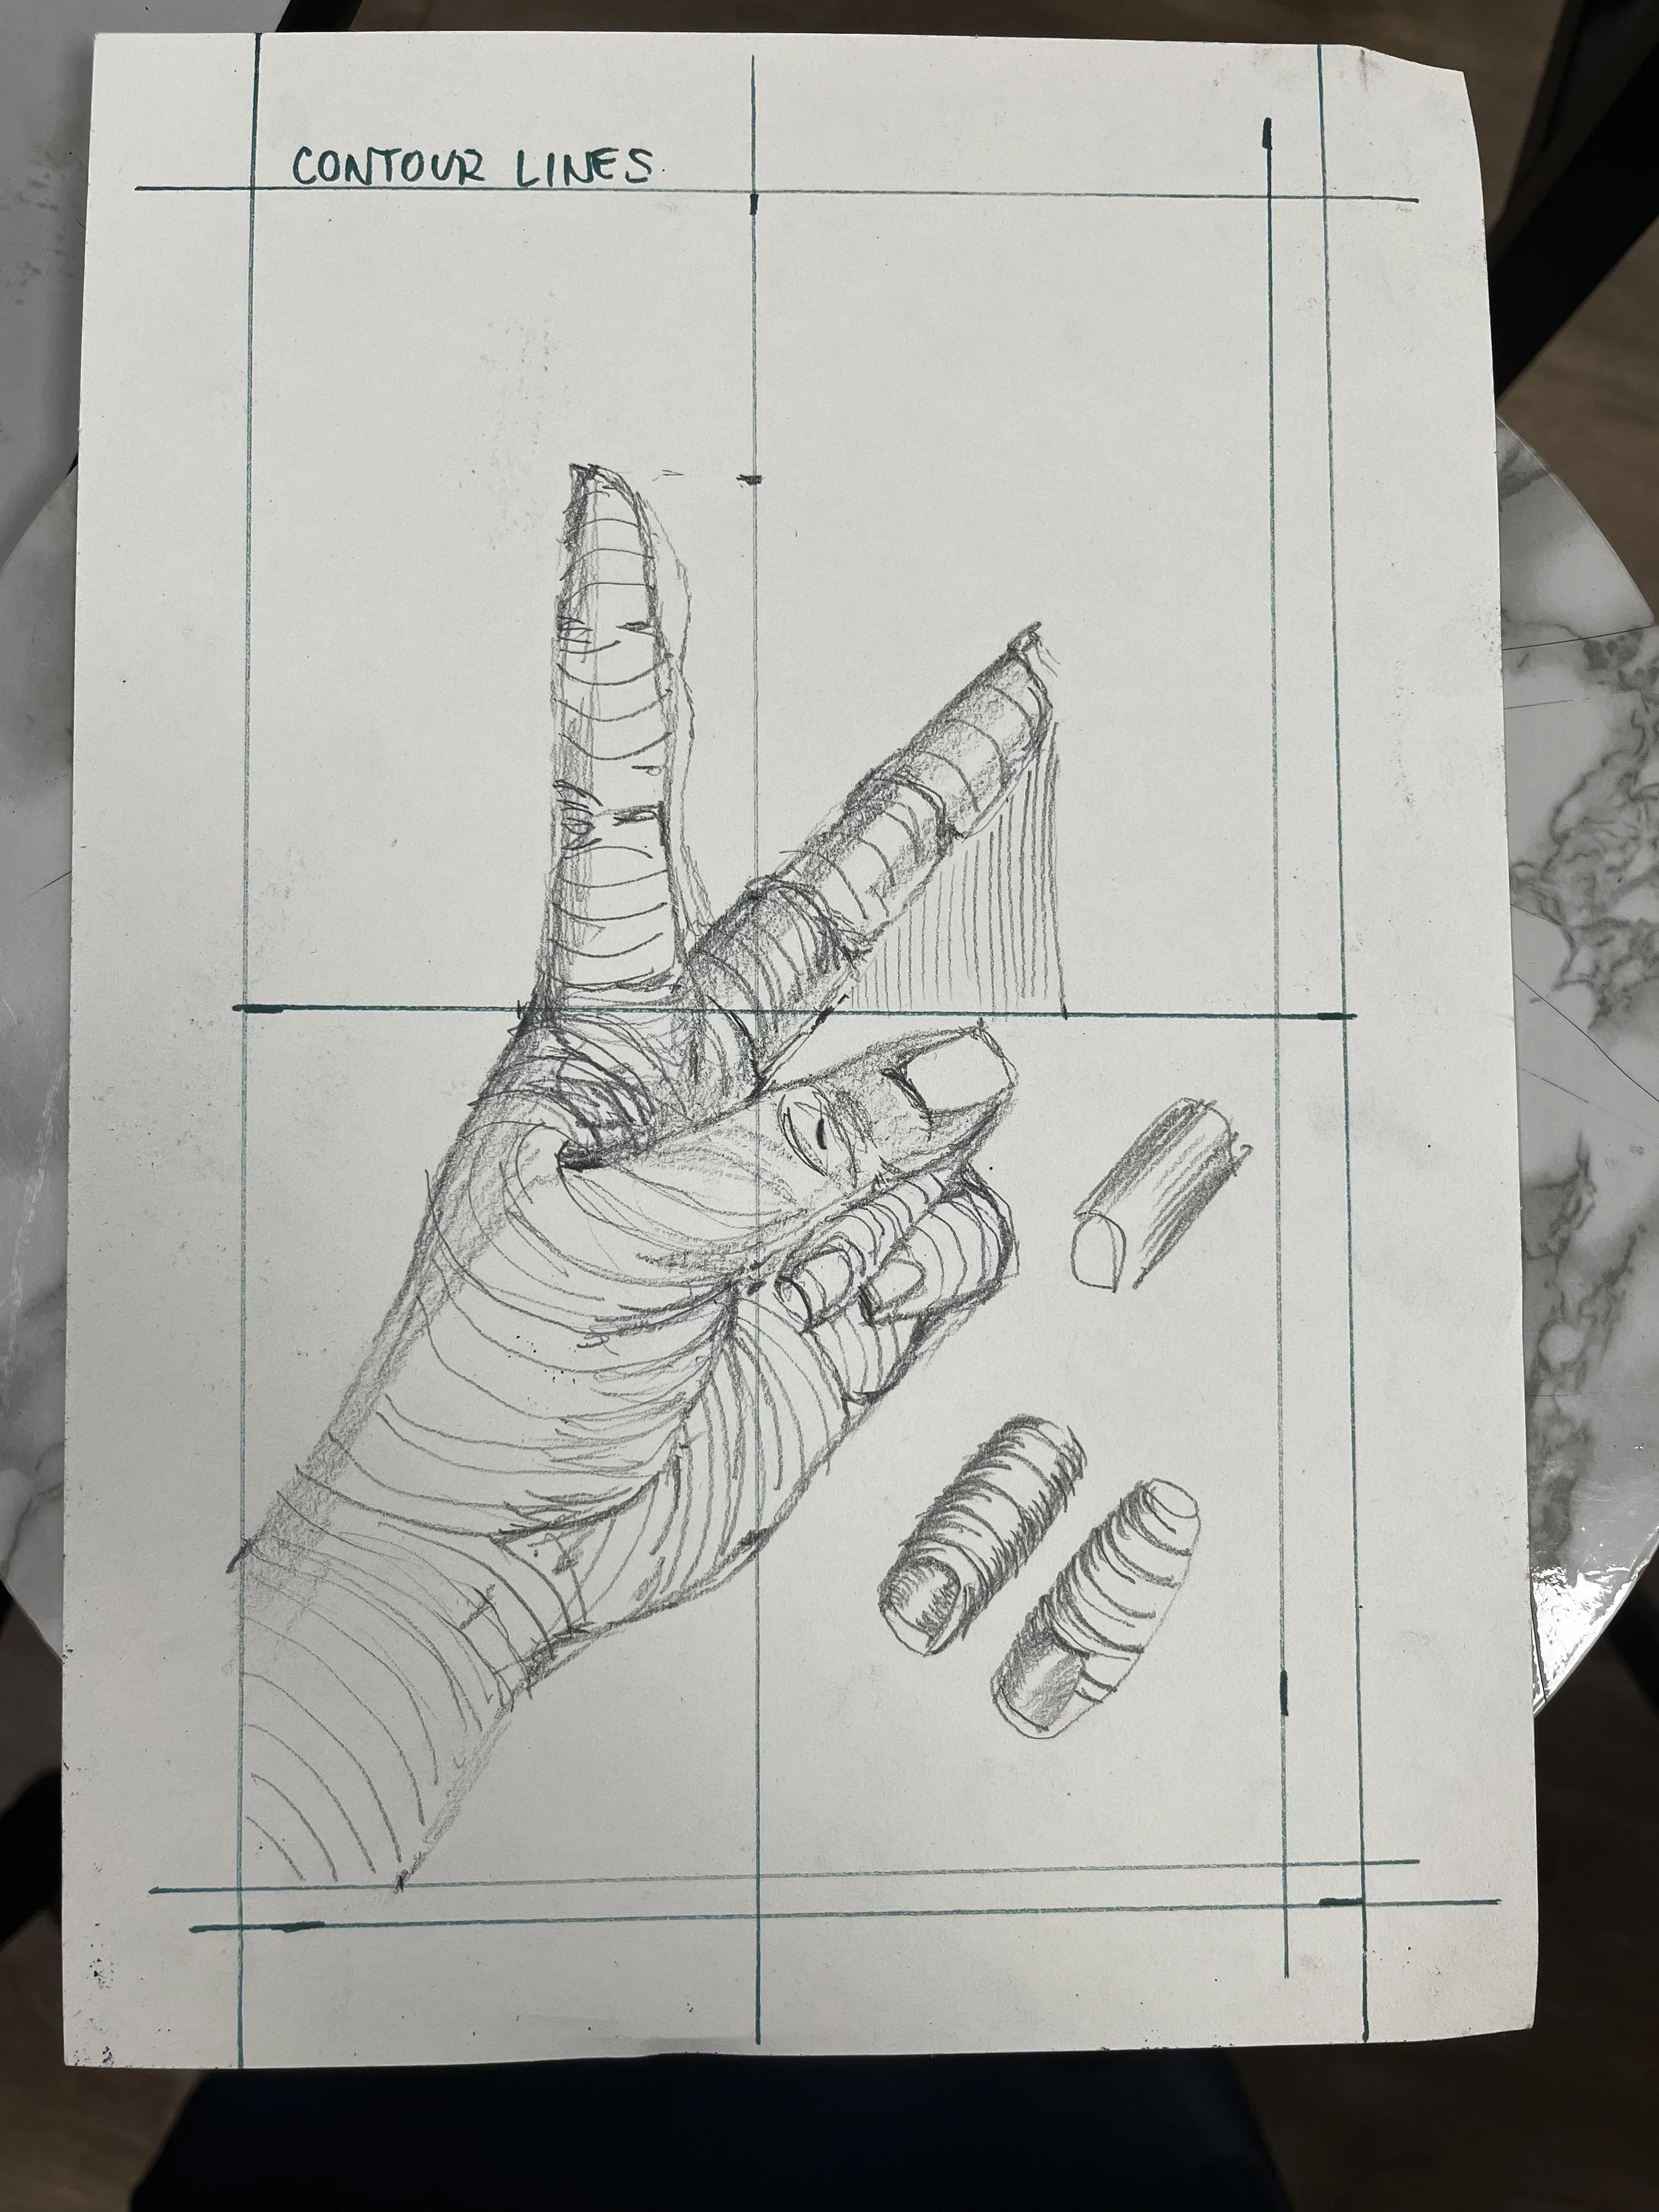
See how the contour line gives the flat drawing a directional volume based on the light that hits all the forms and thus creating a 3D illusion?
The viewfinder I made myself from 3mm Perspex and duck tape. The black you see framing the drawing space is duck tape.
The perspex is where you will trace any 3D subjects of your choice, in this case my left hand holding a folded $5 bill, using a white board marker, and the result is a flattened version of a 3D subject.
The viewfinder act as a filter so you can see what shape a 3D subject looks like on a 2D surface.
Betty Edwards invented this viewfinder tool back in the 70’s and is part of her seminal book ‘ Drawing On the Right Side of the Brain”. She did not invent this tool, it has been invited for hundreds of years before her.
The viewfinder is meant to only be used as a form finding tool, and not to for drawing the details or values. You can look at the actual subject to draw all the details and values once the basic form has been transferred from the perspex to your paper.
The drawing space in the viewfinder also has 2 cross hair lines evenly cutting it into 4 equal space. This is a simplified version of perspective drawing tool used by master artists such as Albrecht Durer (1471-1528) seen below. His ‘perspective machine’ as he calls it was basically a wooden frame with strings creating the squares you see. In other words, the squares are all cross hair lines to help connect each shape that has been flattened.

I hope this article helps you further your understanding of the drawing tool called the viewfinder, and the concept of ‘contour line’. This is something you will need to practice to really absorb and digest.
The Pinterest board associated to this topic is here
Happy Practice!