Watercolours for Beginners Mind : Lesson 2 is Strokes and Tempo (Time)
This week’s lesson is about exploring strokes in watercolours. If you have more than one kind or size of brush, I recommend you take them all out for a little game I call Energetic Brush Exercises.
Energetic Brush Stroke Exercise
During the sketch-a-long, we will focus on using a round brushes with a good tip.
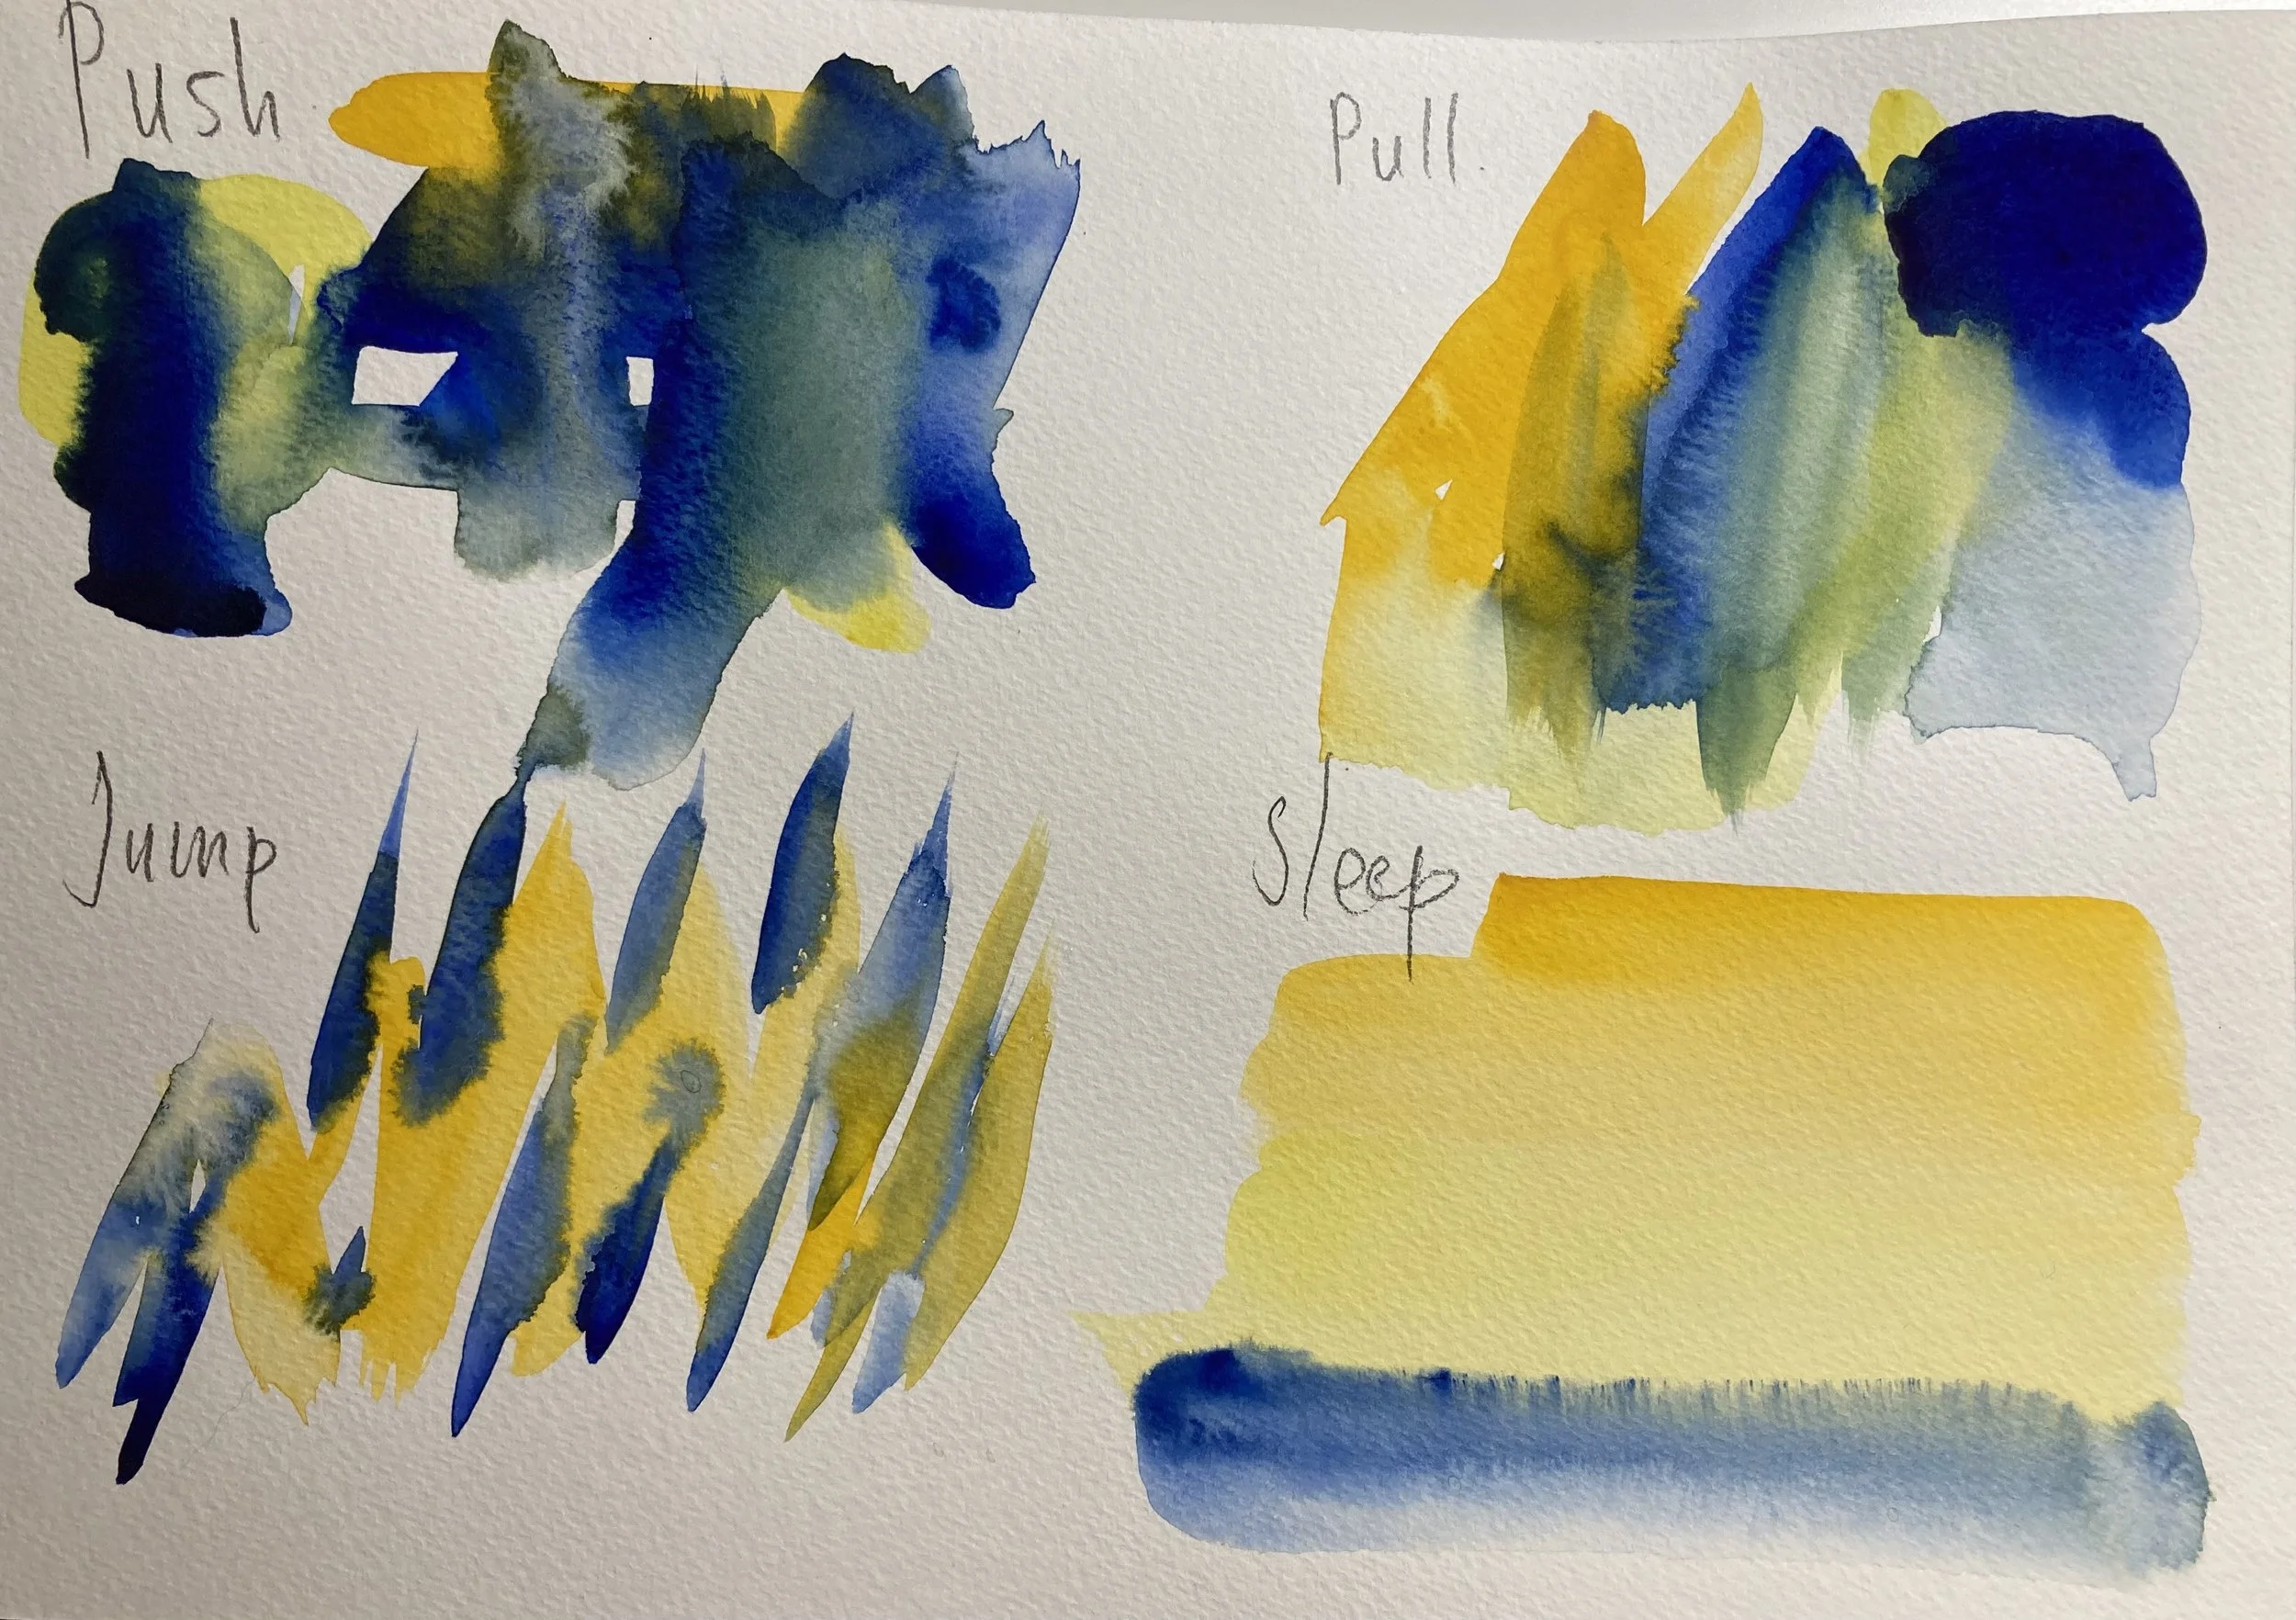
We will start with collecting action verbs such as ‘push, pull, steal, jump, sleepy.’
Not all action verbs works, but lets see what does work.
We are going to pick a subject where brush strokes are mostly visible, such as florals, vegetations, trees, furs and spikes in animals are some good ones, and we’re going to apply our action verbs on to those subjects and see what Energetic movements of our brush we can discover together.
Before we do this, there are a few brush techniques I use that I want to share.
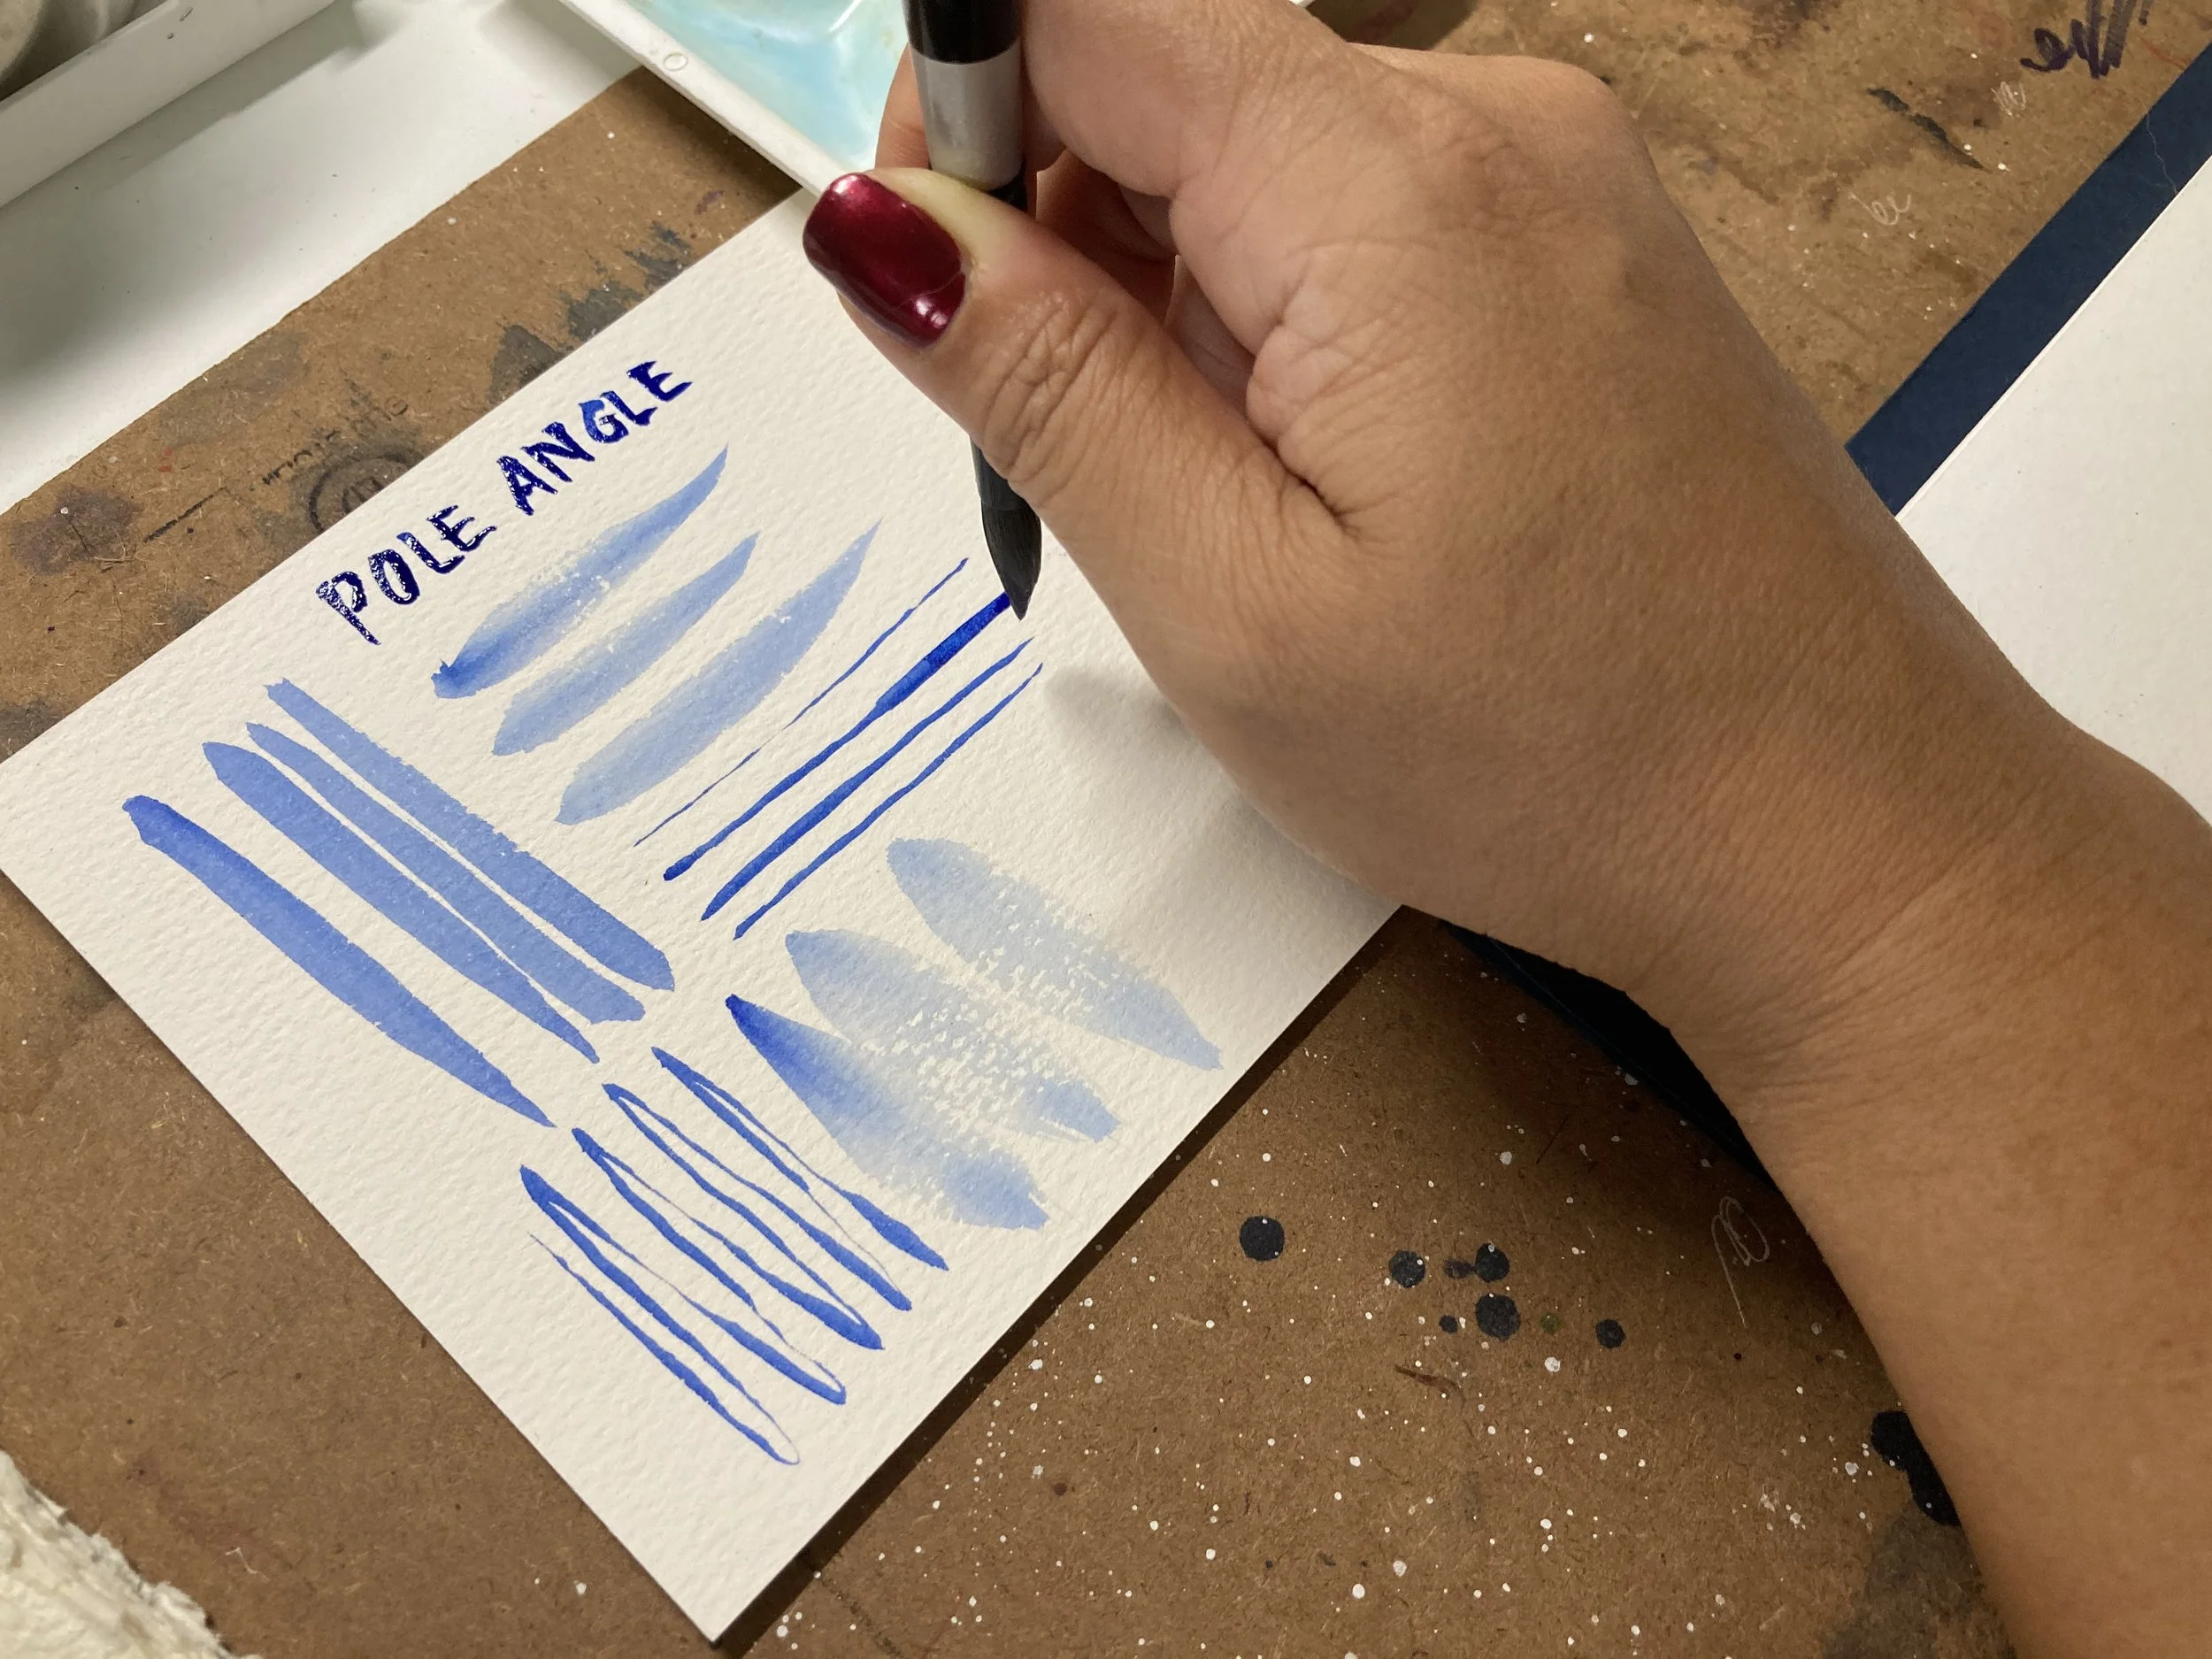
The Pole Angle
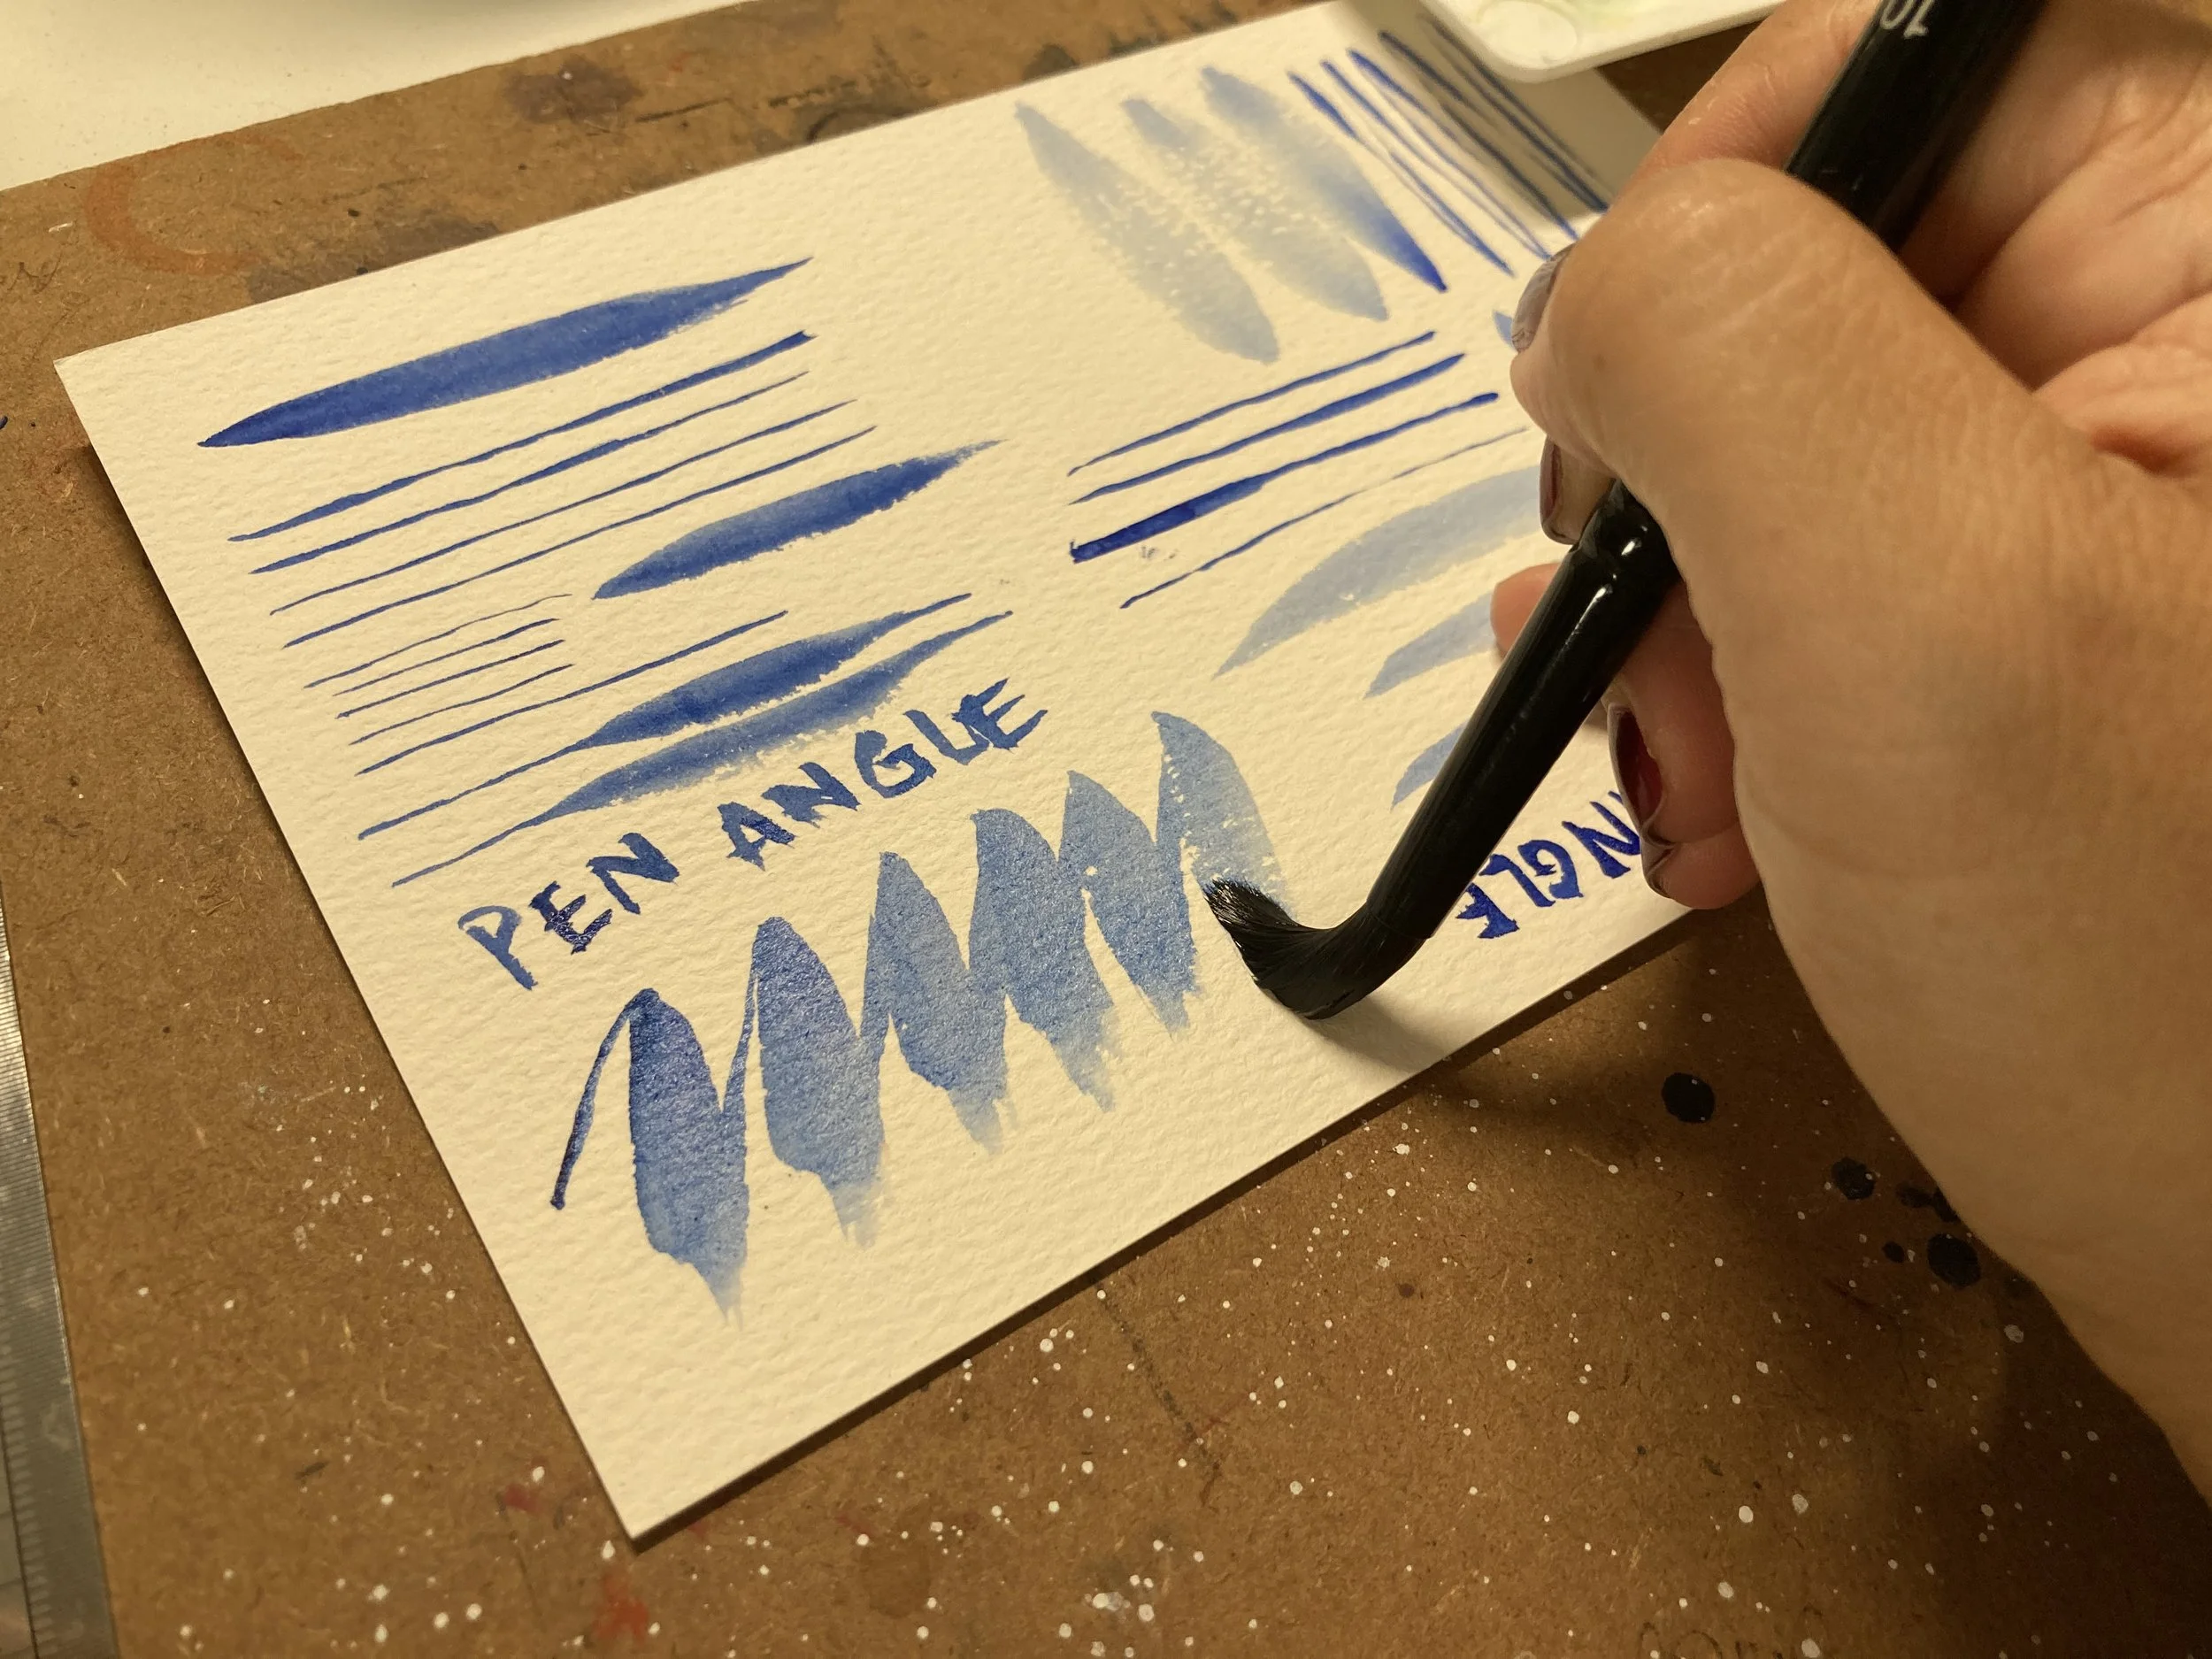
The Pen Angle
The compound strokes.
The Push and Pull, Wet and Dry
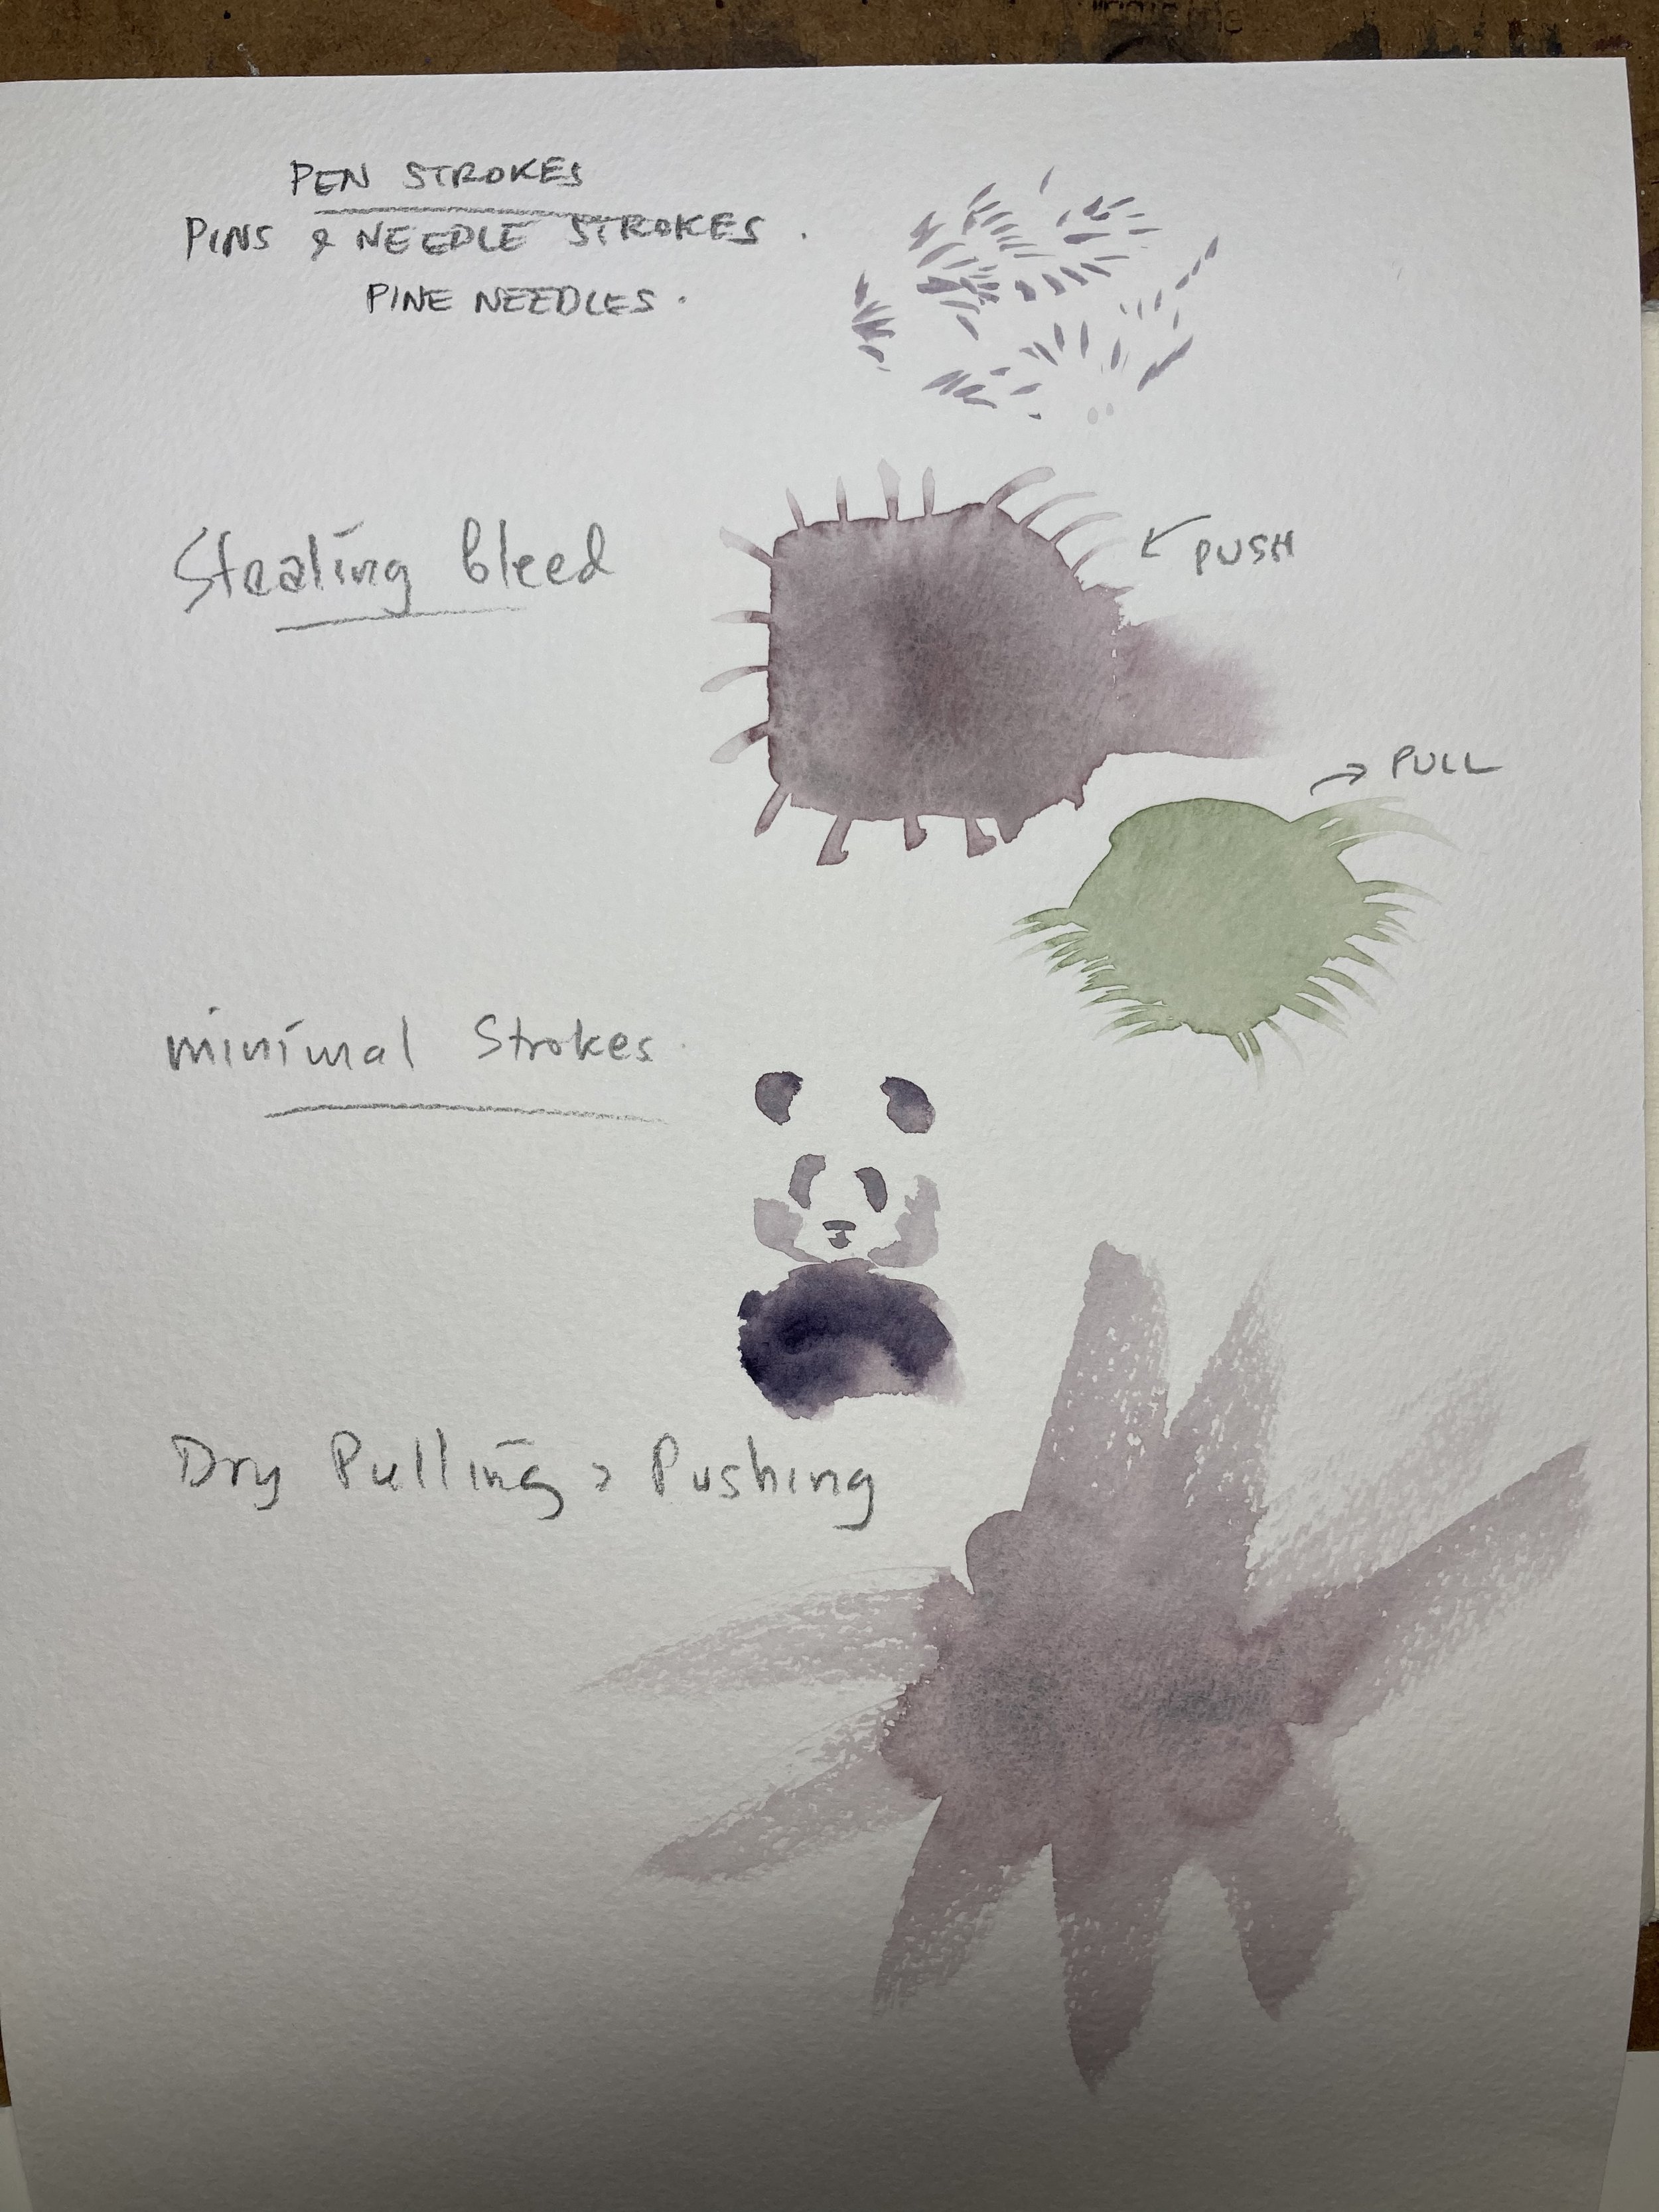
Minimal strokes - using your brush for both lines and fill.
Stealing Bleed
Pine Needle strokes
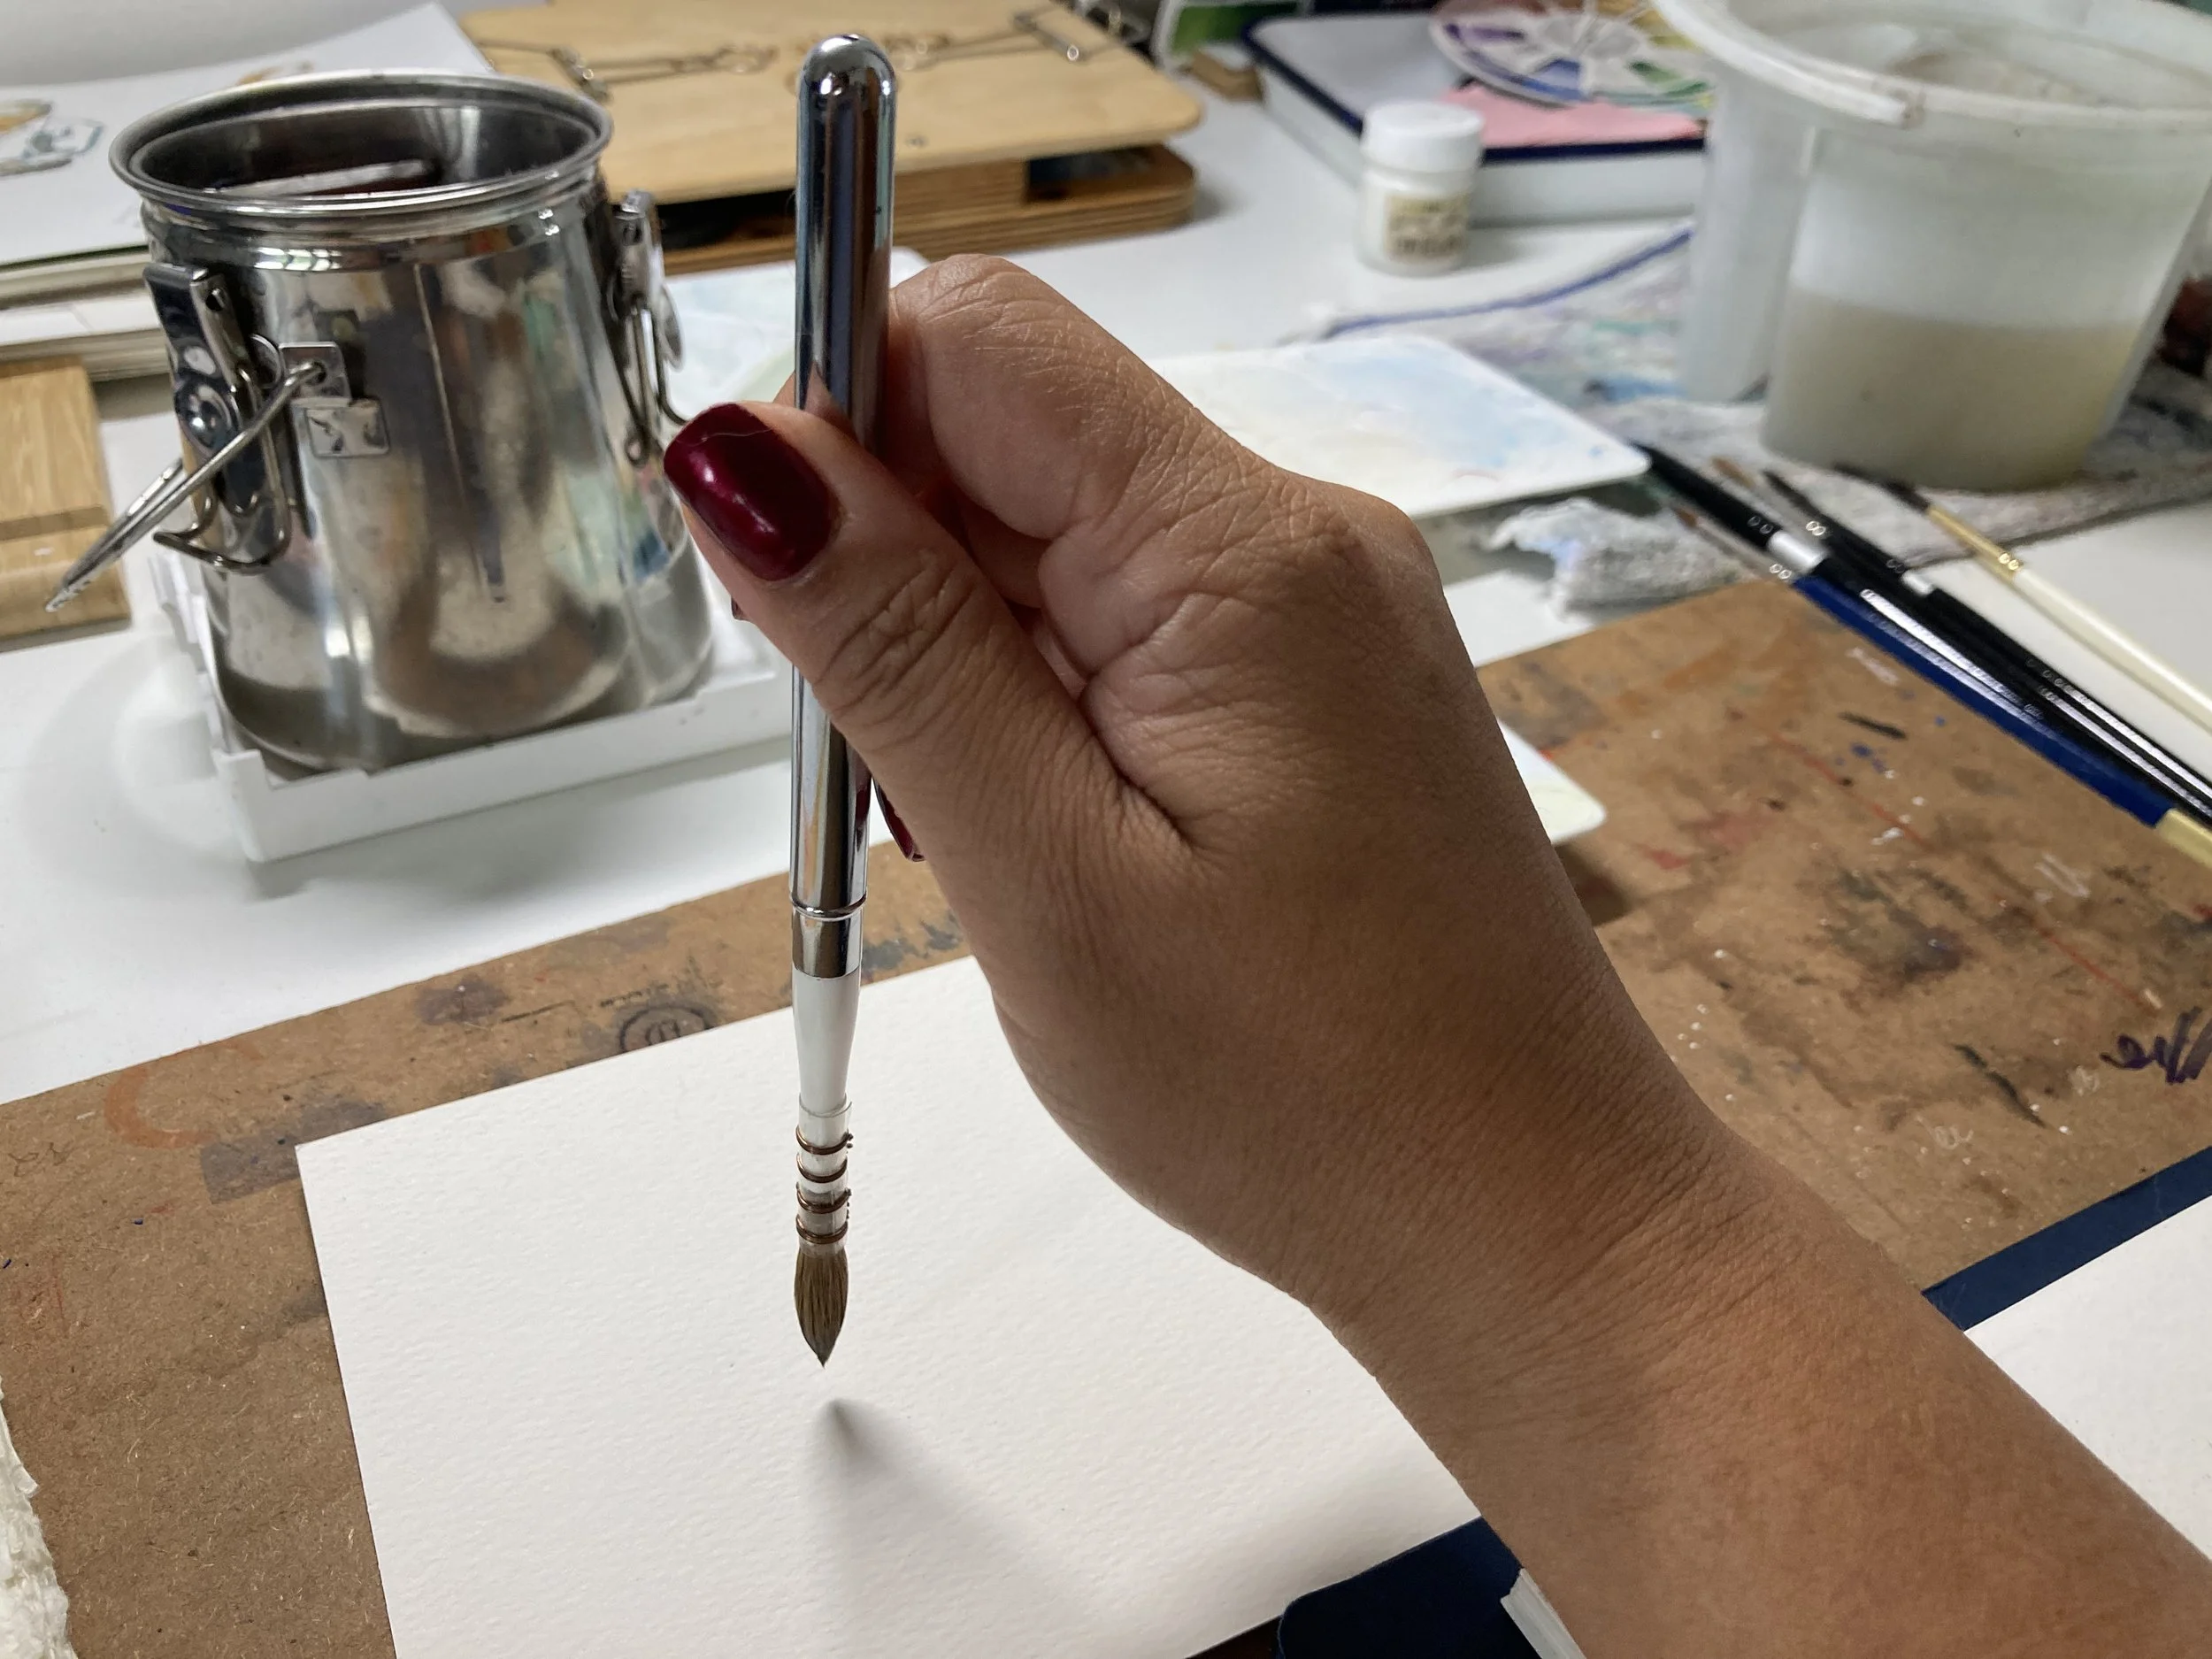
The Pole Angle
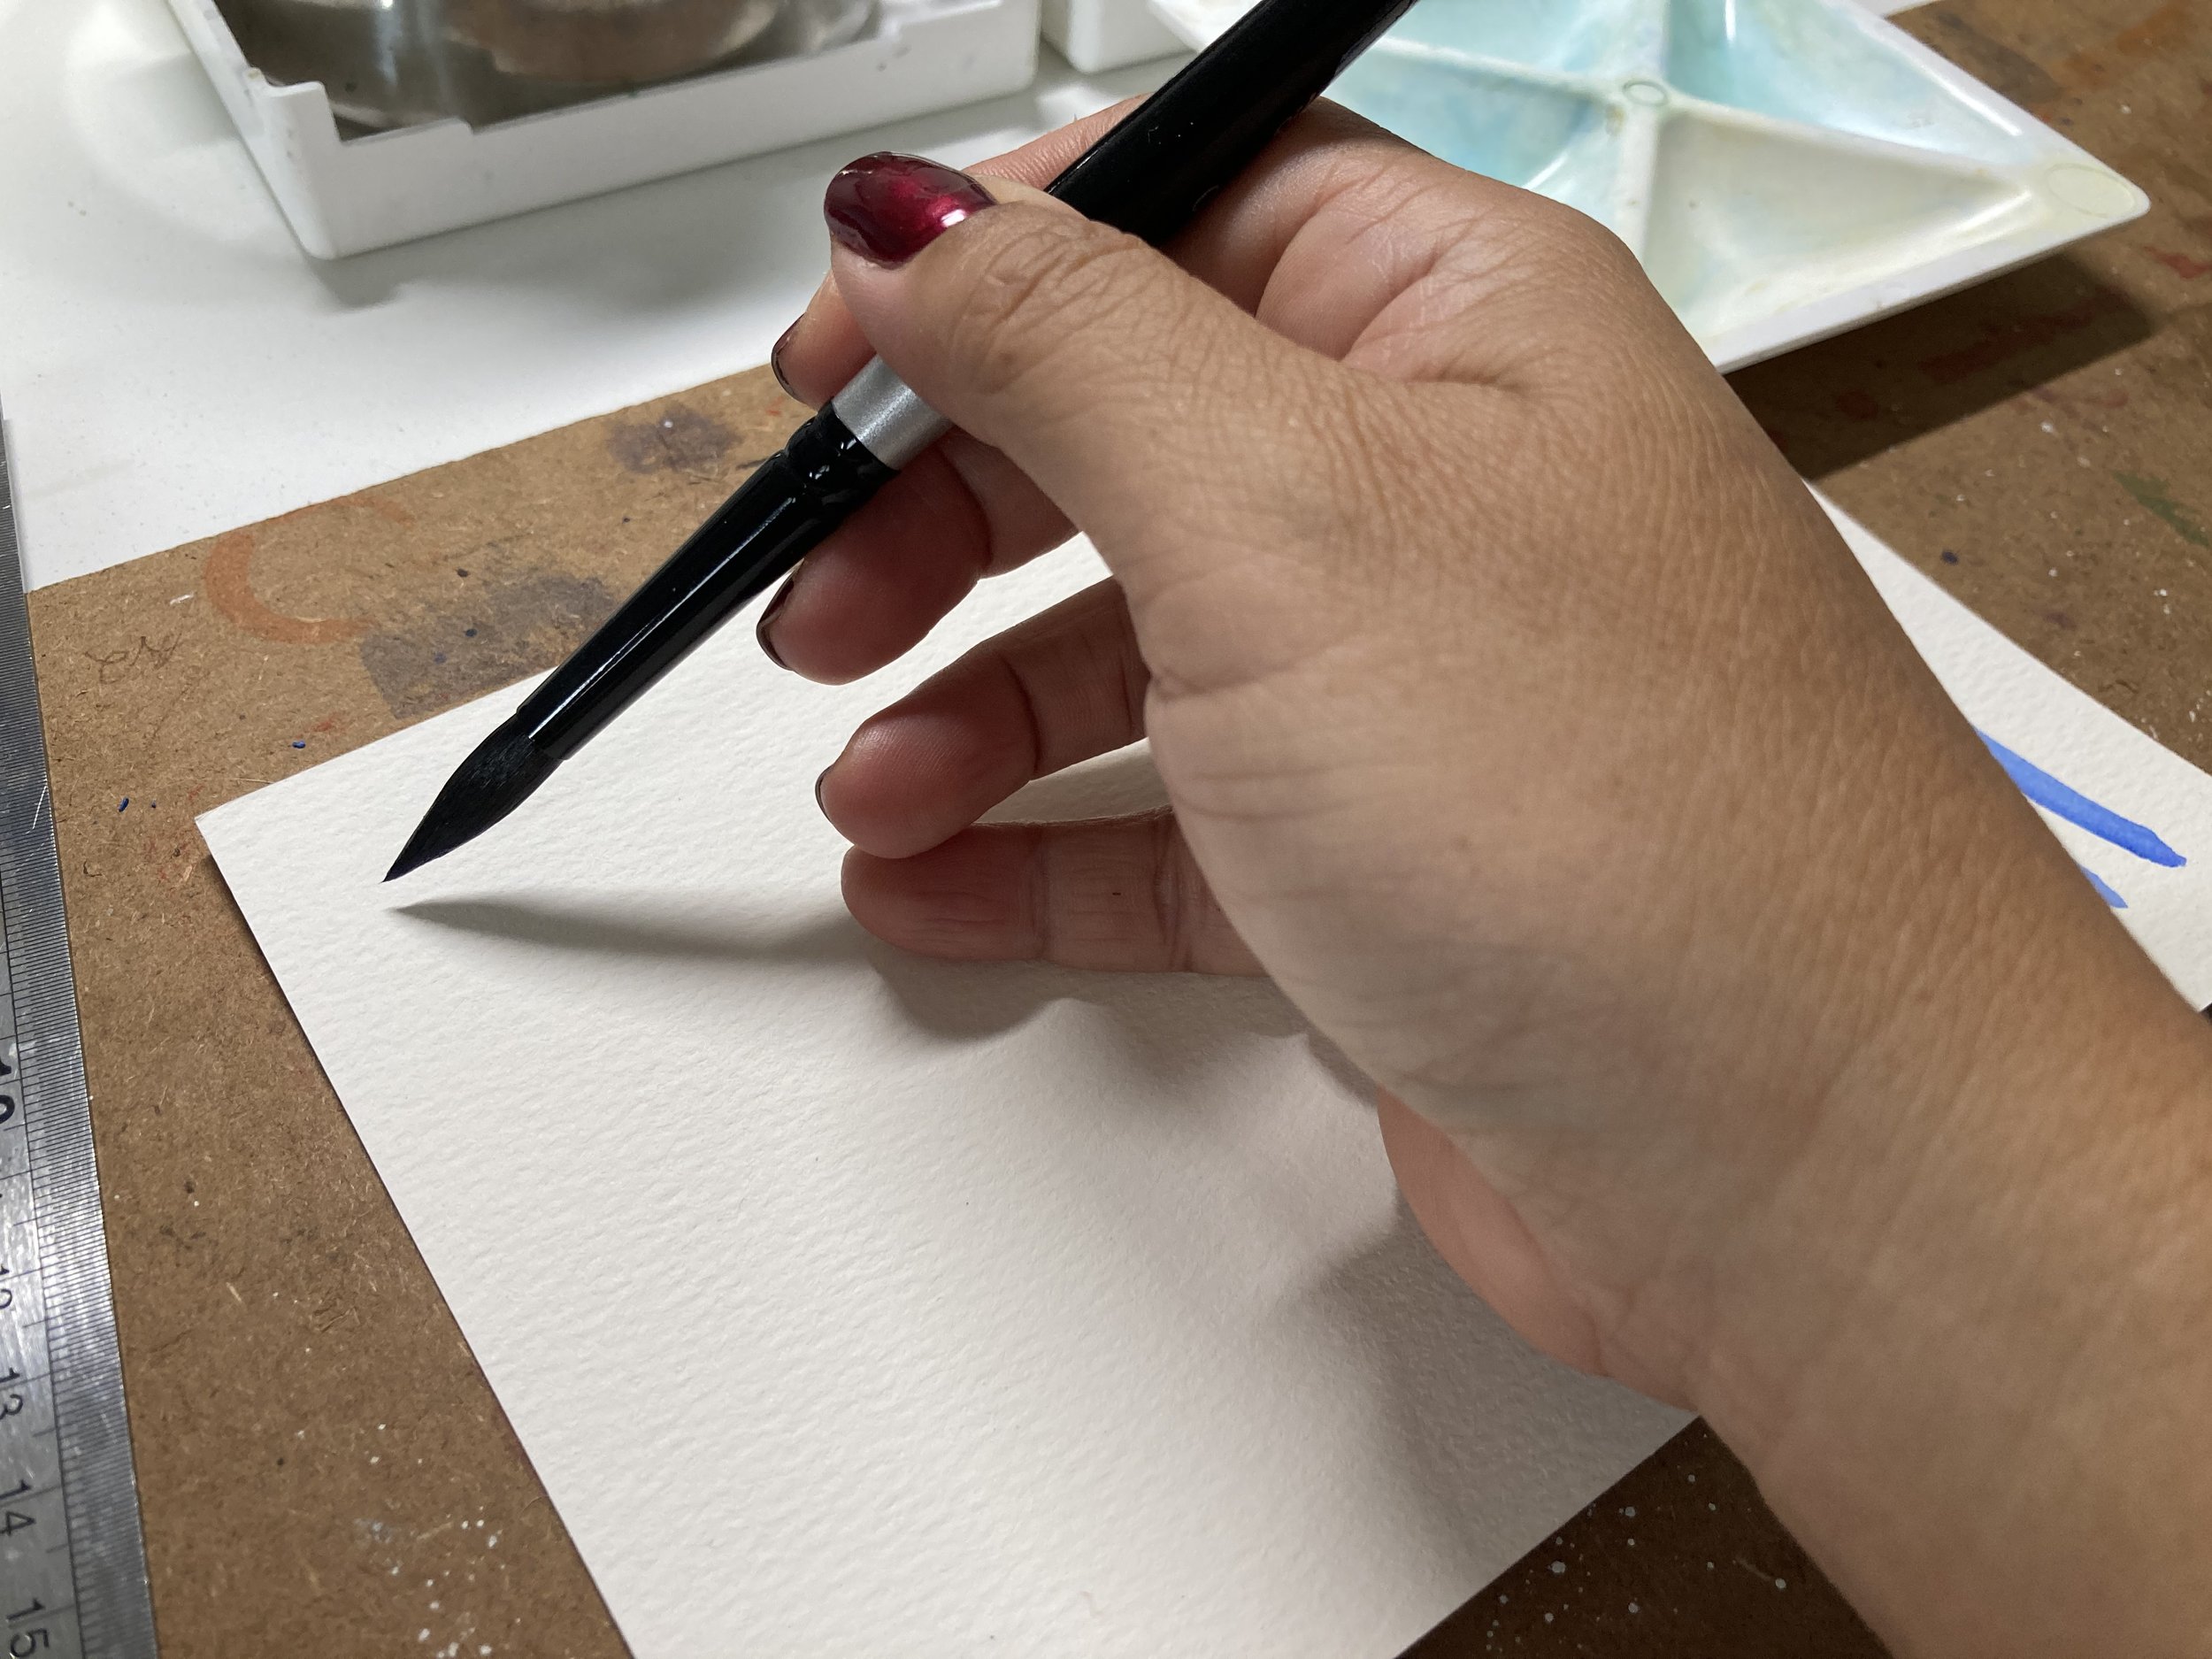
The Pen Angle
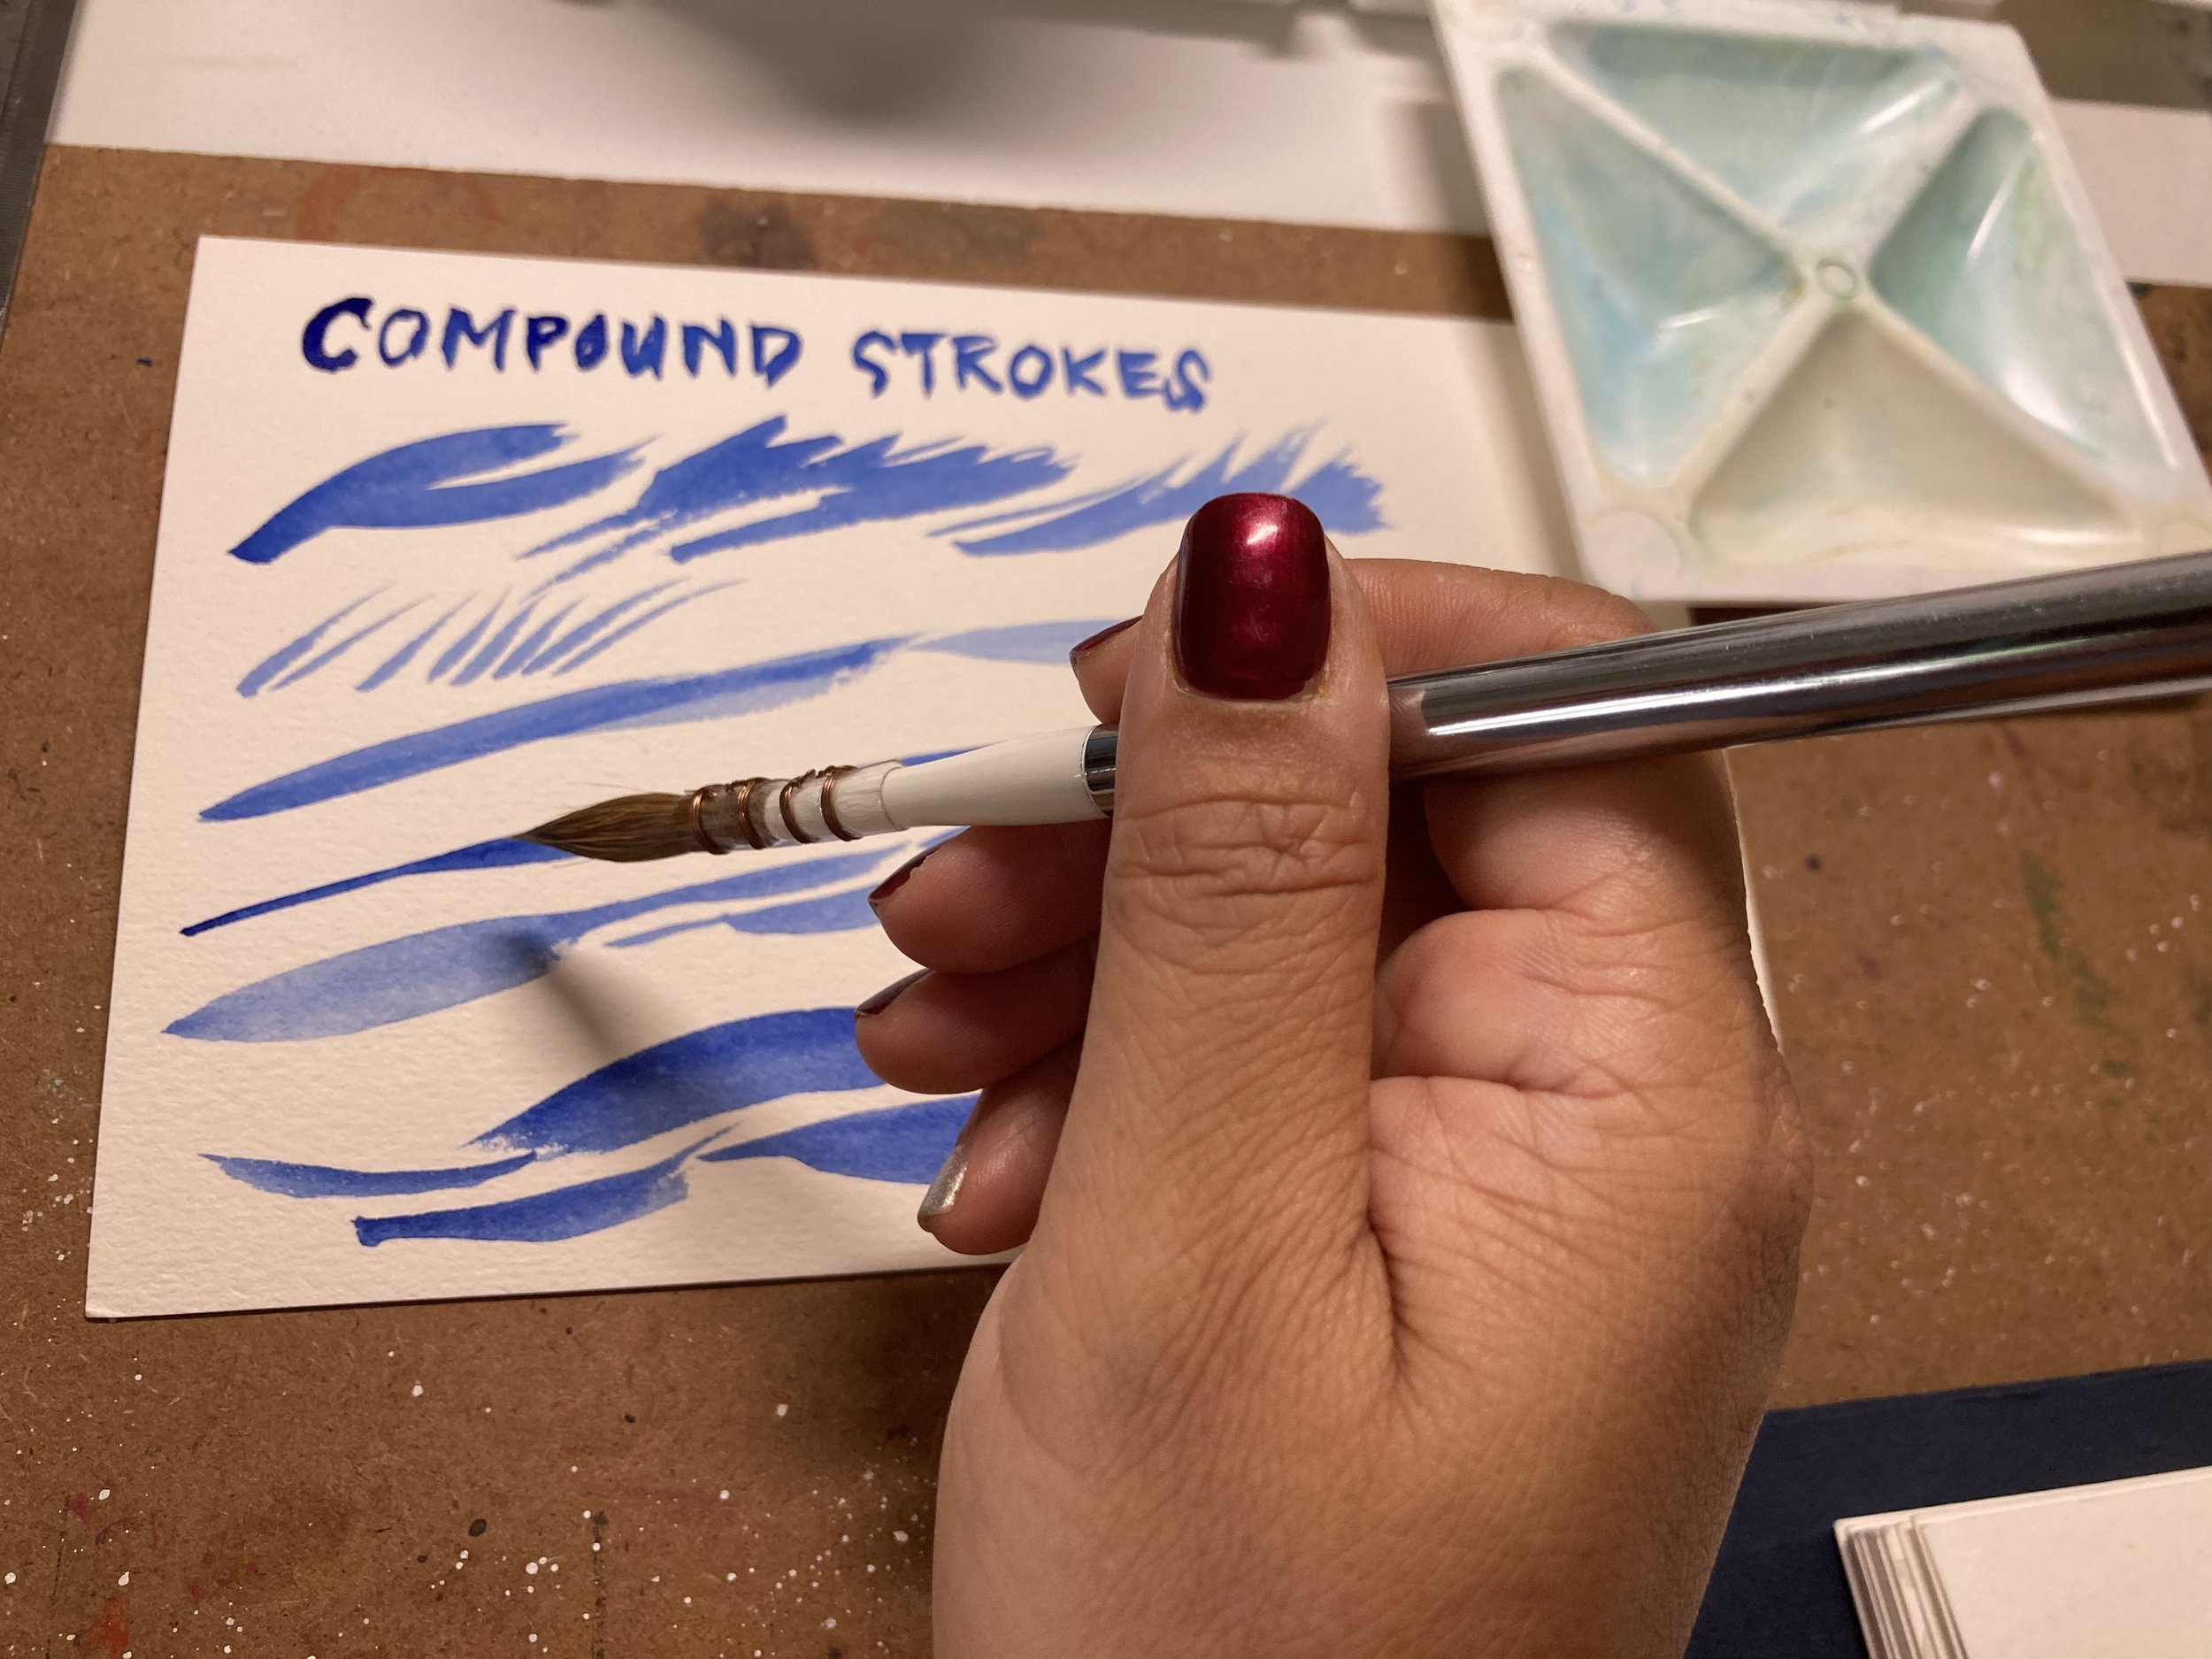
Compound Strokes
There are obviously many more strokes and angles but these are the main ones I discover works for me, and you will discover yours too.
Why do you have to be aware if your strokes and tempo? Because the angles of your brush determine the quality of your strokes, and the tempo which I will elaborate next will determine the quality of your painting too.
TEMPO
The real fun in learning brush strokes is understanding how time is a big part effecting your movements.
Time is the length of time each strokes stays wet or dry out. And how confident you are with as few strokes as possible.
The minimal strokes is something you developed overtime by repeated practice of minimising your strokes.
Even wash needs to be applied at a very even tempo, and you cannot wait too long or you’ll get a lot of uneven surface drying at different tempo.
Gradation wash also need to be applied at an even tempo, so a good pre-mixing of colours could help this process.
Because watercolor painting uses a lot of tempo skills, that means you hv to be confident in your strokes, even if it’s wrong. That’s where the exercises of energetic brush strokes will help improve your watercolor tempo.
A pulling versus a pushing strokes are great on wet on wet techniques that is uneven, strange and when dry, the flow of the strokes are beautifully visible. Pull and Push also applies to negative painting as seen in the owl sketch below.

A slow or sleepy stroke usually applies to even washes and gradation washes. Its a quiet and consistent one.
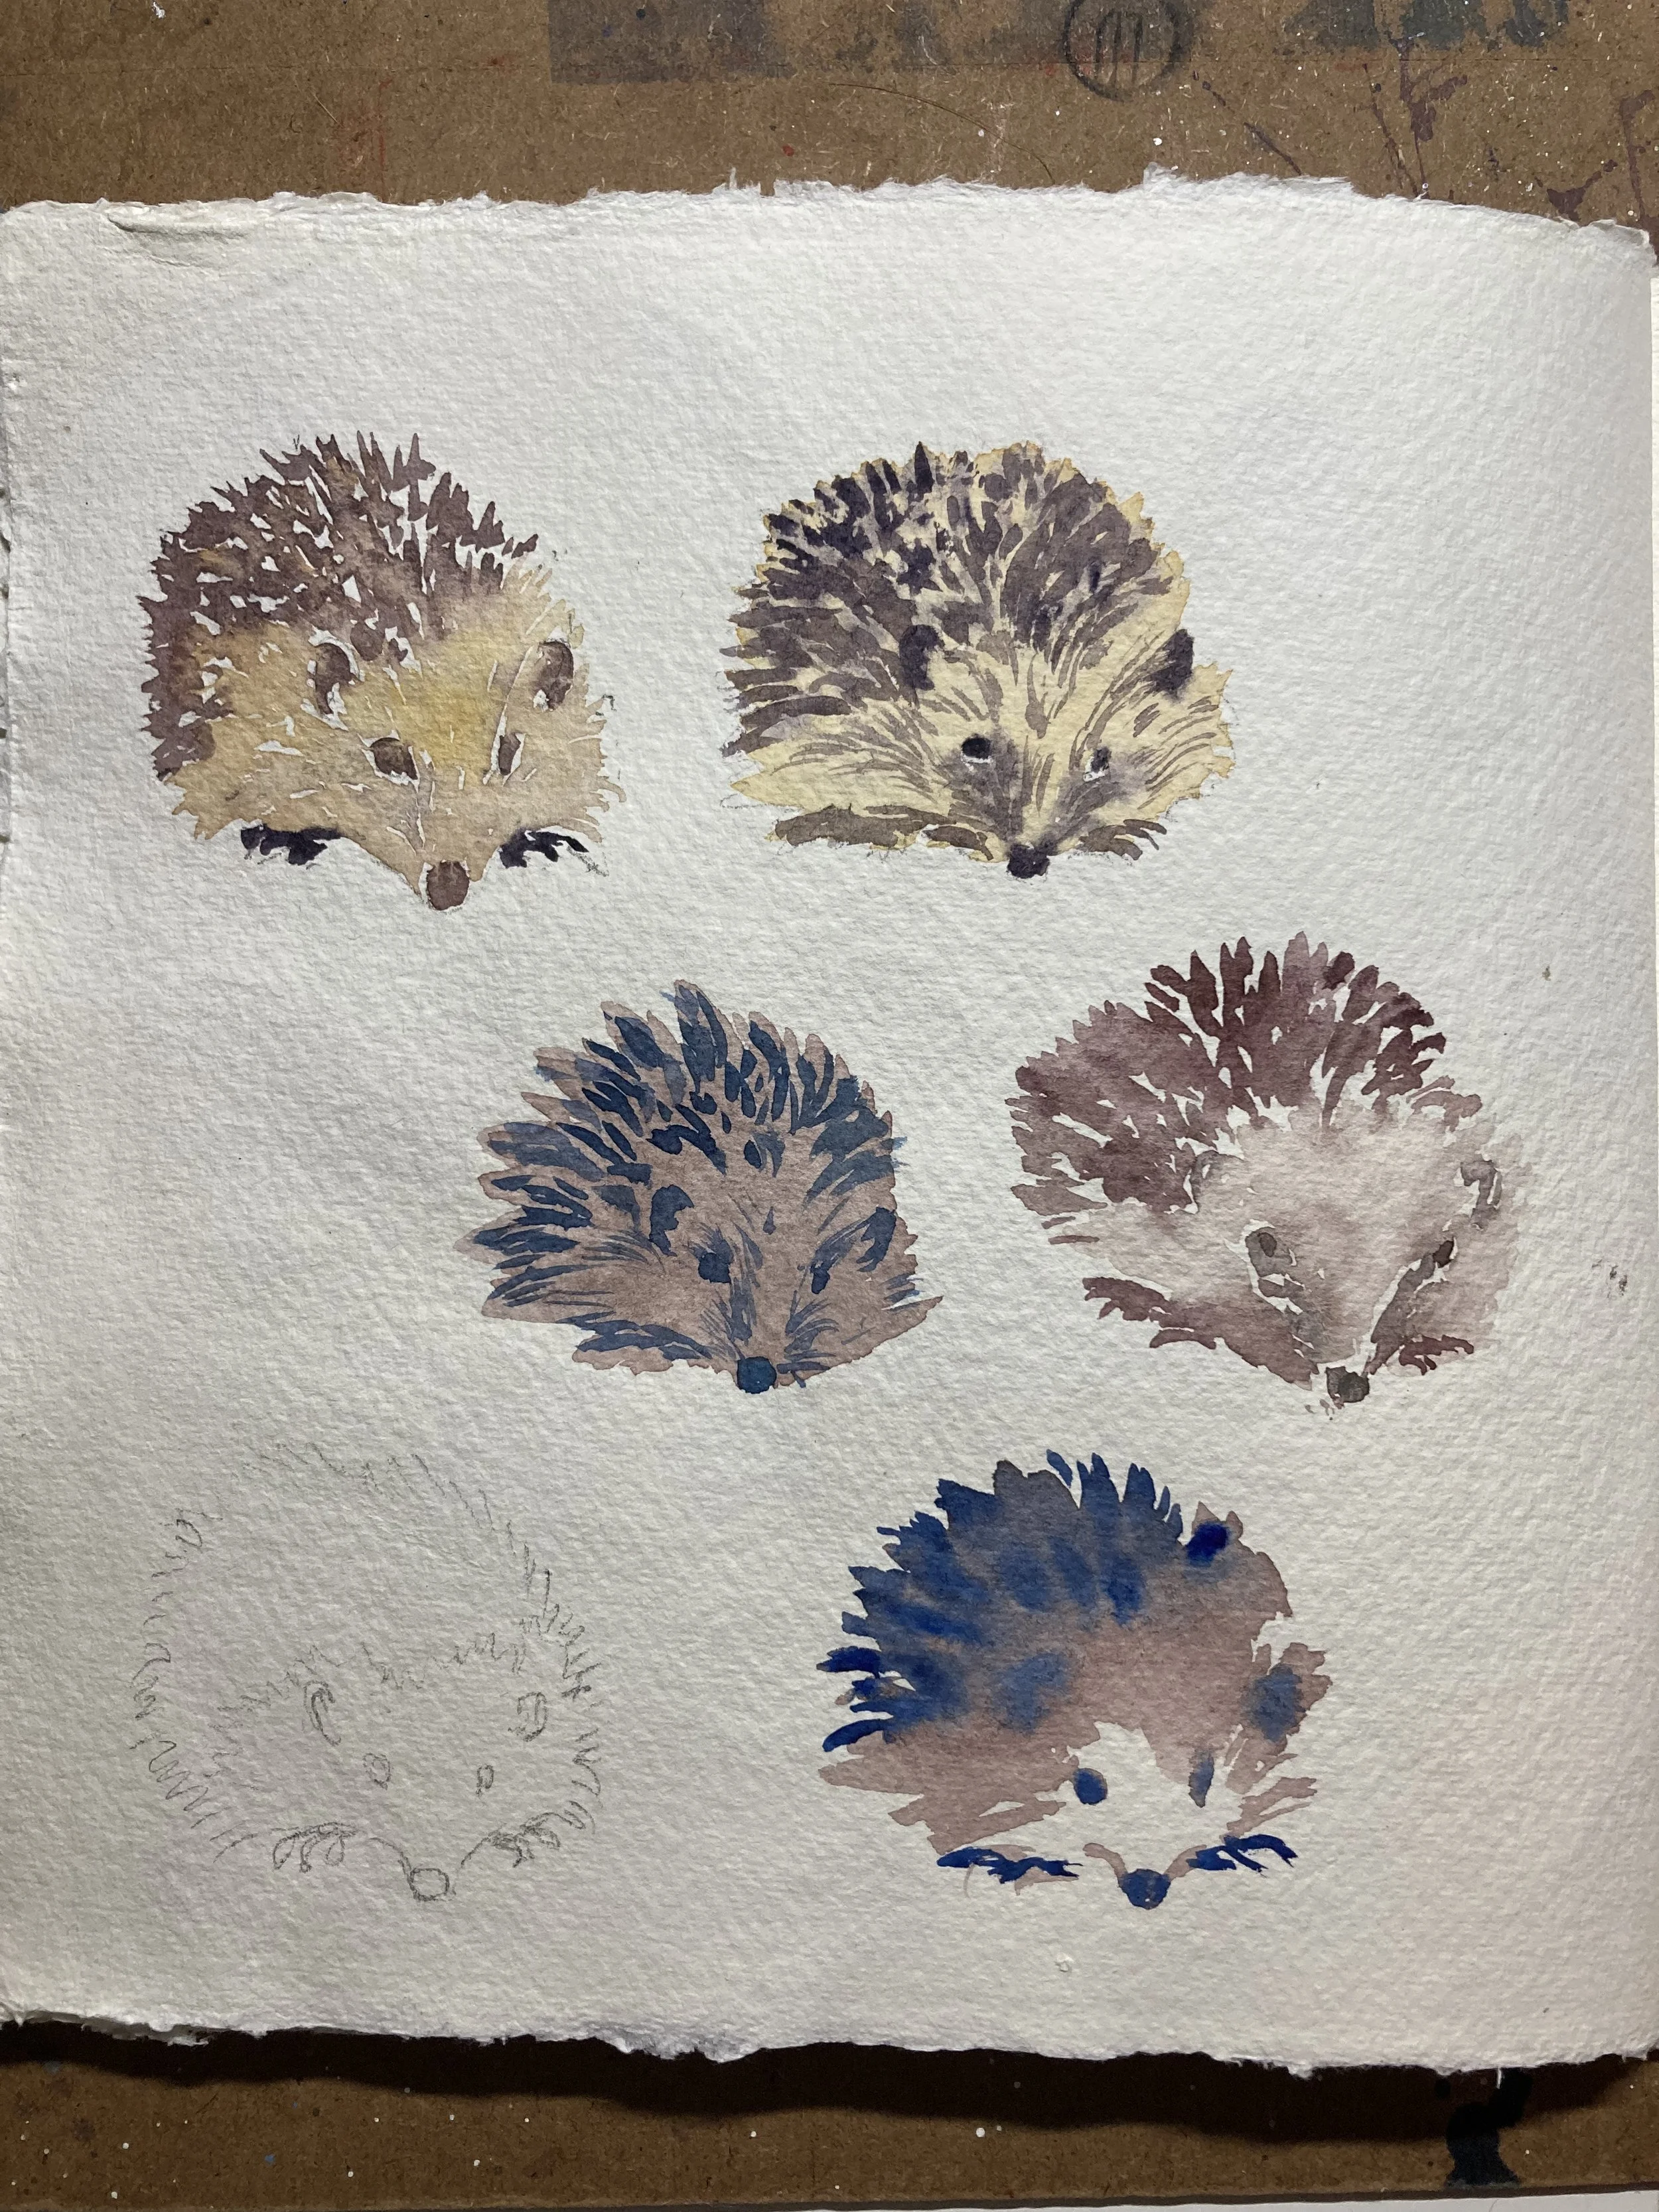
Hedgehog in a variety of strokes and tempo
Hedgehog Reference is here
A dancing stroke is great for dynamic effects for wet on wet and dry brush strokes.
One thing to remember is that when your paper is still wet, the paint on that wet area is still actively painting by itself, a lot of watercolour tempo also includes waiting, and not touching or messing with the area still wet. This is quite hard if you are a controlling kind of person or if you have painted oil and acrylic. Those paints are thick and needed discipline.
Watercolour is a kind of paint that likes a light but confident discipline, and it’s not a subordinate, it’s a friend you can’t tell what to do. Watercolour is a very fluid, dynamic, and transparent beast. The more you try to control it, the worse it gets.
PAPER Quality affects result
Ofcourse lets not forget that all this is also affected by the quality of your paper, so here is where wood pulp paper versus cotton paper differ greatly.
Most sketching paper are not made of 100% cotton, but from a mix of wood pulp and binder. Many watercolour artist love 100% cotton paper because its more absorbent but also disperses the paint more evenly as you put each strokes down, and stays wet more evenly too, so this gives more time to reduce the uneven surface often seen in wood pulp or cellulose paper.
So whatever paper you currently are using, is a good place as any to start figuring out how your paper react to the watercolors on your brush. Don’t worry too much if the result you see in my demonstration is very different to yours. The key in this class is about how you move with your brush.
Your homework is to paint the owl and panda on your own and do them the way we did the hedgehog, applying as many different strokes and tempo as you can, focusing on your movement and your tempo, not on how the result looks.
Finally, remember that a beautiful result is irrelevant if you cannot do it again, so don’t get too hung up on results.
See you in the next lesson (Lesson 3)