Watercolours for Beginners Mind : Lesson 3. Edge and Shape
I woke up this morning and thought to myself I cannot wait to teach this lesson. I love this so much.
This is a lesson on understanding edges by using shape, in pencil drawing, edges refers to the line that divide the space , the line can be in various thickness, in pencil, the line tends to start thin when your pencil is most sharp, and gradually becomes thicker as your pencil tip become duller. In using a brush and watercolour, an edge refers to the stroke that is made to divide space, because the thickness of the line can not only vary but has different quality, brush strokes edges are referred to as hard, firm, soft, lost, and sharp.
What’s the difference between a hard and a sharp edge? A hard edge can be the edge of a shape that’s quite large, while a sharp edge tends to refer to thinner shapes.
Soft and Lost edges can be easily confused as well, but soft tends to mean you can still see the edge, while lost tends towards there’s almost no edge to be seen.
Shape is fundamentally used to define lots of watercolor painting, and the more diverse shapes that we can make with our variety of brushes, the more tools you have in your pocket to paint anything you want.
In watercolor, edges can be learned with brush strokes, so following our previous class, this is learning how to understand and create different varieties of edges, through a series of shape making drills.
Hard edges, Soft edges, Lost or lifted edges. Firm and Sharp are a variety of hard edges that could vary depending on the quality of paint and paper. In this case there are also opaque and transparent to be included because certain opaque Watercolours such as the cadmium’s will be less opaque then gouache, and thus the edges that can be created differ slightly too.
This lesson involves brush stroke techniques that’s not fully covered in lesson 2, because the brush techniques used here is more used to control the outcome of the painting, while lesson 2 is exploring what are possible.
Use a medium round brush
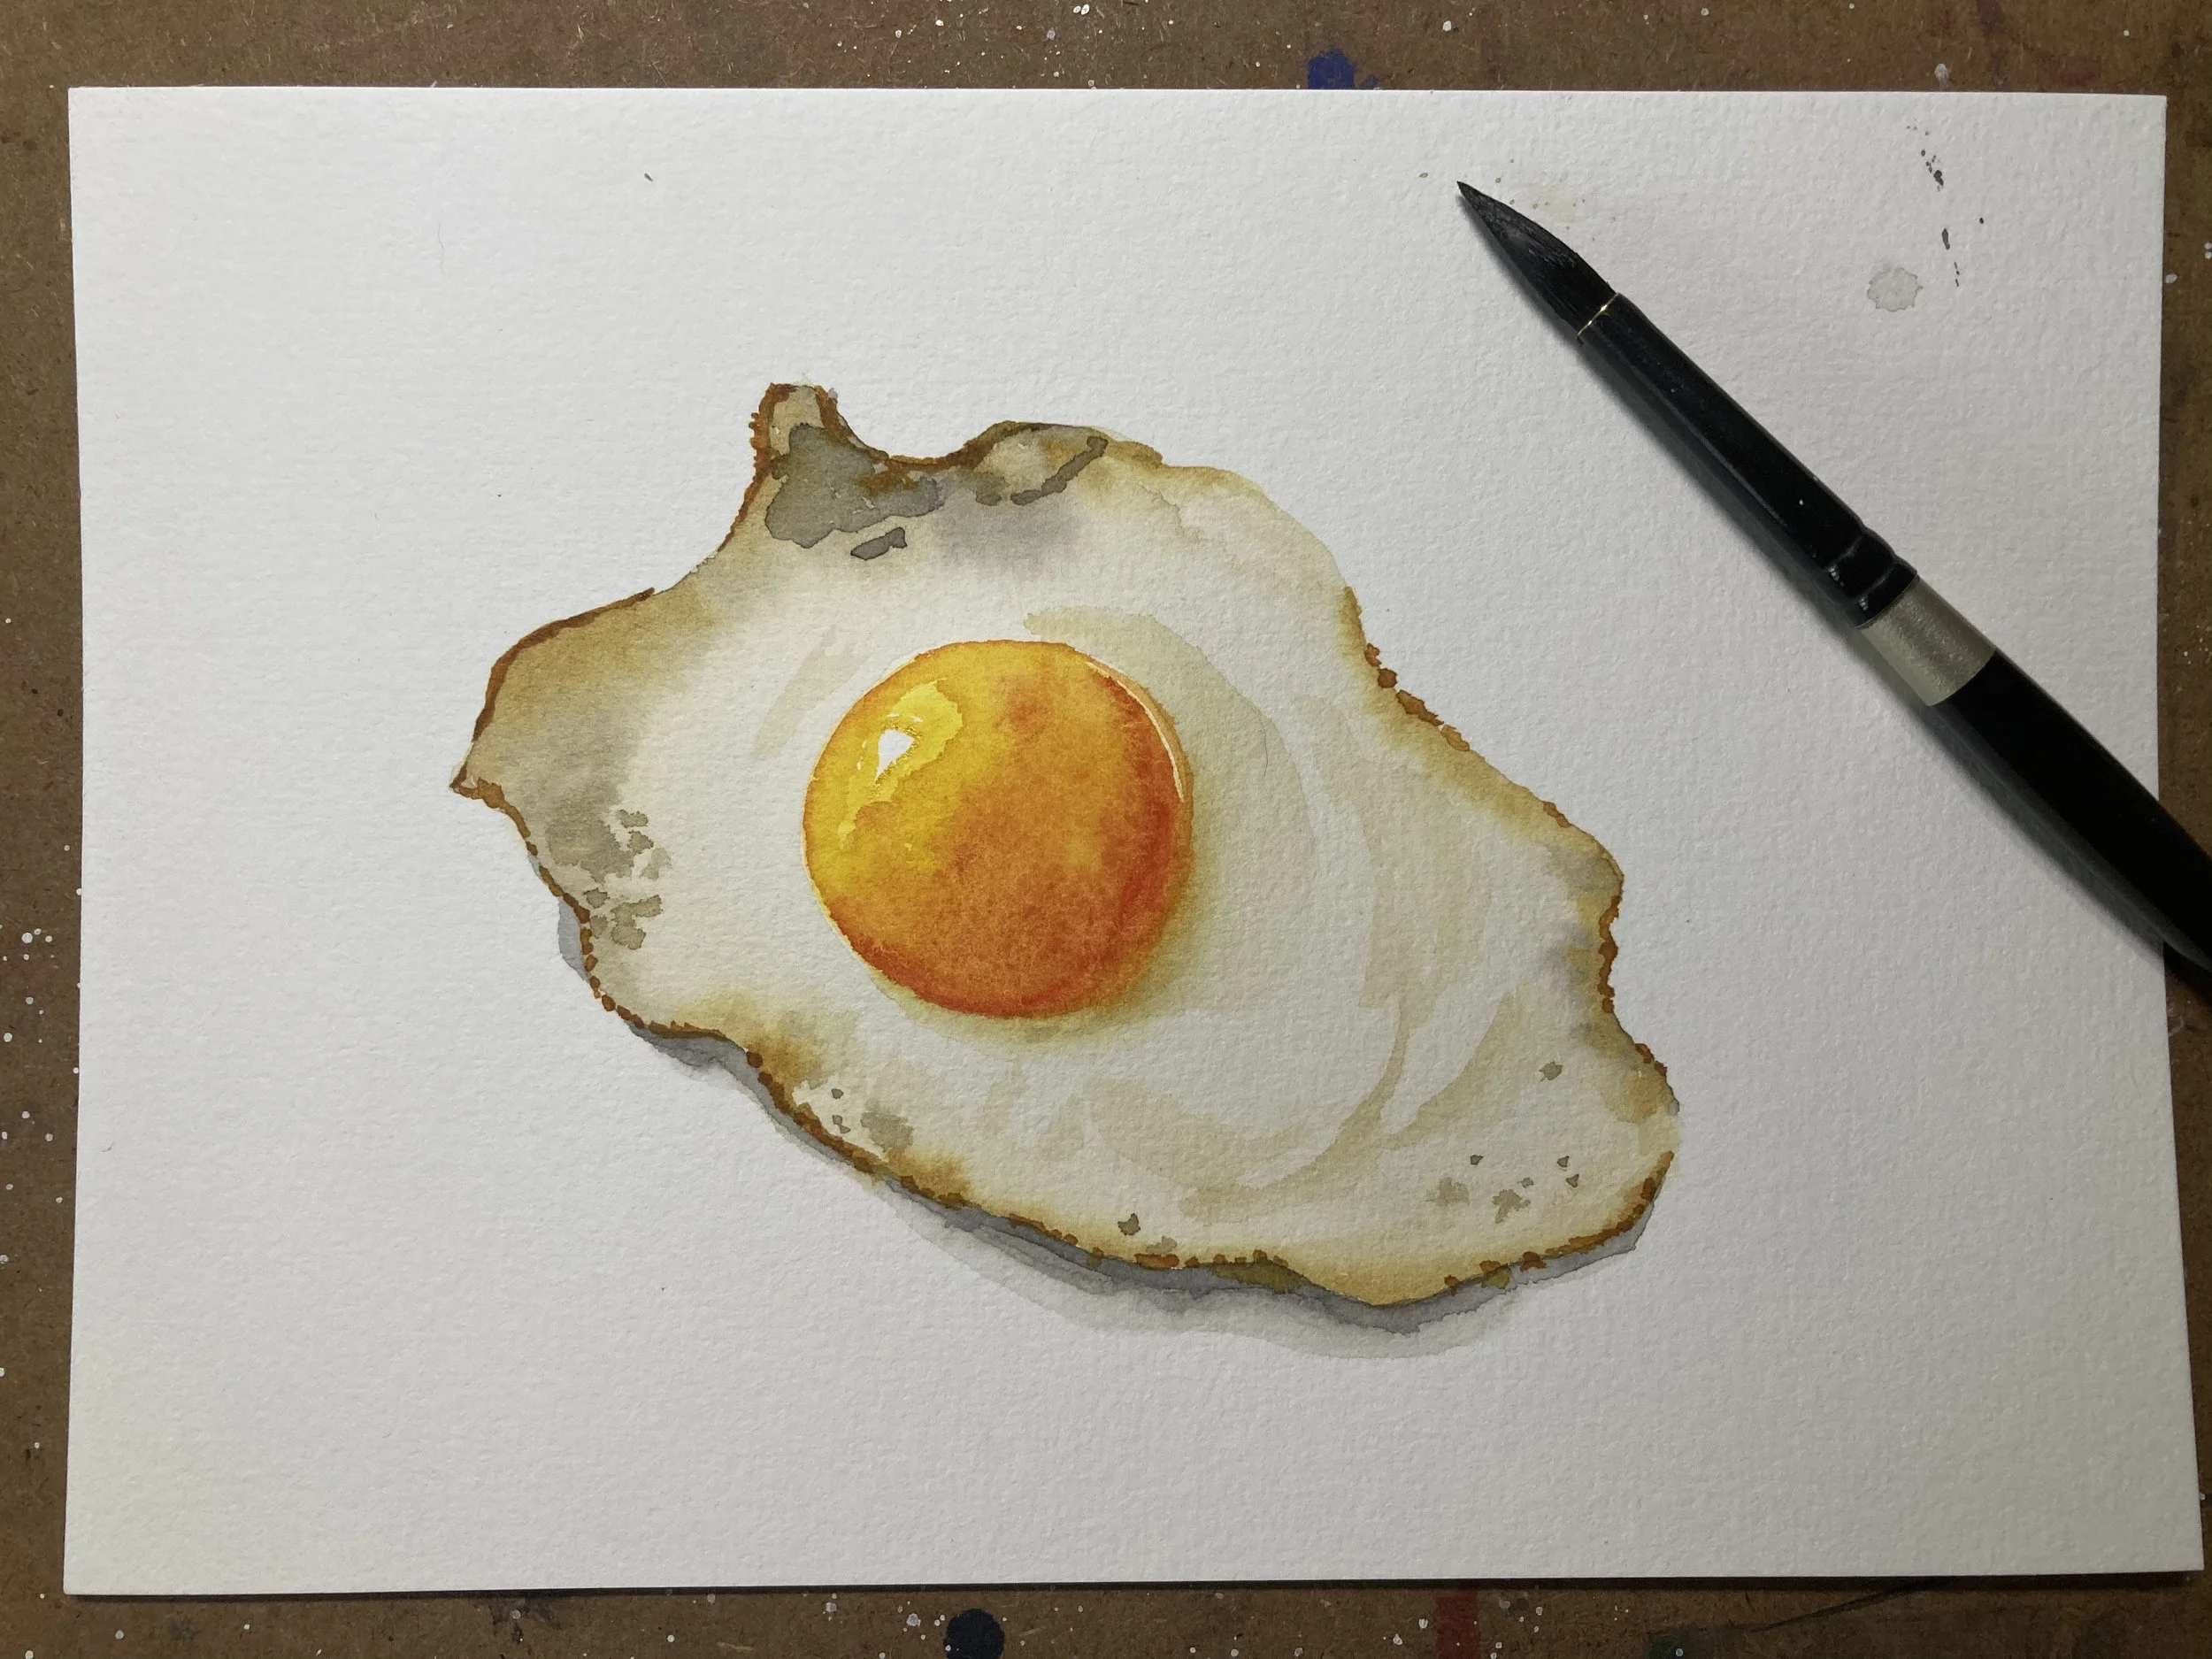
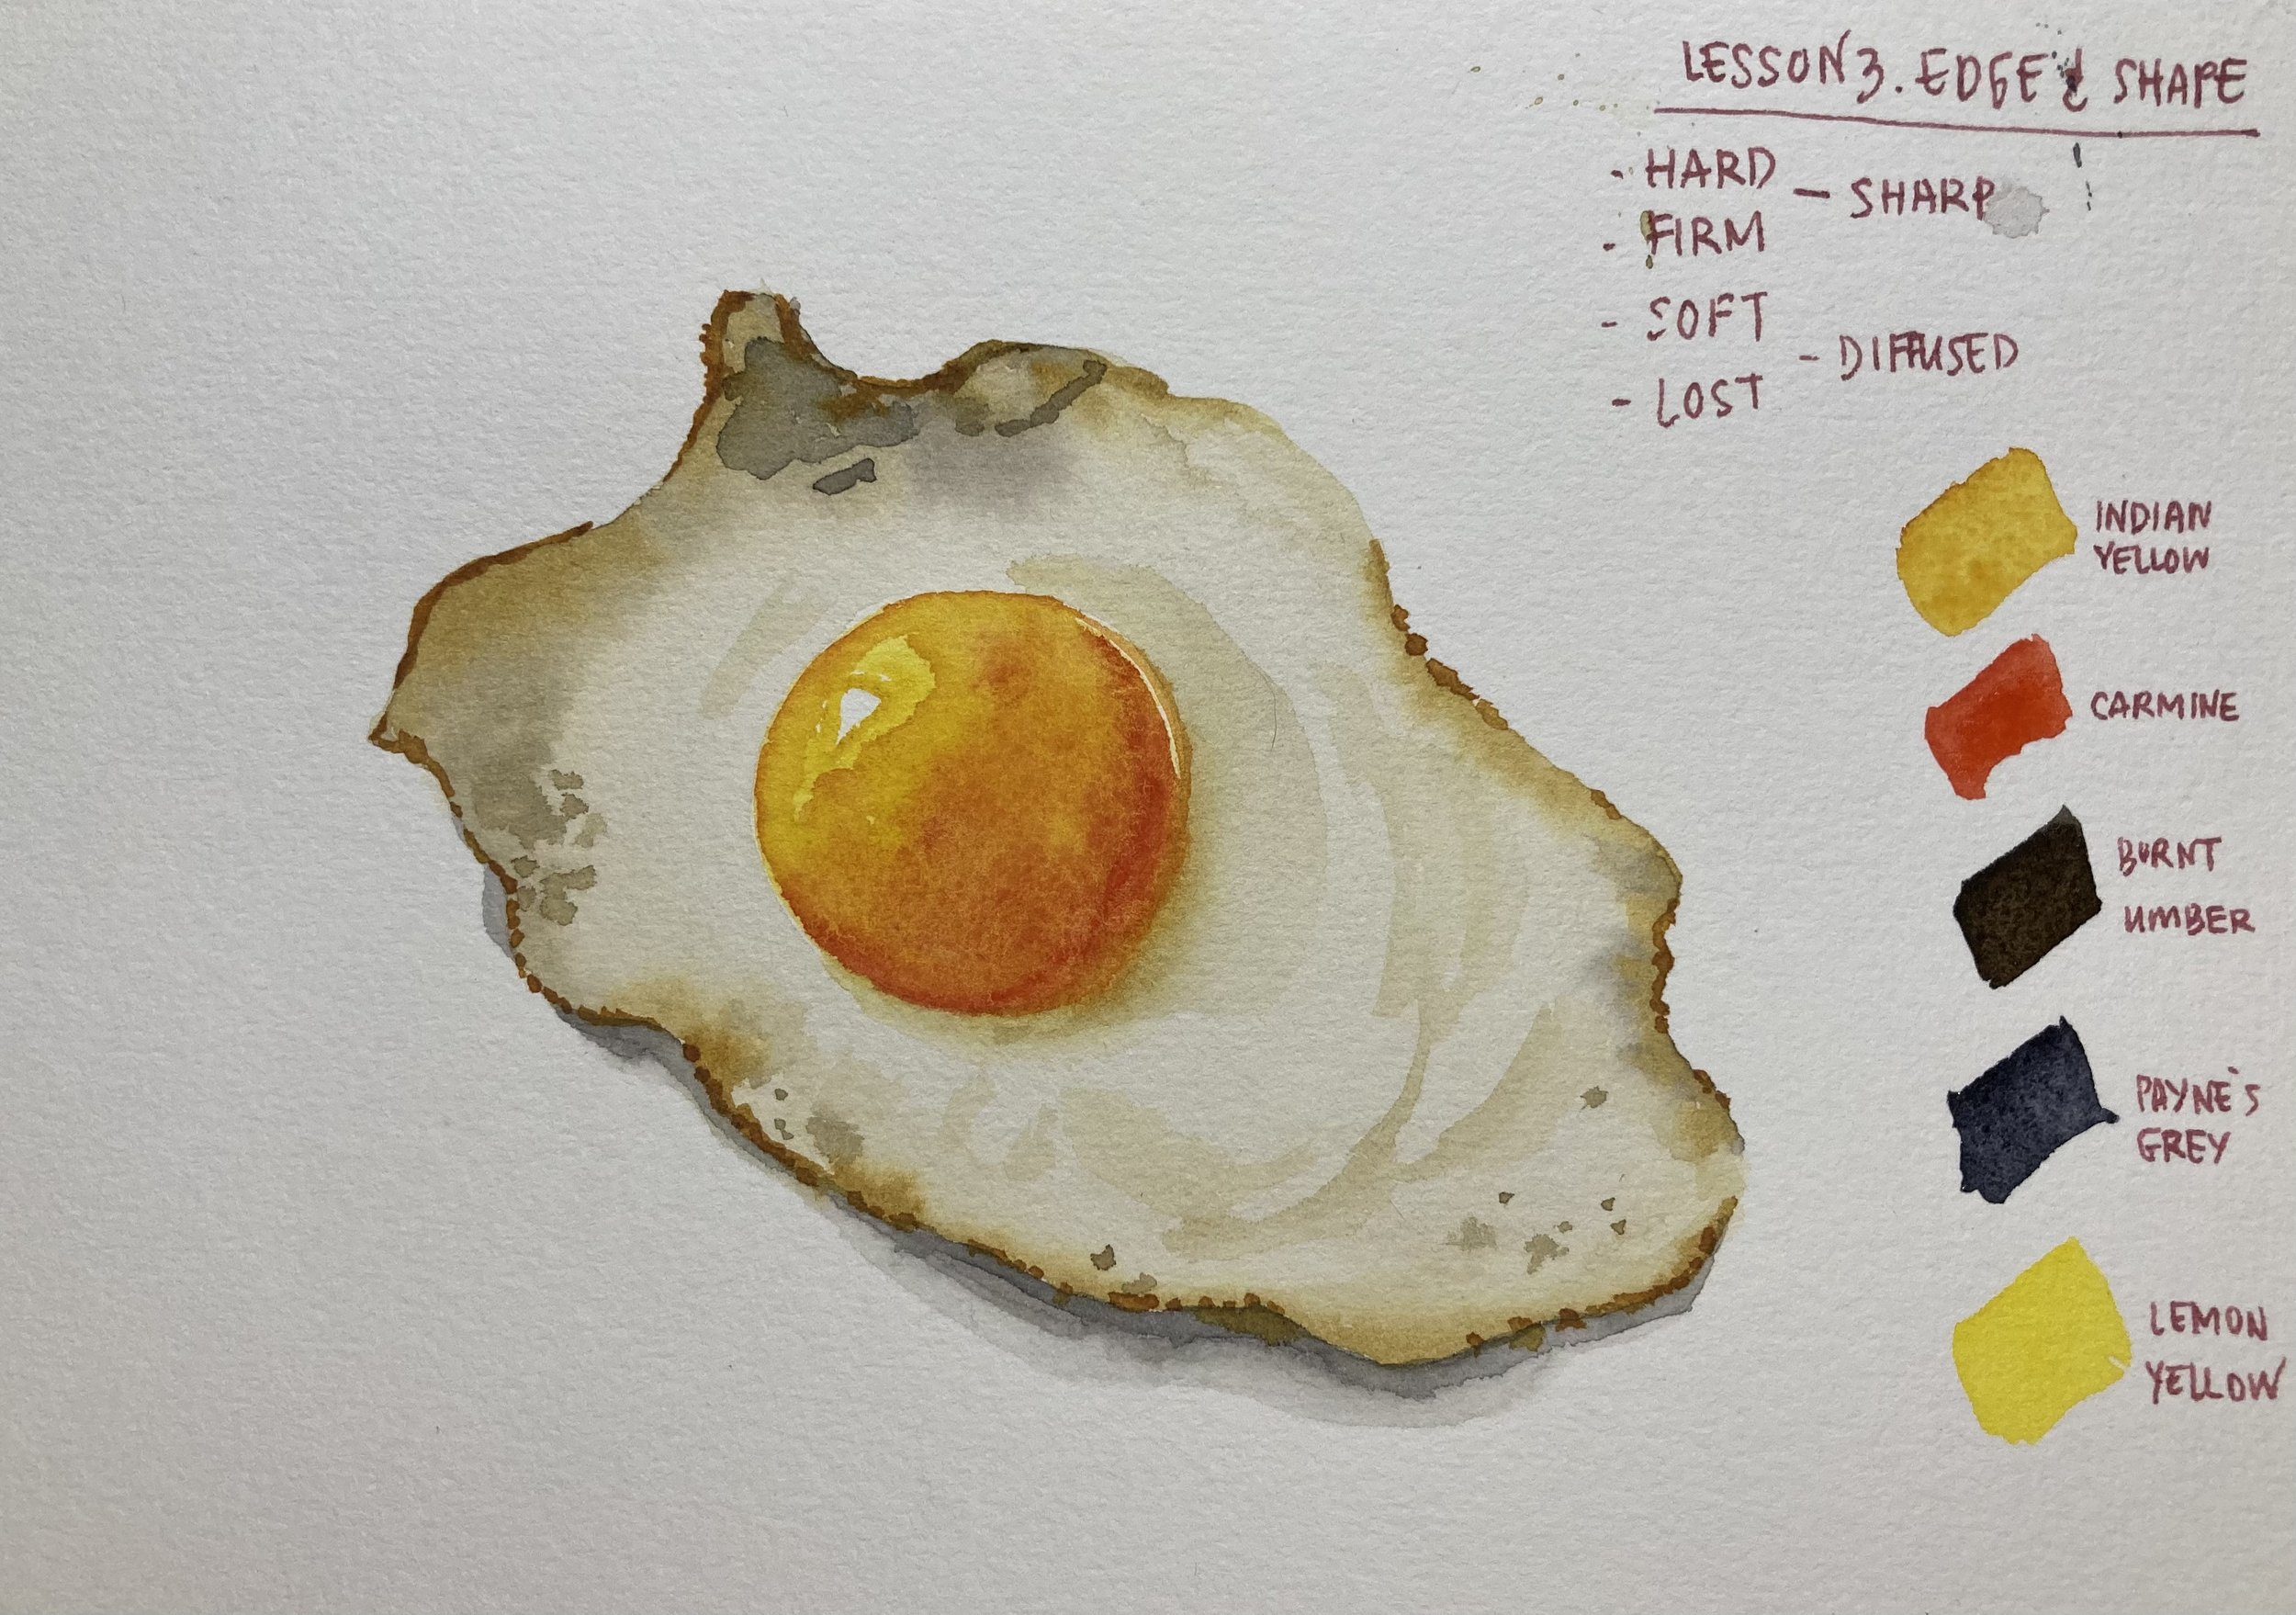
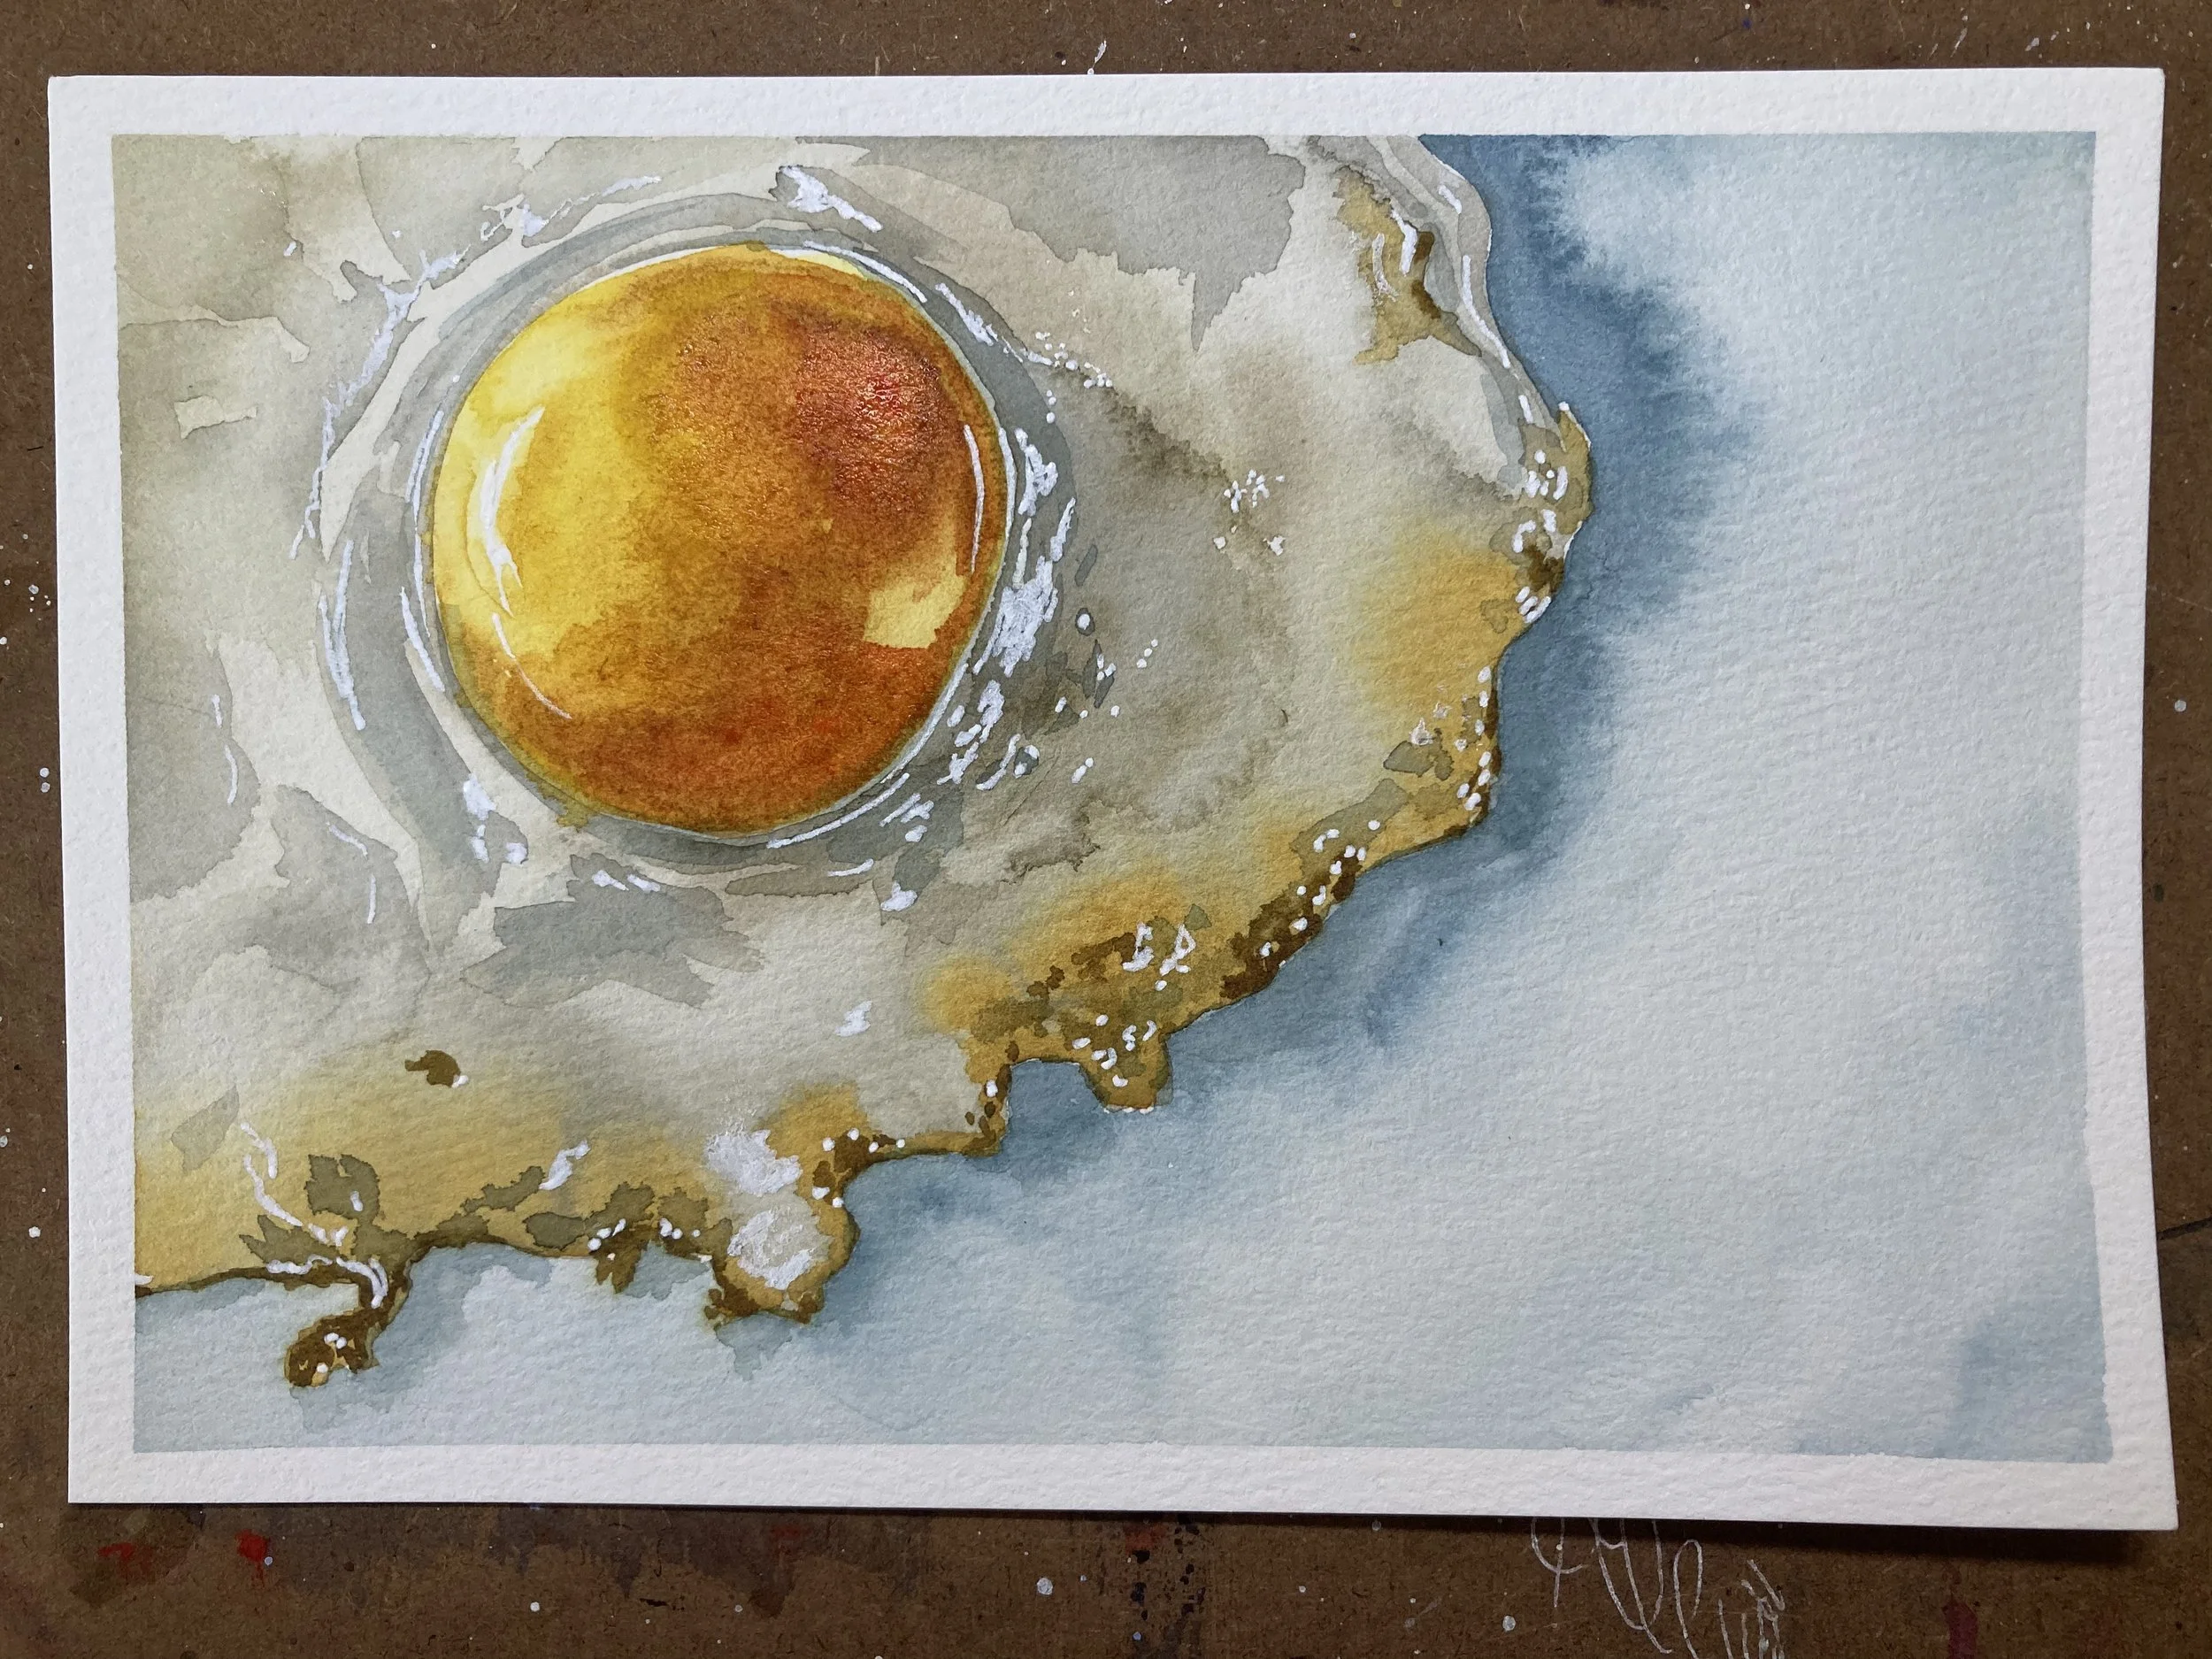
Behold the fried egg, this sketch uses a variety of edges called Hard, Firm, Soft and Lost. All four of these edges are terms you want to not only know, but know how to paint, repeat and do in varieties of ways. There will also be some lifting techniques that can be hard, firm or soft. And this egg has it all.
Soft and Lost edges sometimes go together seamlessly, as seen in the egg whites around the darker edge of the yolk.
So in this painting, we’re employing, brush strokes of pine needles for the sharp burnt edges of the egg whites.
We’re using a speedy tempo for the start of the main egg shape in wet on wet smooth wash into the middle, leaving out the round yolk area dry.
We’re also using a push and a pull of brush strokes to get the hard edge, and the shadow shapes are created with softening a firm edge, and to some degree wash them to a lost edge.
Here’s the speed video of the egg painting:
When we draw a variety of shapes using a brush directly, we are brushing up on our knowledge of the weight of the brush, the water to paint consistency and brush strokes we learned in the past 2 weeks as we practice, and adding on top of that the study of shape using the edge of your brush.
I won’t be showing you each of the variety of edges individually in photographs because the best way for you to understand edges is to sketch-along with me, and it’ll become apparent to you as you do it how each ones feel, and you’ll know when it goes right or wrong by feel, and by eye. Remember you can access the class recording anytime for a year after this course ends, so practice and rewatching is so easy.
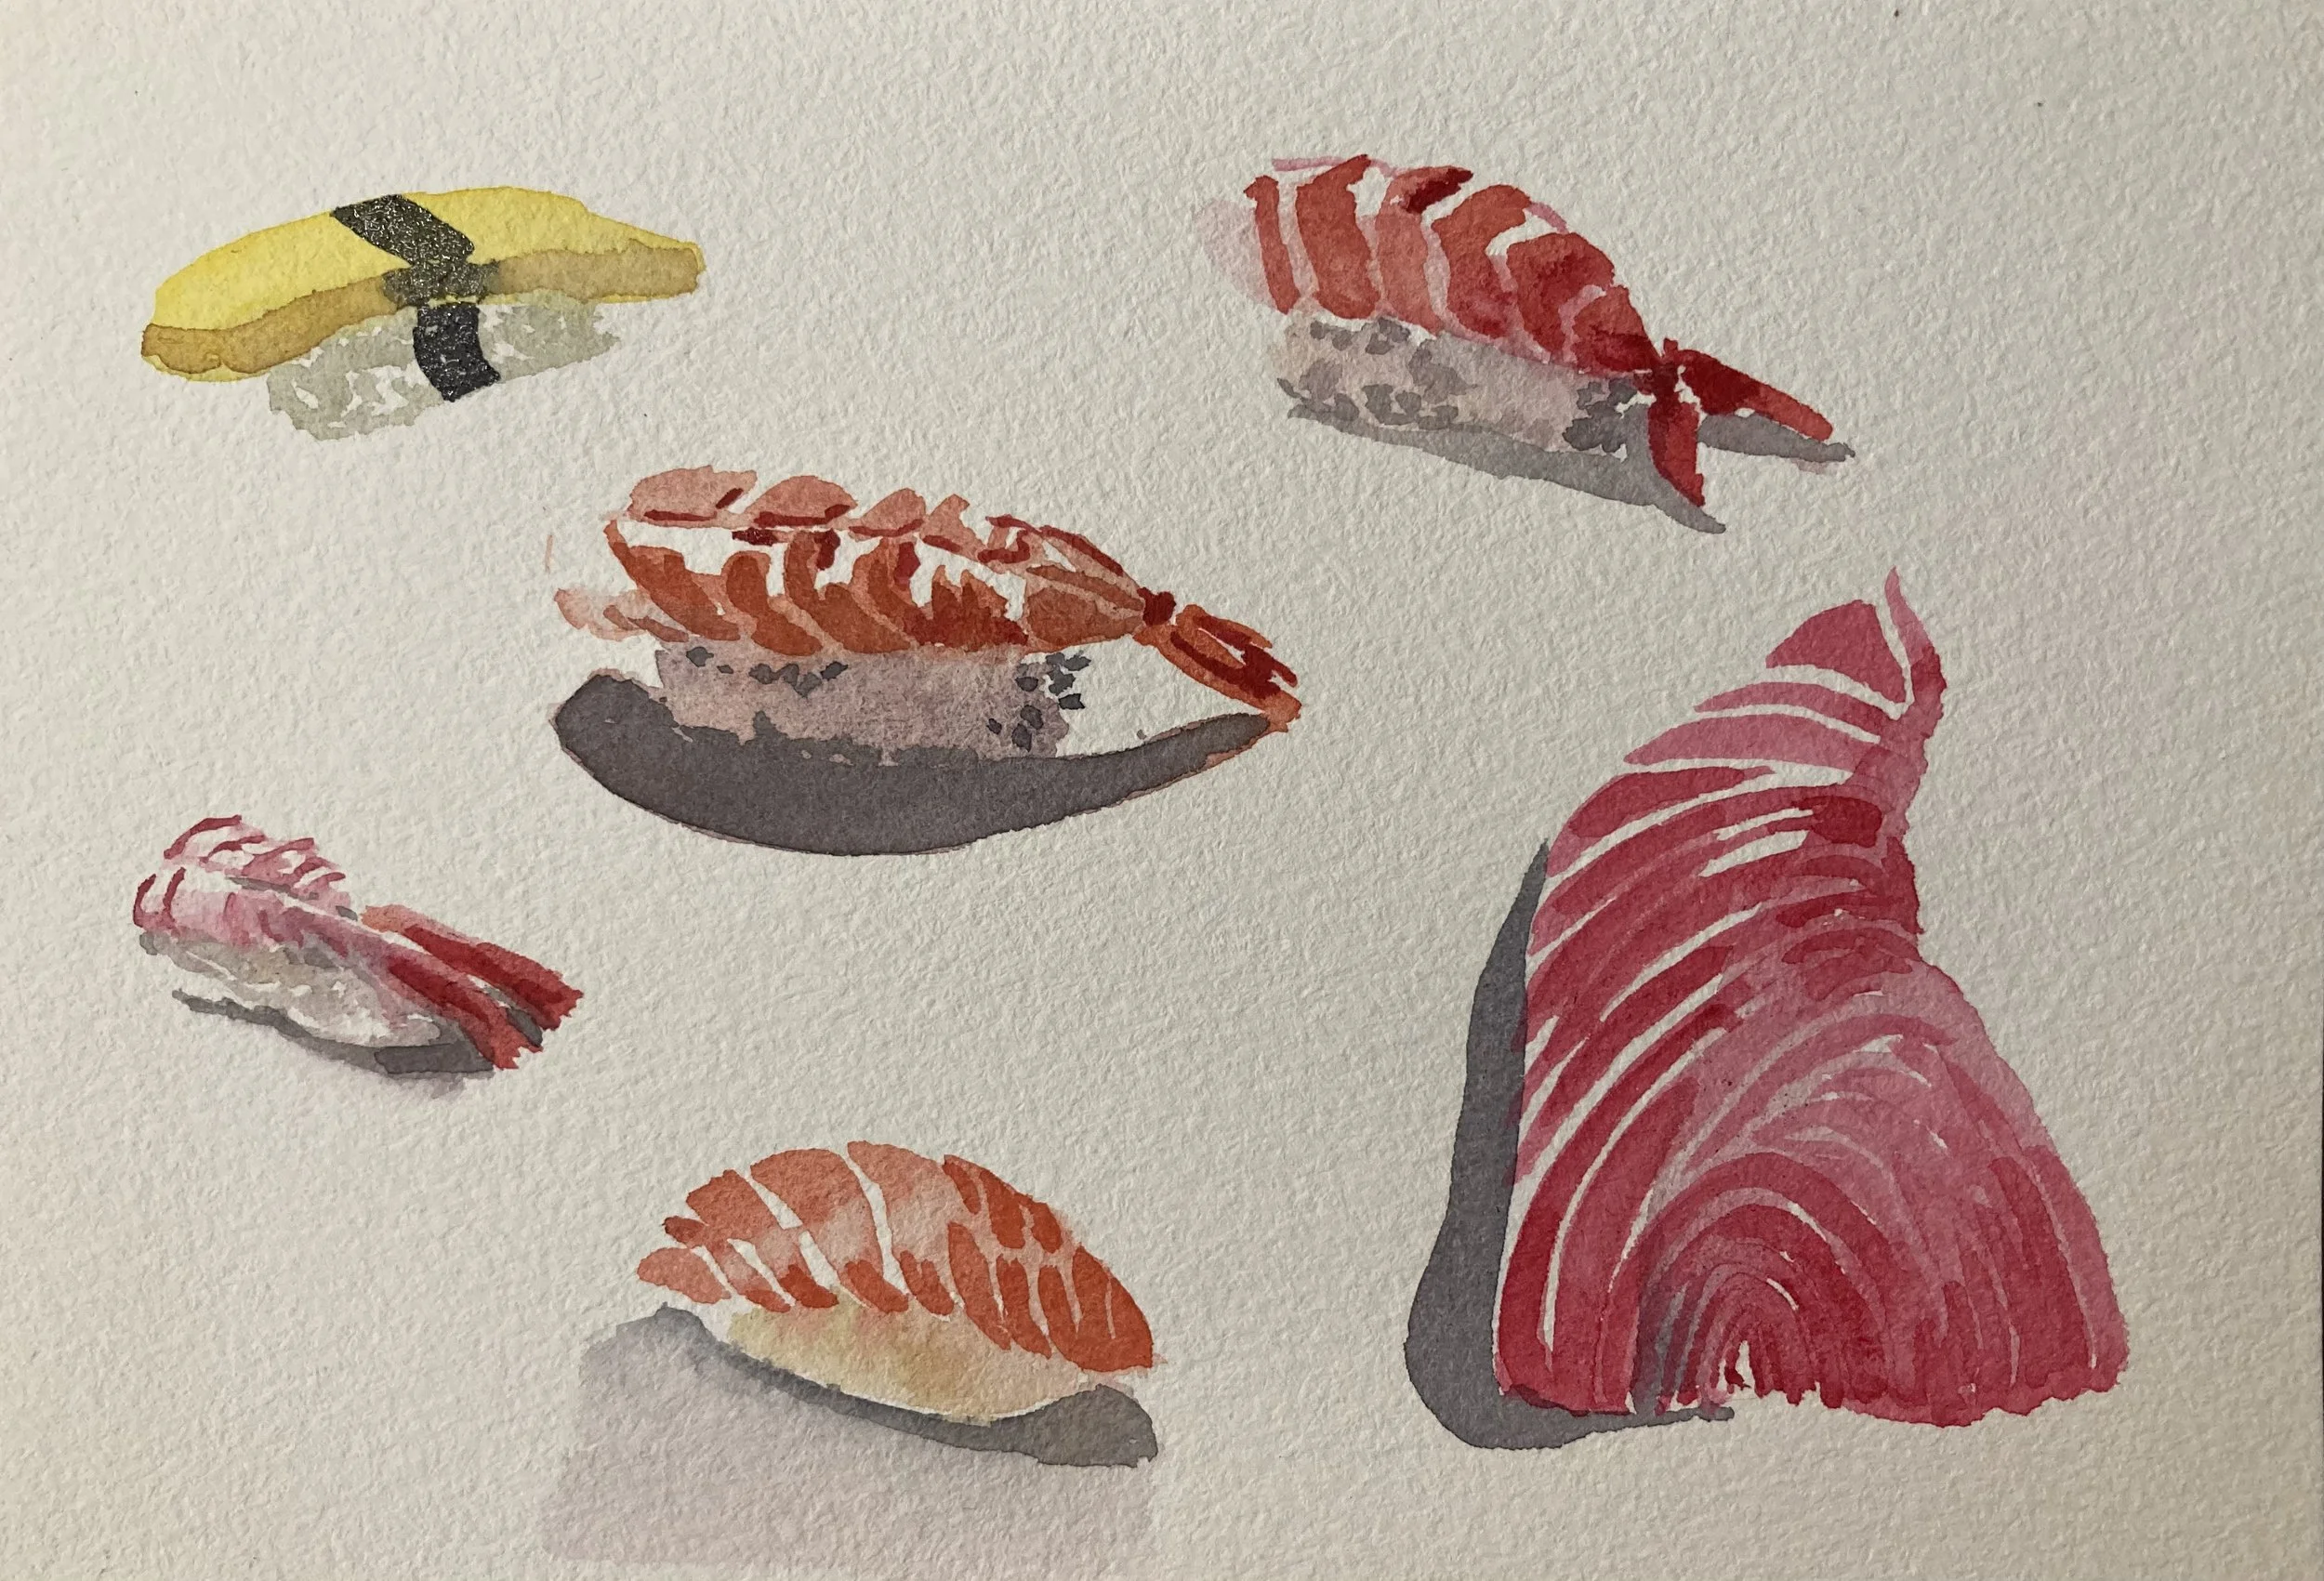
And now here for comparison is a more dramatically lit painting of another fried egg, the difference here is that there’s more dark values and the egg is cut off by the paper. I use a white pen at the very end to lift some of the white areas back up. On hindsight, I should have used white opaque paint instead of the pen as these pen marks could use a bit softening and its harder to soften pen marks.
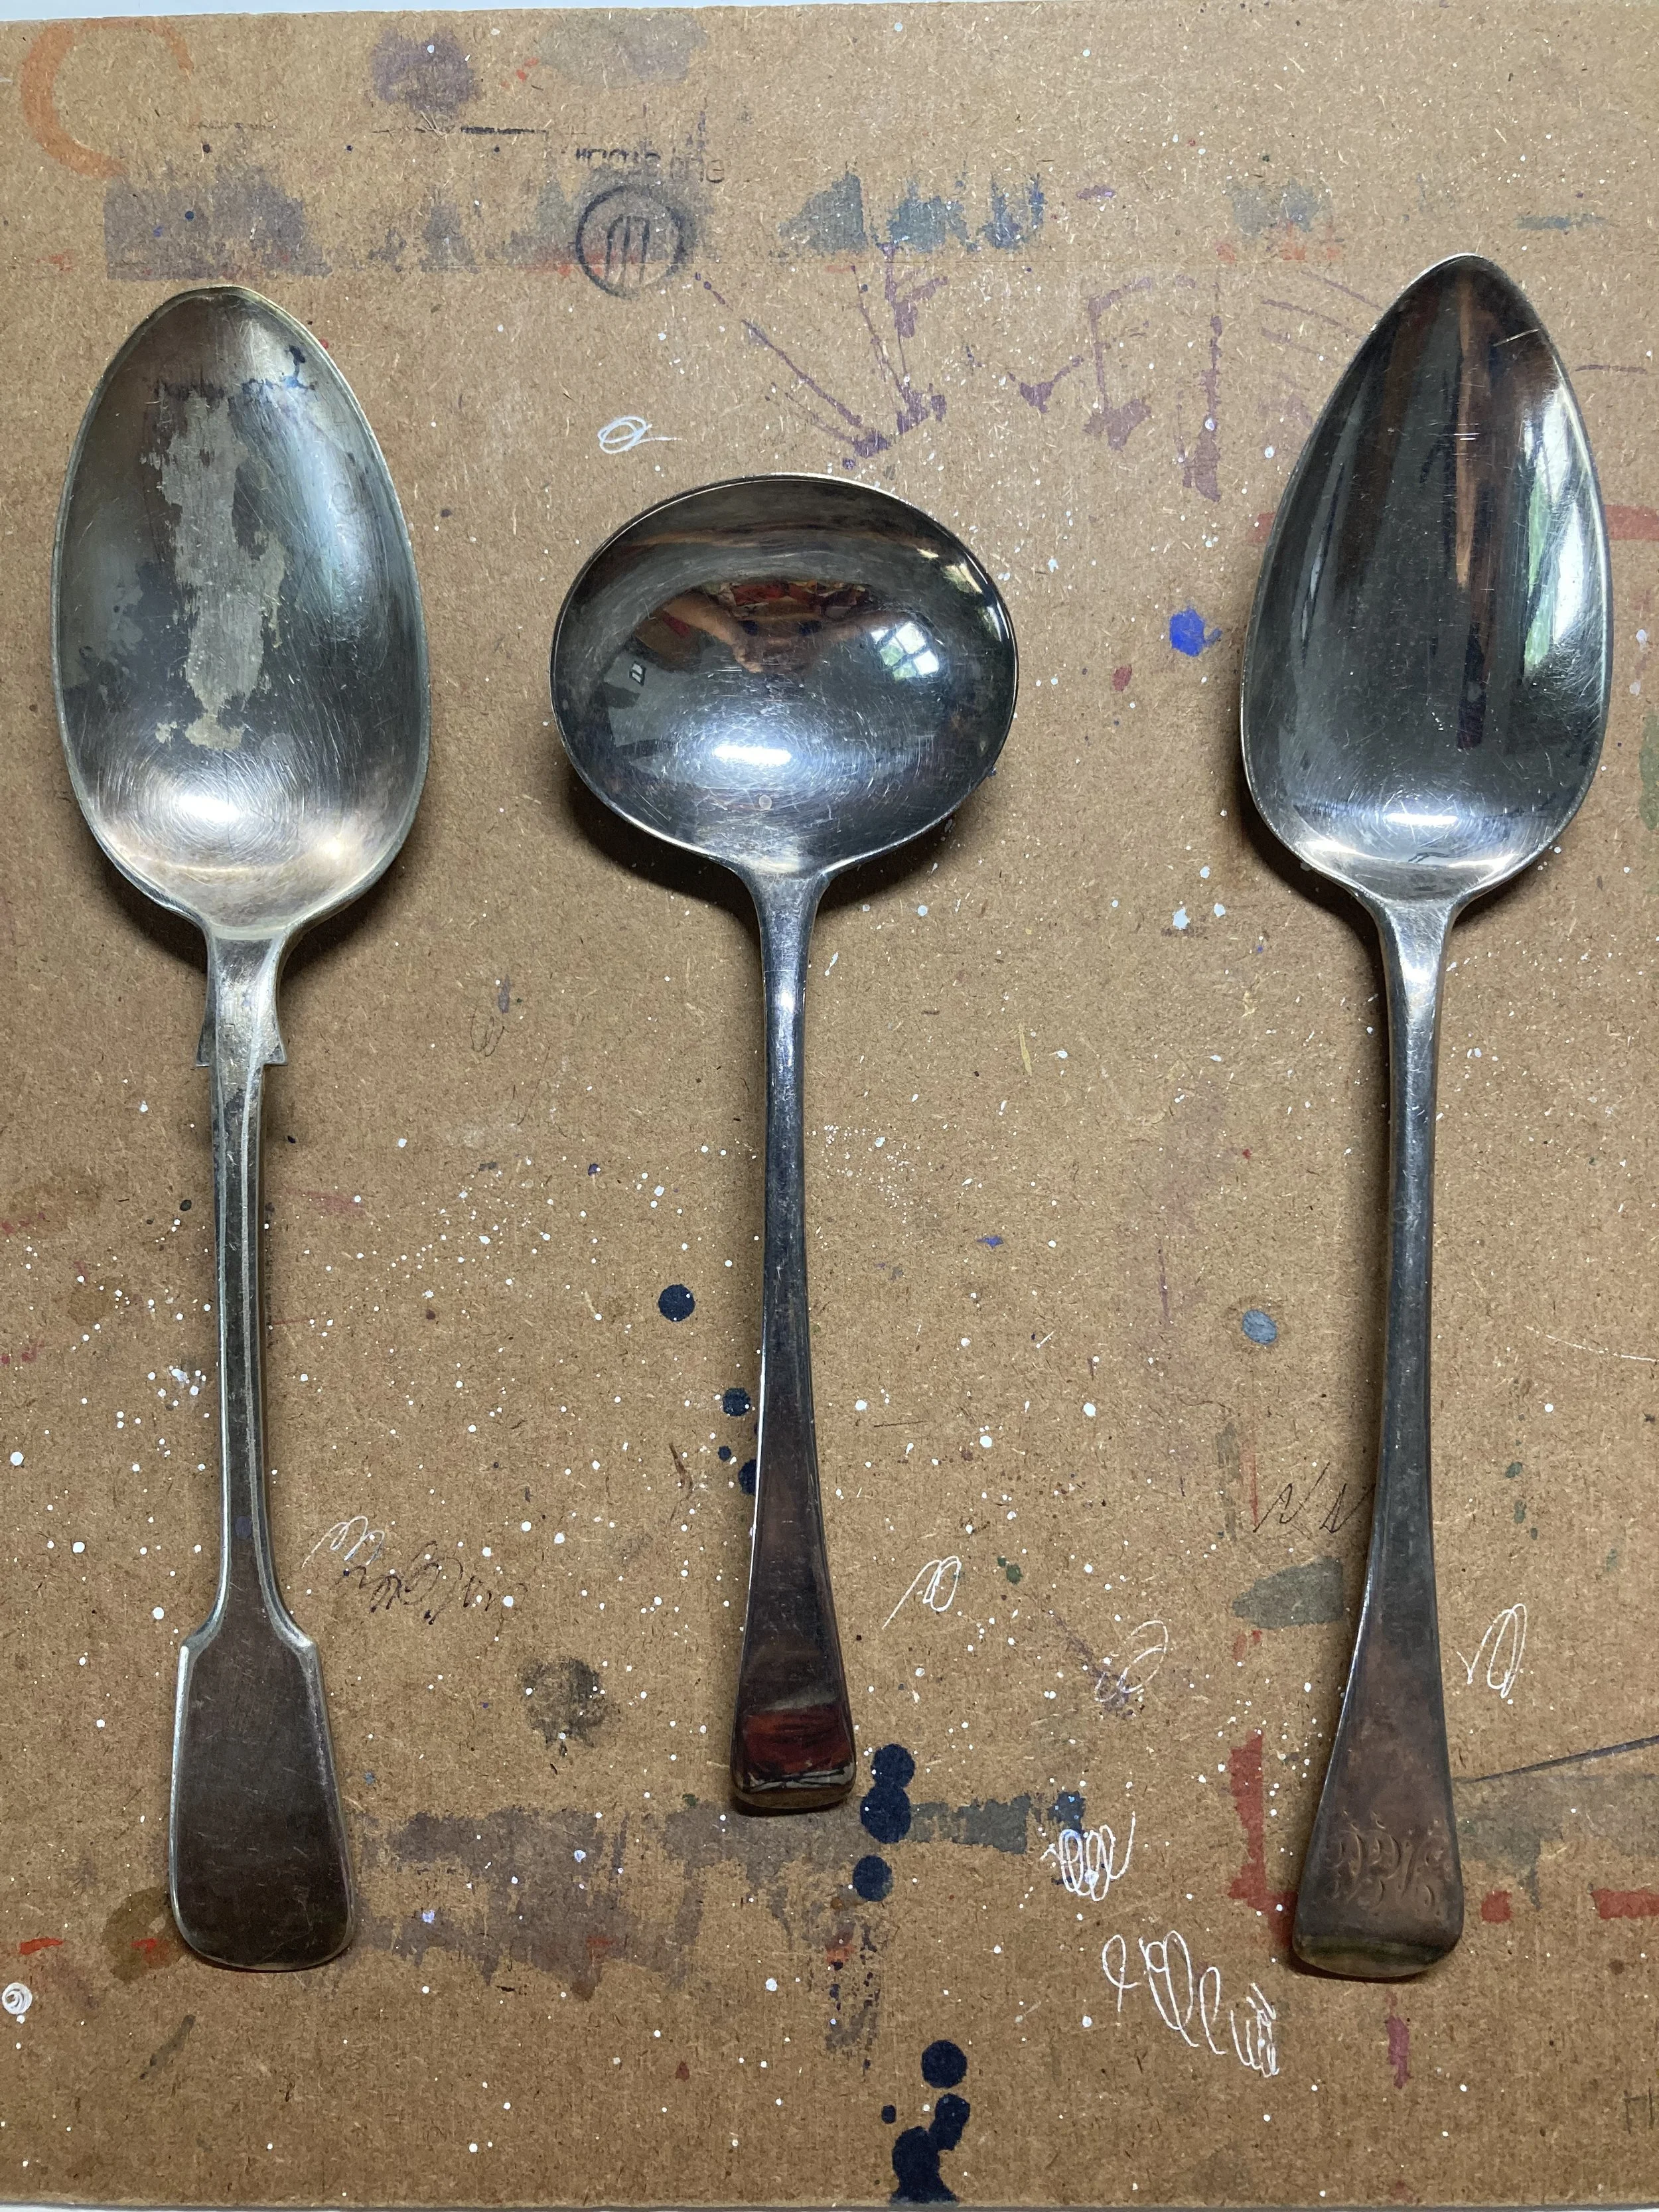
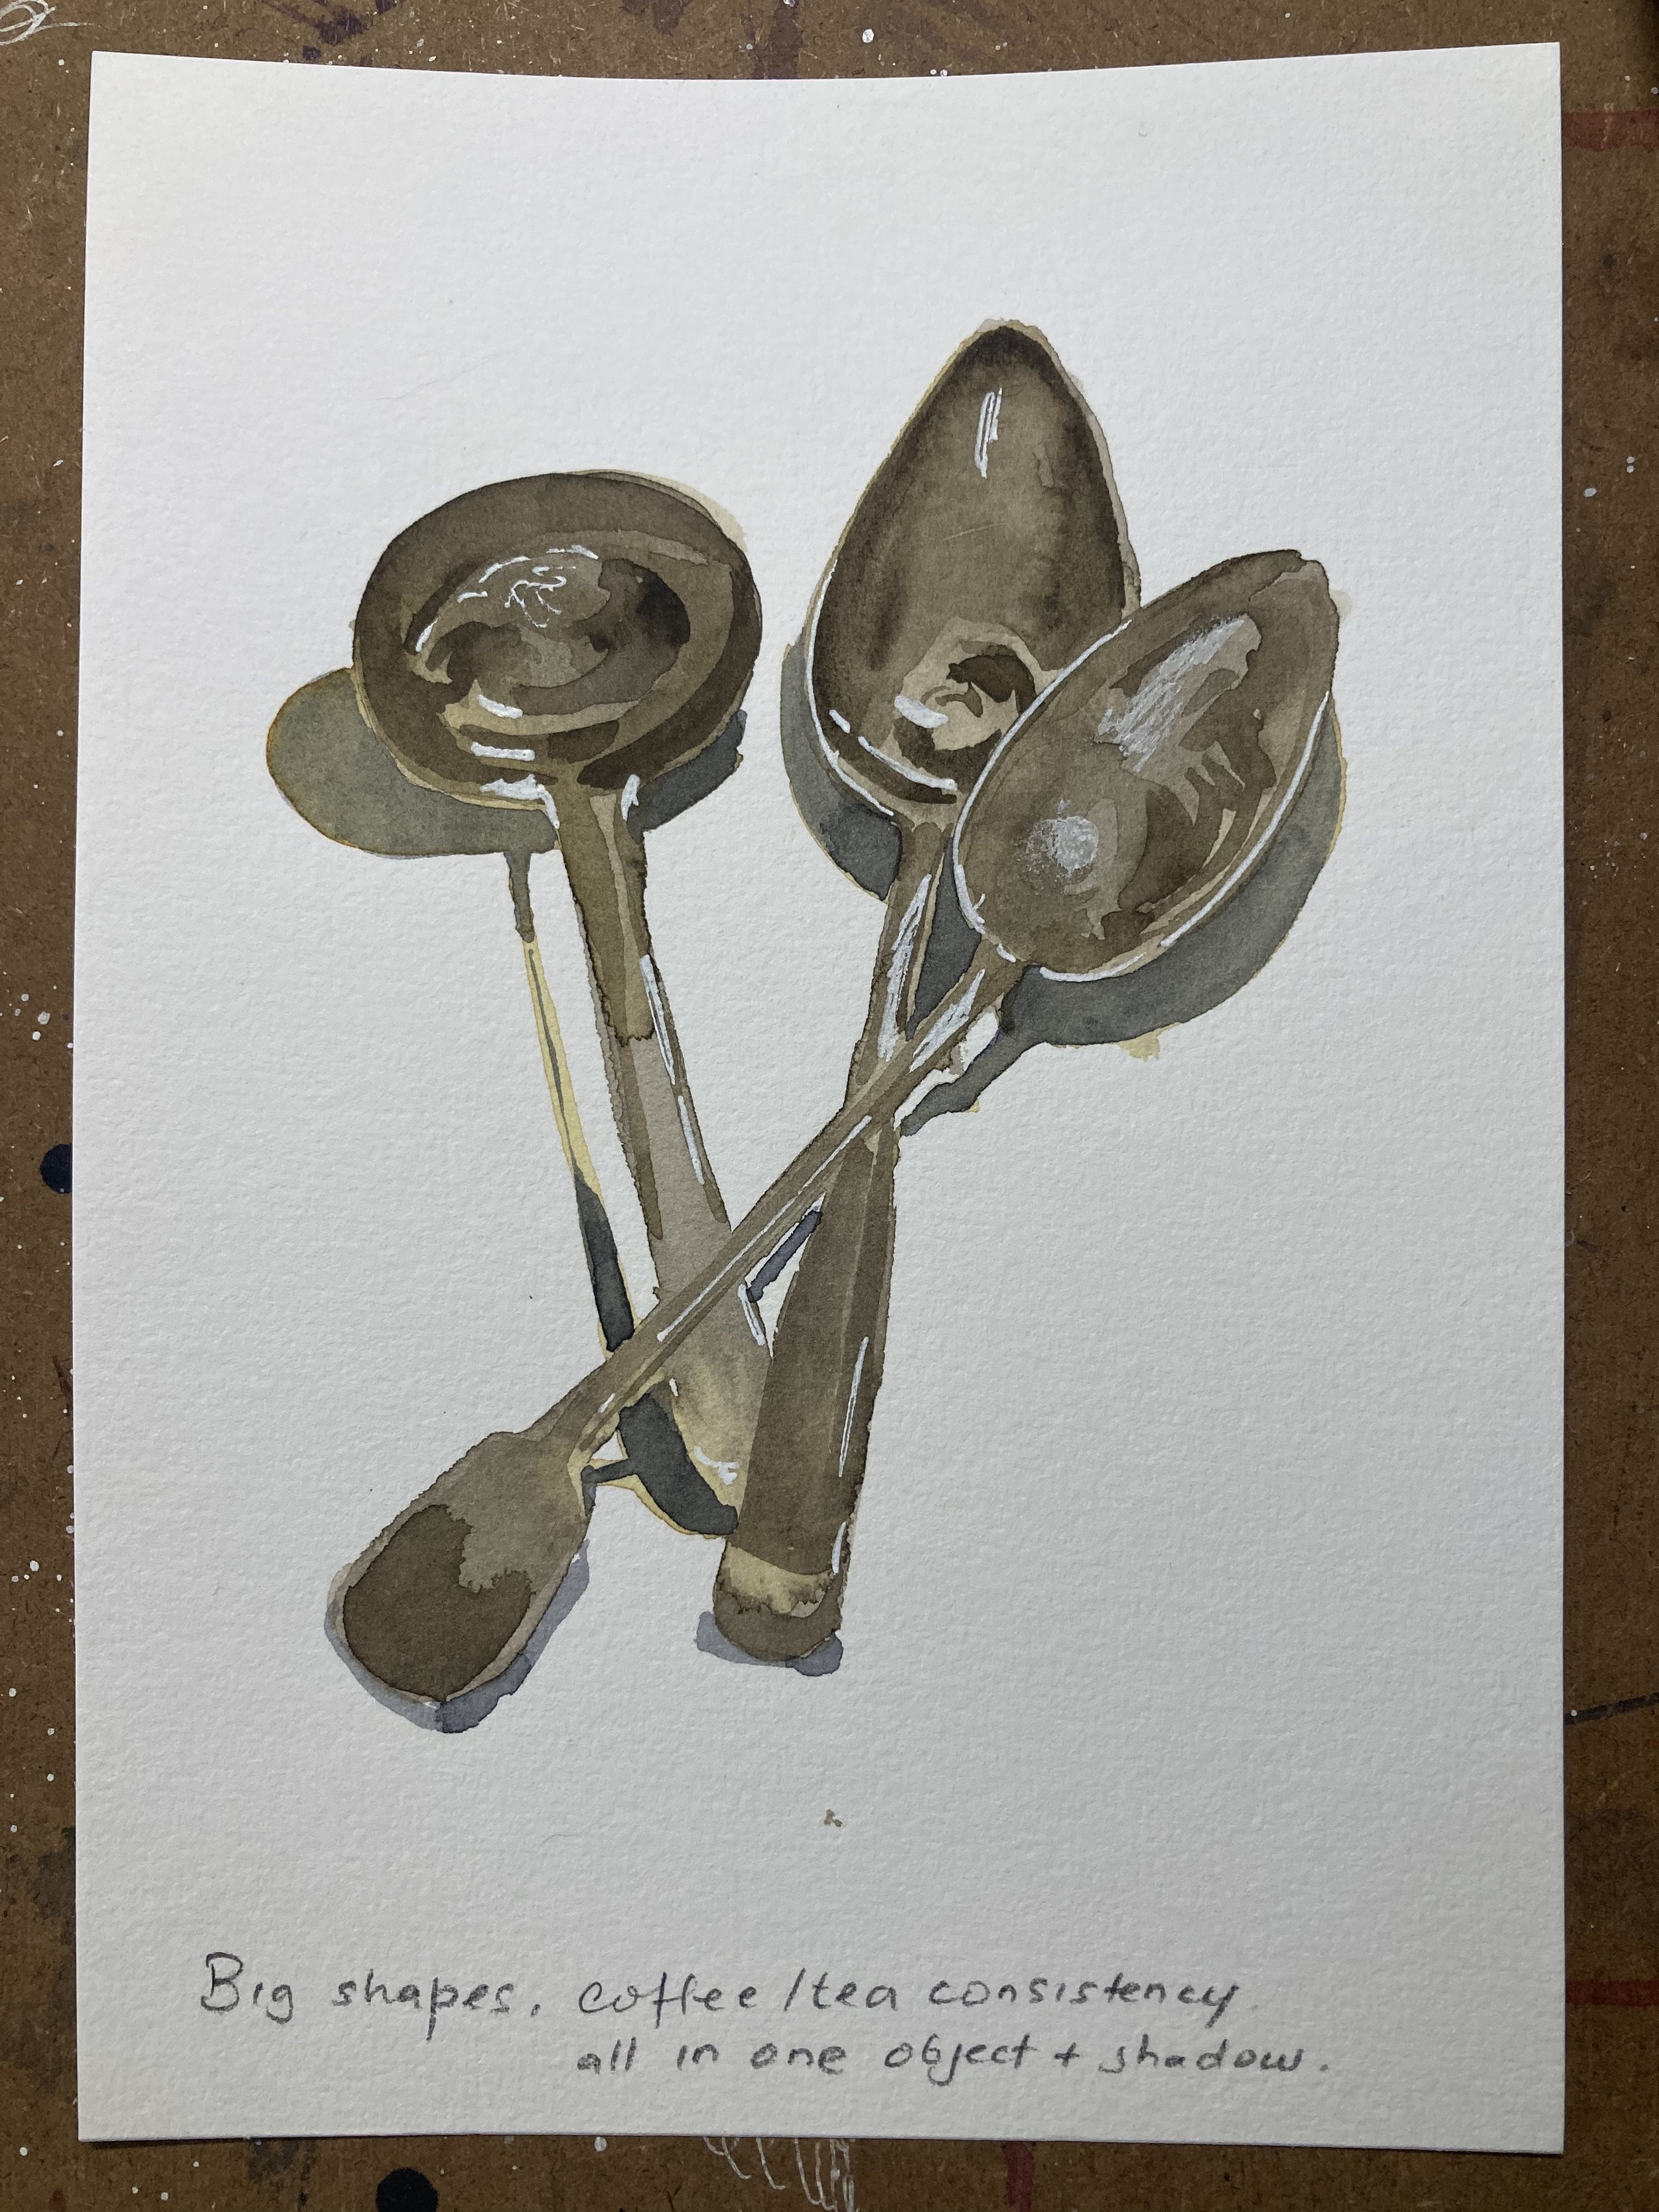
Finally, here’s your homework to practice on your own, these spoons looks hard but they’re simply challenging, and can be done with fun if you keep to the task at hand, focusing on edge and shape. And these spoons will push your observation skills a little hard because there’s a lot you have to interpret as dark and light shapes that you might not know how to do. Give it your best shot! I trust you will be fine.
Below is a bit of my own process of learning for you to see.
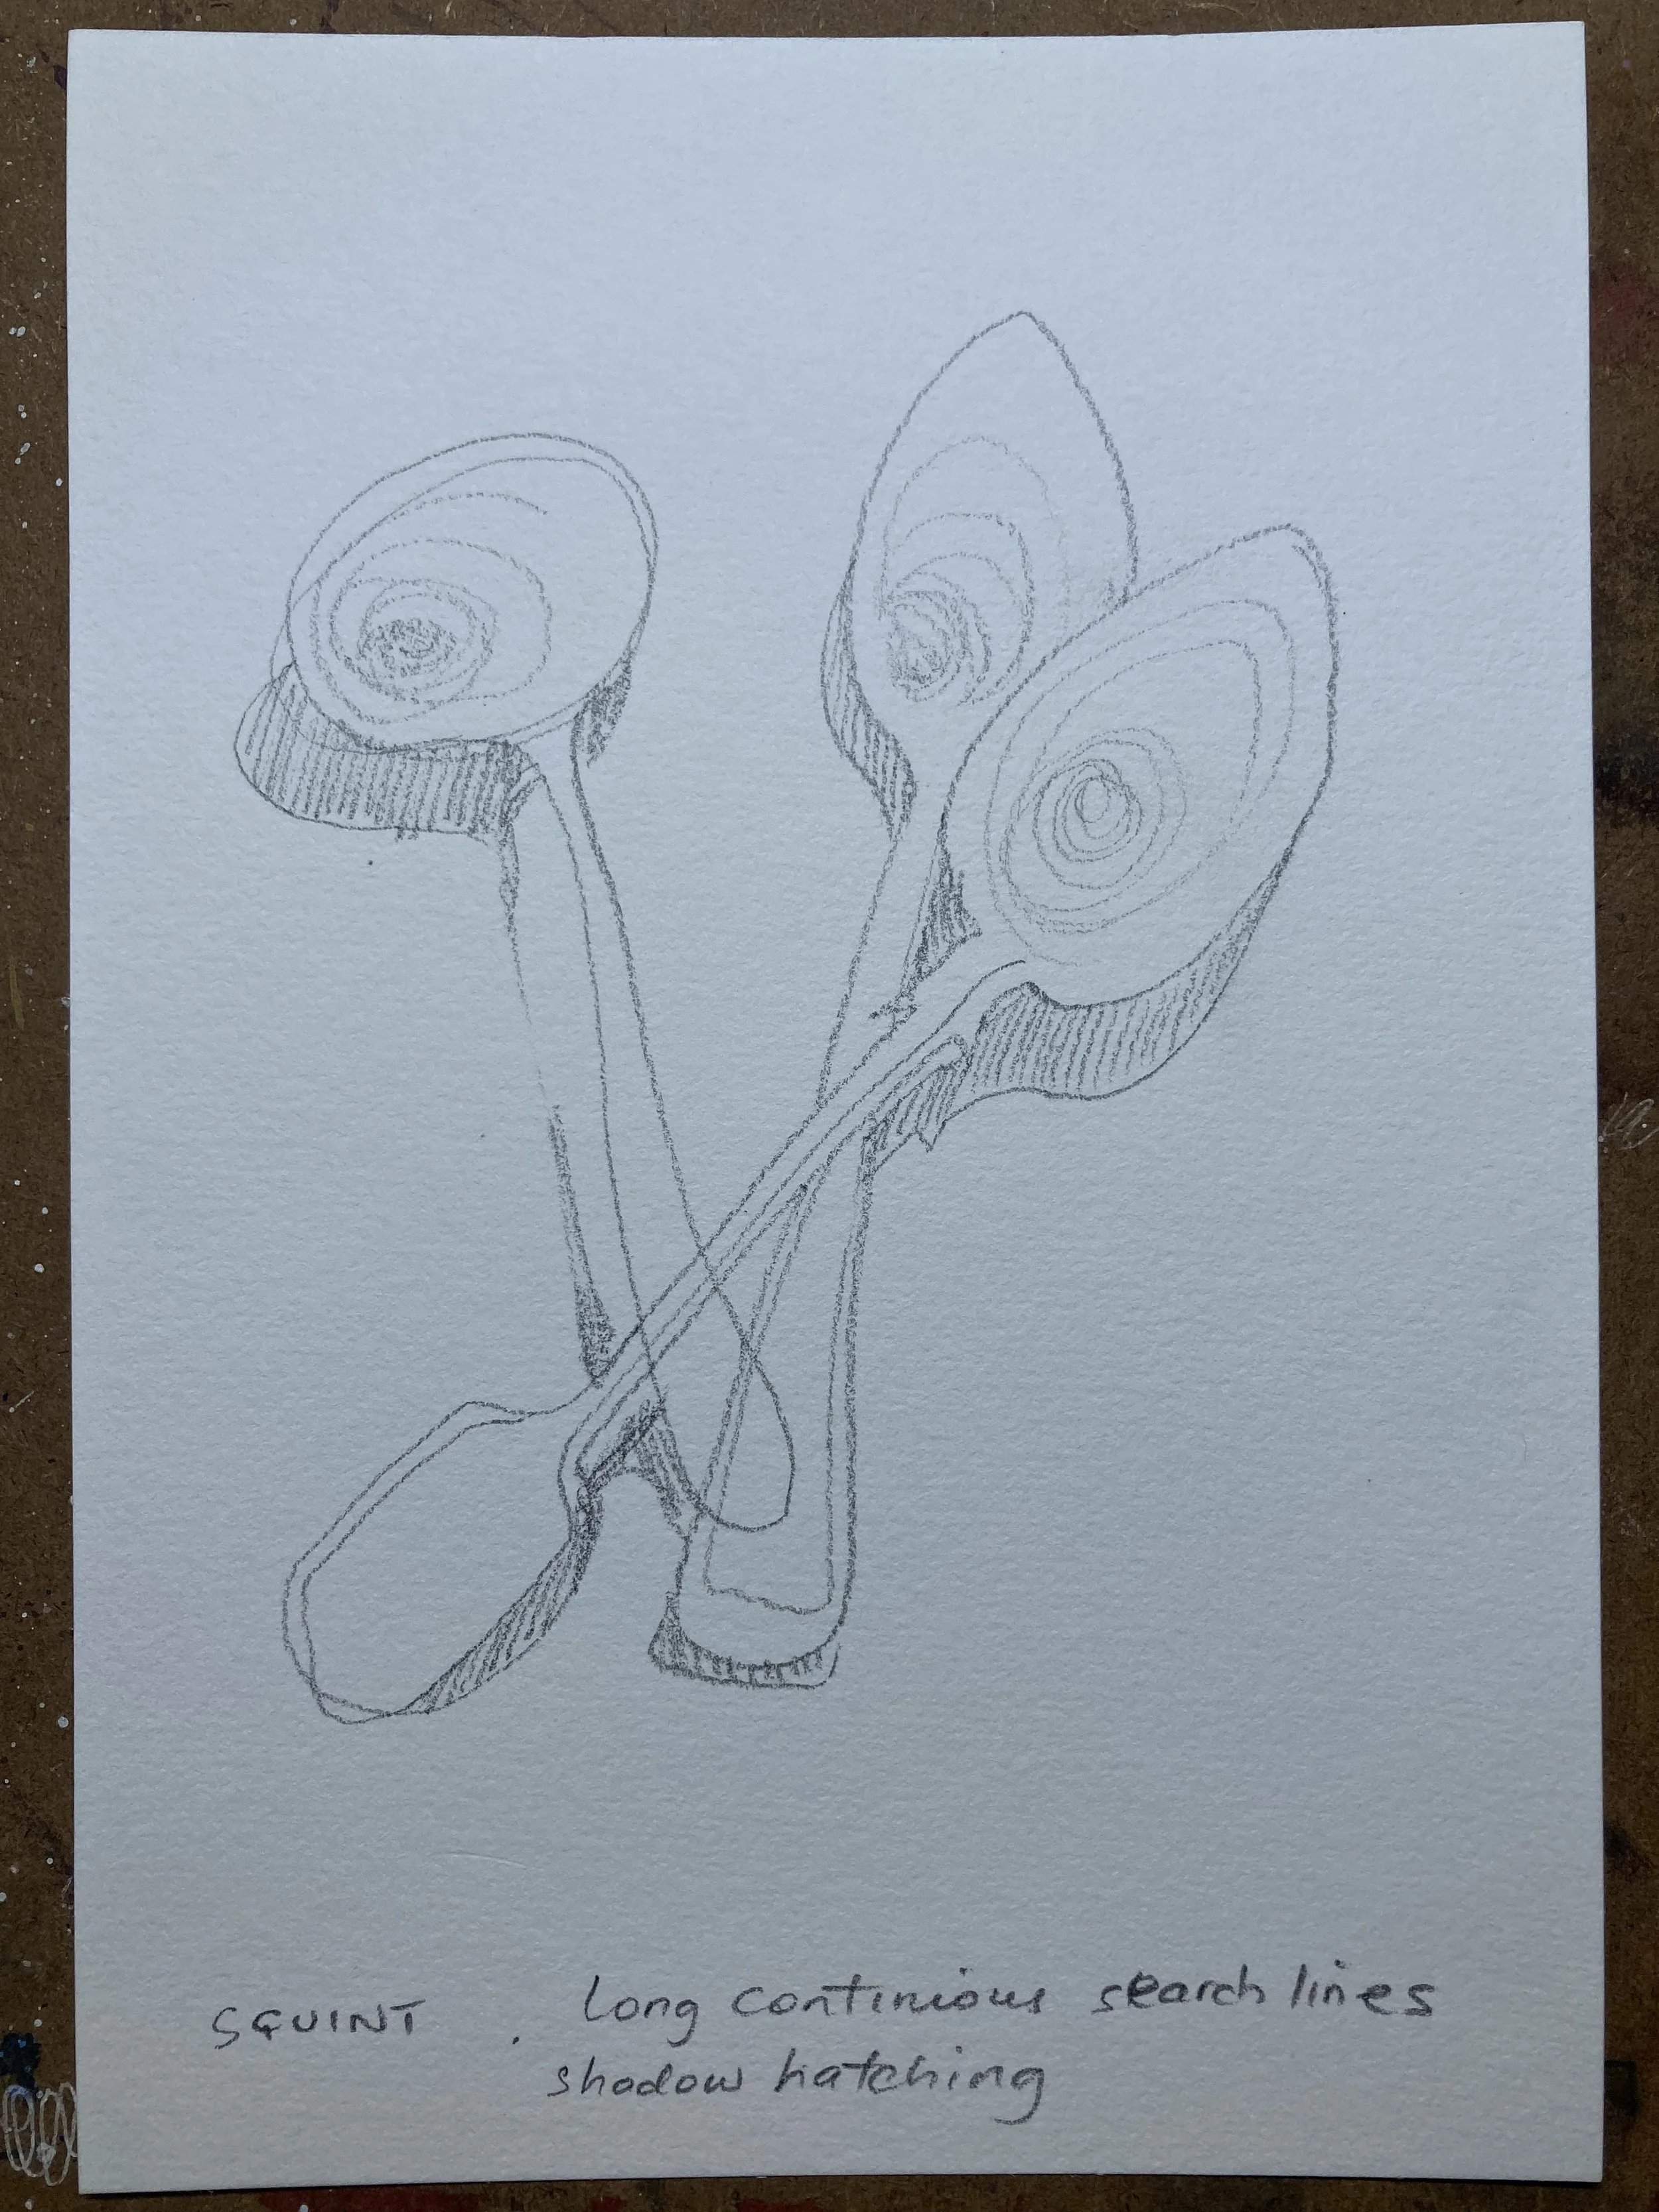
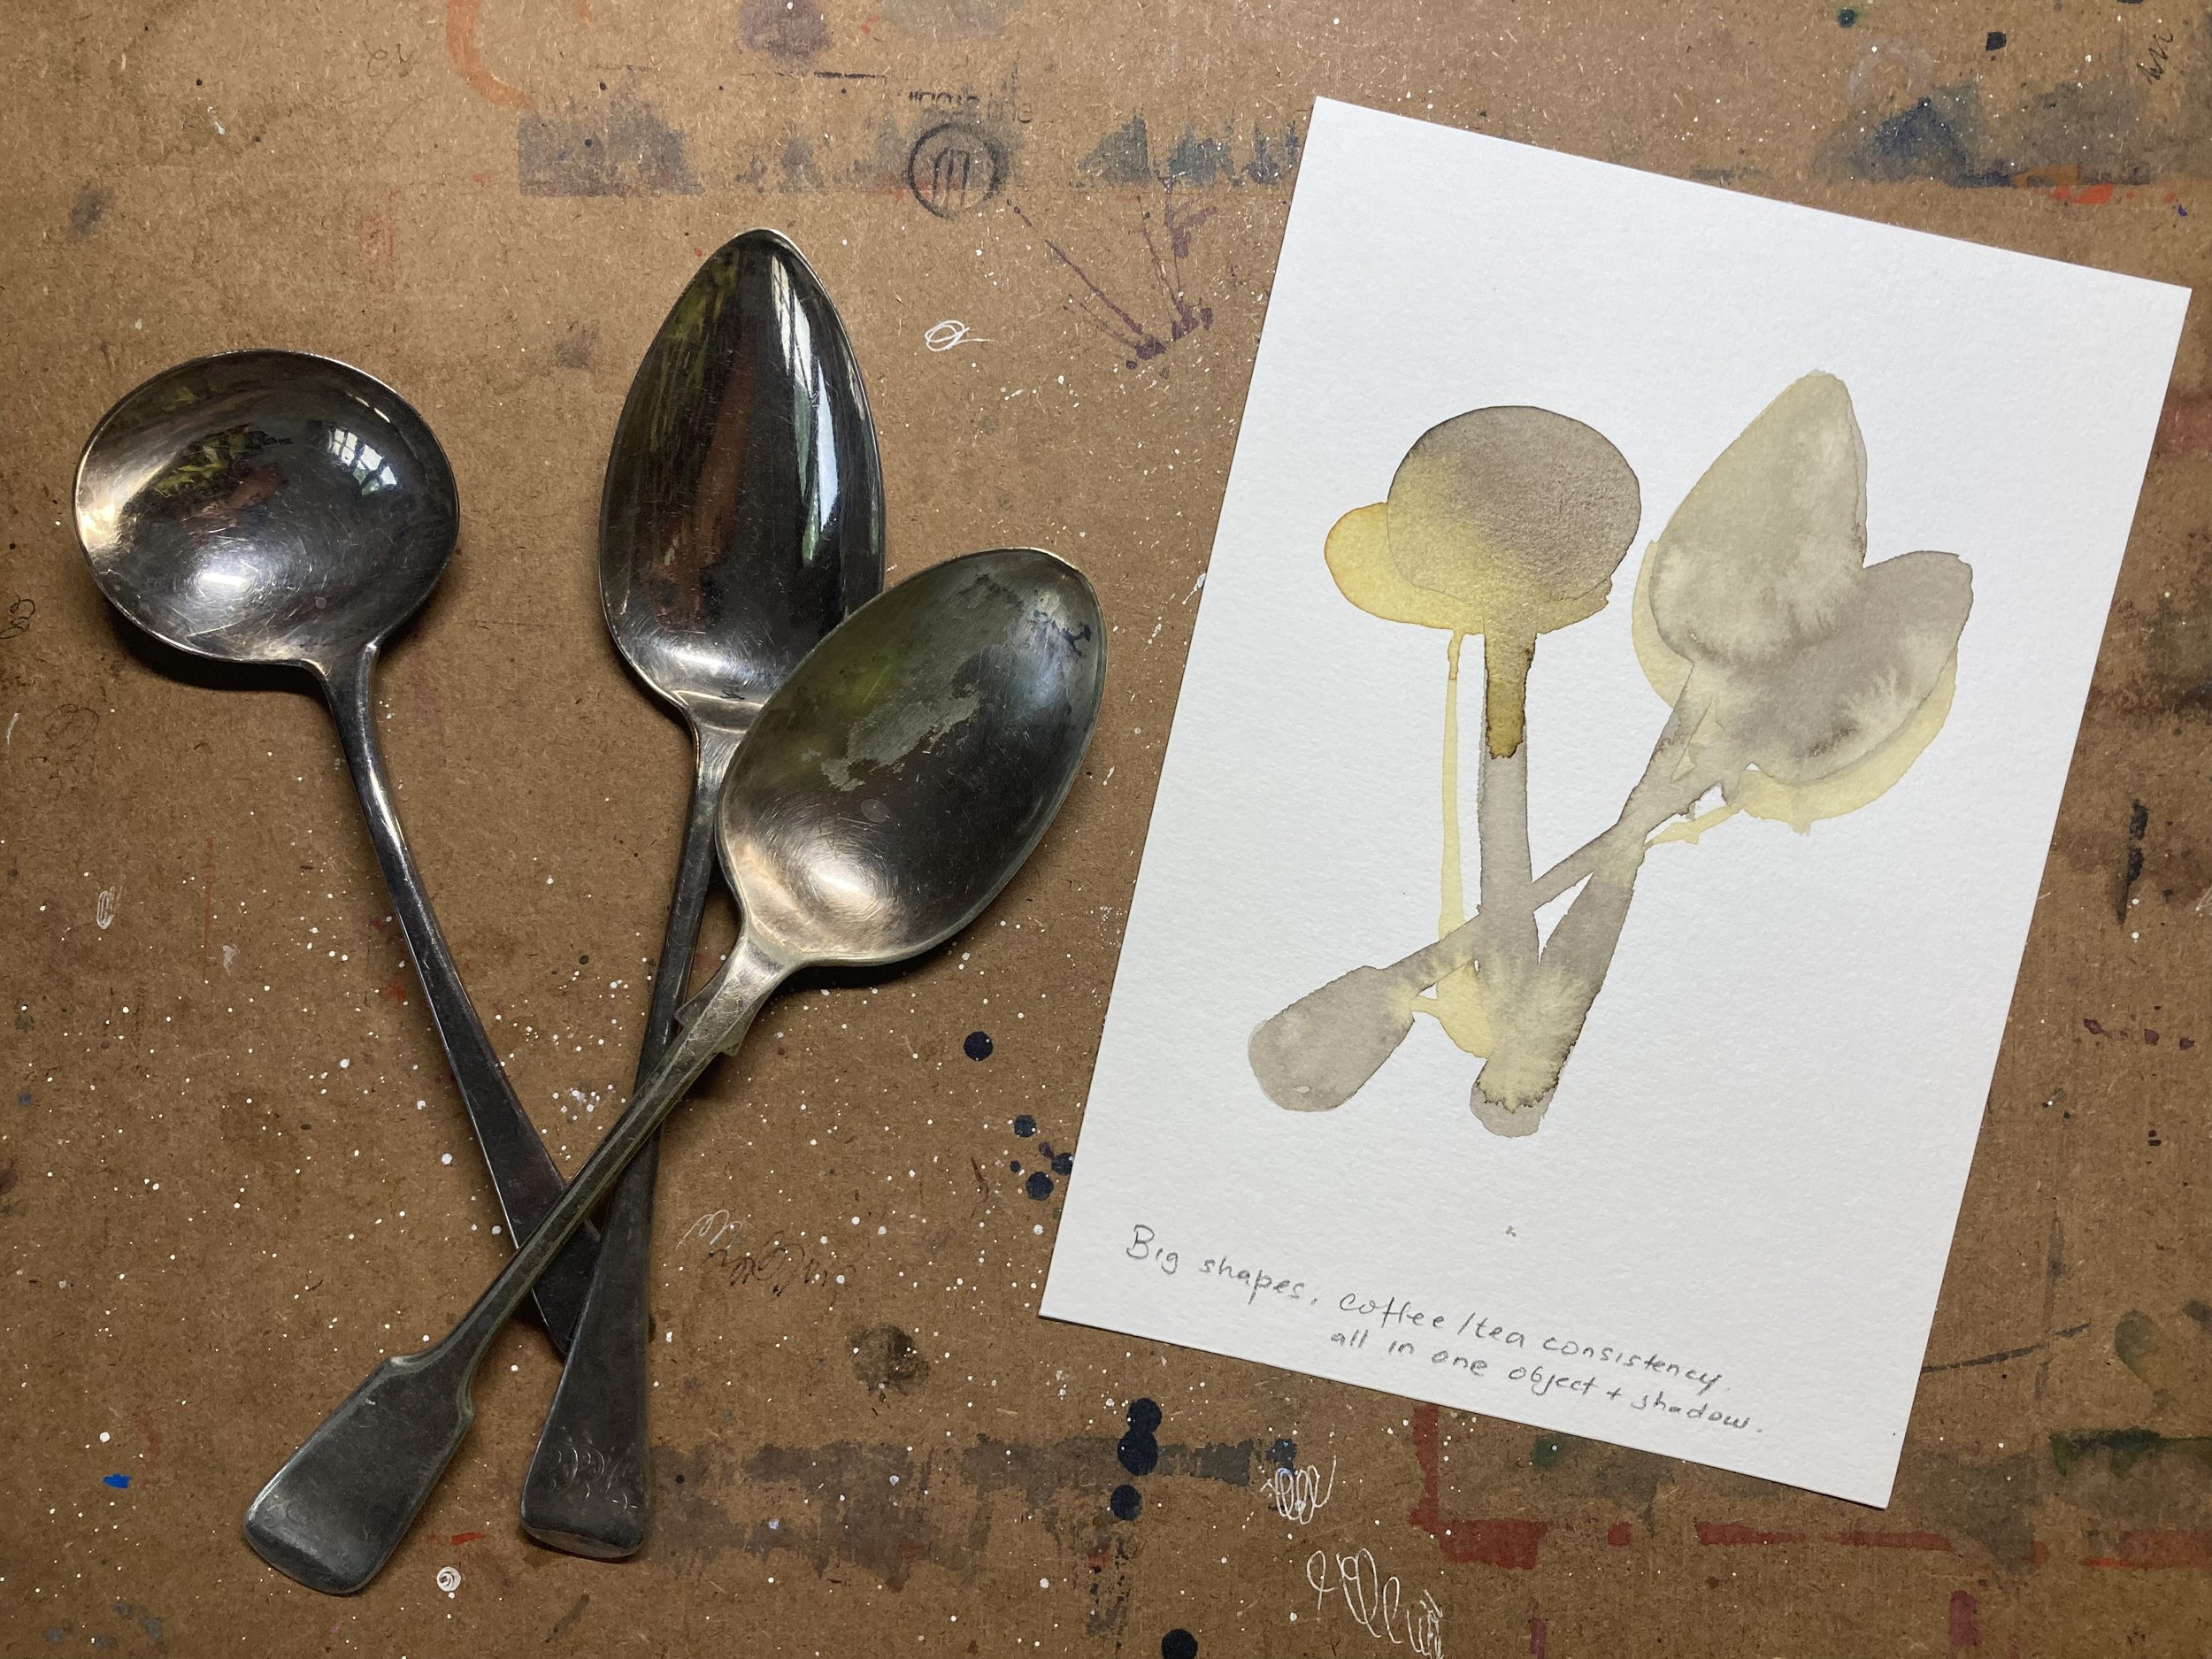
This is my practice of overlapping the silver spoons and doing a few different drawings from them. I did a continuous line pencil drawing. Notice how simple they are, not every drawing has to be done super detailed or spent hours on. The next attempt, I painted a rather loose but big shape, that means all three spoons are seen as one big shape, with just one dirty mix of colour. Remember how I painted the buildings in London sunset in one big shape on week 1? Same idea. Once that first layer completely dries, I layer in darker values in different shapes using the variety of edges I could see on the spoons. This really need practice in observation and then the practice of shapes using your brush. So I recommend to do more than one attempt of the same subject.
Remember that if the spoons doesn’t feel fun to do, use your own objects from your kitchen, and observe it directly. Stay with simple objects so the shapes doesn’t overwhelm you. As long as the object reflect some light, mainly make sure the object is fascinating to you.
Hope you’re enjoying the course so far and practicing lots.
See you in next weeks’ class where we cover Colour.